


On This Page: [hide]
Joomla powers about 2% of all websites on the internet, making it the second most popular open-source CMS after WordPress. While WordPress dominates the market, Joomla offers something different: built-in multilingual support, granular user permissions, and a content structure that handles complex sites without piling on plugins.
Quick answer: To create a Joomla website, you need hosting with PHP 8.1+ and MySQL 8.0+, then either use your host’s one-click installer or manually upload Joomla files and run the web installer. This guide walks through both methods plus the essential setup steps after installation.
Last reviewed: February 2026. Technical requirements verified against official Joomla documentation.
Why Choose Joomla Over WordPress?
Before spending time on installation, make sure Joomla fits your needs. Both are solid CMS options, but they solve different problems.
Choose Joomla if you need:
- Built-in multilingual support without plugins
- Complex user permission systems (multiple teams, approval workflows)
- Structured content types beyond blog posts and pages
- SEO tools included in the core (meta descriptions, URL structures)
- Forced SSL without extra configuration
Choose WordPress if you want:
- Faster setup with minimal learning curve
- Massive theme and plugin ecosystem (59,000+ plugins)
- Easier time finding developers and tutorials
- Simple blog-style content management
Joomla’s learning curve is steeper than WordPress, but that’s the trade-off for more built-in power. If you’re building a multilingual business site, a membership portal, or anything with complex content relationships, Joomla handles it natively where WordPress would need multiple plugins. Still unsure? Check our WordPress alternatives guide for more context.
Joomla 5 Hosting Requirements
Joomla 5 requires modern PHP and database versions. If your current hosting doesn’t meet these minimums, you’ll need to upgrade before installing.
Minimum Requirements
- PHP: 8.1.0 minimum (8.3 recommended)
- MySQL: 8.0.13 minimum (8.1+ recommended)
- MariaDB: 10.4.0 minimum (11.1+ recommended)
- PostgreSQL: 12.0 minimum (16.0 recommended)
Web Server Options
- Apache: 2.4 (most common, works with mod_rewrite for SEO URLs)
- Nginx: 1.21 minimum (1.25+ recommended)
- Microsoft IIS: 10 (less common for Joomla)
Required PHP Extensions
Your hosting must have these PHP extensions enabled:
- json
- simplexml
- dom
- zlib
- gd (for image processing)
- mysqlnd or pdo_mysql (for MySQL/MariaDB)
Most shared hosting providers meet these requirements by default. If you’re unsure, contact your host or check your cPanel’s PHP settings. Hosts running PHP 7 won’t work with Joomla 5, and PHP 7 support ended in late 2023 anyway, so it’s time to switch if you haven’t already.
SSL Requirement
Joomla strongly recommends HTTPS. The CMS includes a built-in “Force SSL” option that redirects all traffic to HTTPS without needing additional configuration. Make sure your hosting includes a free SSL certificate (most do via Let’s Encrypt).
Local Development Option
Want to build your site before going live? Install Joomla locally using XAMPP (Windows), MAMP (Mac), or LAMP (Linux). These packages bundle Apache, PHP, and MySQL on your computer. Build and test everything offline, then migrate to live hosting when ready. Akeeba Backup handles the migration.
A Note on Joomla 6
Joomla 6 is in development with stricter requirements: PHP 8.3 minimum, MySQL 8.0.13+. If you’re setting up a new site now, choose hosting that already supports PHP 8.3 so you’re ready when Joomla 6 releases. The upgrade path from Joomla 5 to 6 should be straightforward.
Installing Joomla: Two Methods
You can install Joomla through your hosting control panel (easier) or manually via FTP (more control). Both methods end at the same place: the Joomla web installer.
Method 1: One-Click Installation (Recommended)
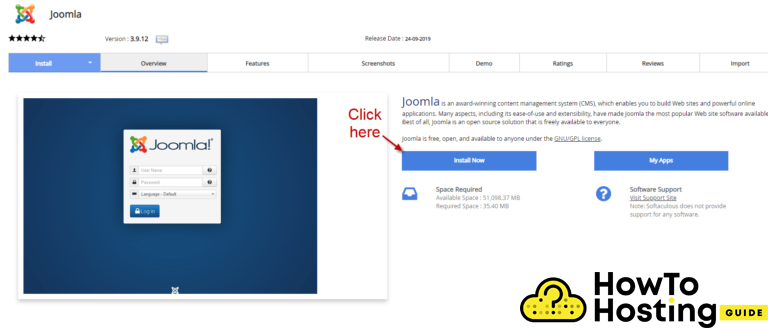
Most hosting providers include Softaculous, Installatron, or a similar auto-installer in their control panel. This is the fastest way to get Joomla running.
Steps:
- Log into your hosting control panel (cPanel, Plesk, or similar)
- Find the auto-installer (usually under “Software” or “Applications”)
- Search for Joomla and click Install
- Choose your domain and directory (leave directory blank for root installation)
- Set your admin username, password, and email
- Set your site name and description
- Click Install and wait 1-2 minutes
The installer creates your database automatically and handles file permissions. Once complete, you’ll see links to your new site and the admin panel.
Method 2: Manual Installation
Manual installation gives you more control and works on any hosting that meets the requirements.
Step 1: Download Joomla
Get the latest Joomla package from downloads.joomla.org. Download the “Full Package” ZIP file.
Step 2: Upload Files
Use an FTP client like FileZilla to upload the files:
- Connect to your server via FTP
- Navigate to your public root directory (usually public_html or htdocs)
- Upload the ZIP file and extract it on the server, OR extract locally and upload all files
- Make sure files end up in the root directory, not in a subfolder
Step 3: Create a Database
In your hosting control panel:
- Go to MySQL Databases
- Create a new database (note the name)
- Create a new database user with a strong password
- Add the user to the database with “All Privileges”
- Save these credentials for the next step
Step 4: Run the Web Installer
Open your domain in a browser. The Joomla installation wizard appears automatically.
Configuration Page:
- Enter your site name
- Set admin email, username, and password
- Choose your site language
Database Page:
- Database Type: MySQLi (most common)
- Host: Usually “localhost”
- Username: The database user you created
- Password: The user’s password
- Database Name: The database you created
- Table Prefix: Leave default or customize (useful if sharing a database)
Step 5: Complete Installation
Review your settings and click Install. Joomla creates the database tables and configures your site. When finished, delete the installation folder when prompted. This is a security requirement.
First Steps After Installation
Your Joomla site is live, but it’s using default settings. Here’s what to configure first.
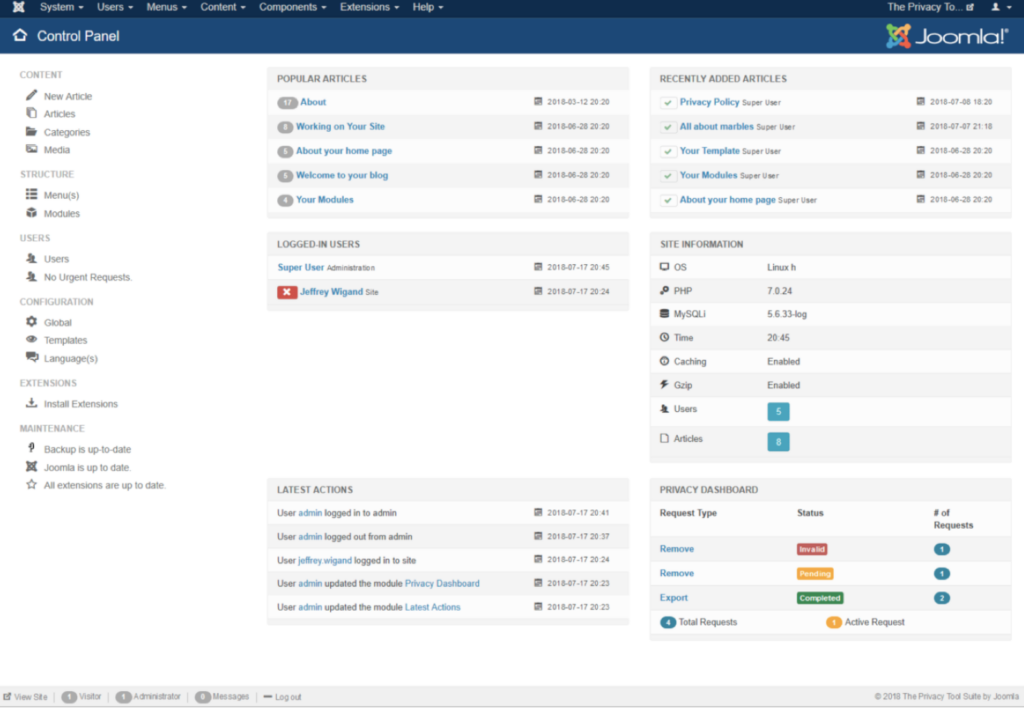
Access the Admin Panel
The Joomla admin panel (called the Control Panel) lives at:
https://yourdomain.com/administrator
Log in with the admin credentials you set during installation.
Configure Global Settings
Go to System → Global Configuration and review these settings:
Site Tab:
- Site Name: Confirm it’s correct
- Site Offline: Keep “No” unless you’re building in private
- Default Editor: TinyMCE works for most users
System Tab:
- Debug System: Set to “No” for live sites
- Cache: Enable for better performance once your site is ready
Server Tab:
- Force HTTPS: Set to “Entire Site” for security
- Error Reporting: Set to “None” for live sites
- Server Time Zone: Match your target audience
Enable SEO URLs
Still in Global Configuration, go to the SEO Settings section:
- Search Engine Friendly URLs: Yes
- Use URL Rewriting: Yes (requires mod_rewrite on Apache)
- Add Suffix to URL: Optional (.html at the end)
- Unicode Aliases: Yes (for non-Latin characters)
If using Apache, rename htaccess.txt to .htaccess in your root directory. Nginx users need to add rewrite rules to their server configuration.
Creating Your First Content
Joomla organizes content differently than WordPress. Understanding categories, articles, and menus is essential.
Understand the Content Structure
Joomla’s content hierarchy looks like this:
Categories (containers)
  └── Articles (your actual content)
        └── Menu Items (make articles visible on site)
              └── Modules (display content in template positions)
Categories: Required containers for articles. Create these first.
Articles: Your actual content. Every article must belong to a category.
Menu Items: Links that make articles accessible. Without a menu item, articles exist but visitors can’t reach them.
Modules: Widgets for sidebars, footers, and other template positions.
This hierarchy trips up WordPress users. In WordPress, you publish a page and it’s live. In Joomla, you create an article, assign it to a category, then create a menu item pointing to it. Extra steps, but more organizational control.
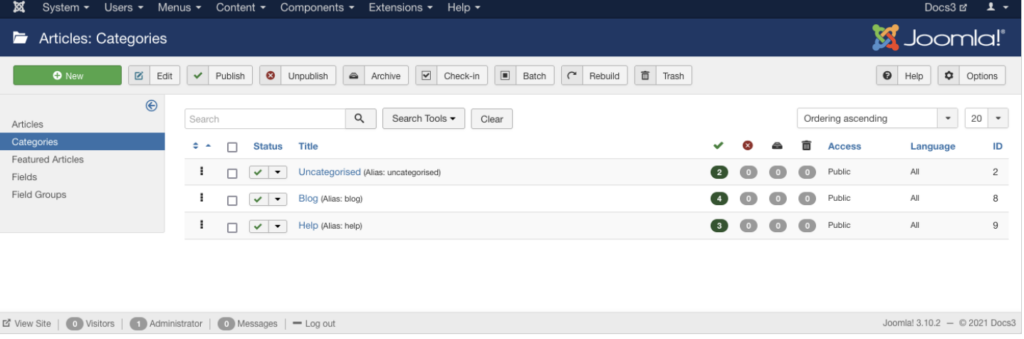
Create Categories First
- Go to Content → Categories
- Click New
- Enter a title (e.g., “Services”, “Blog”, “About”)
- Add a description if needed (shows on category pages)
- Click Save & Close
Create categories for each major content section of your site before adding articles.
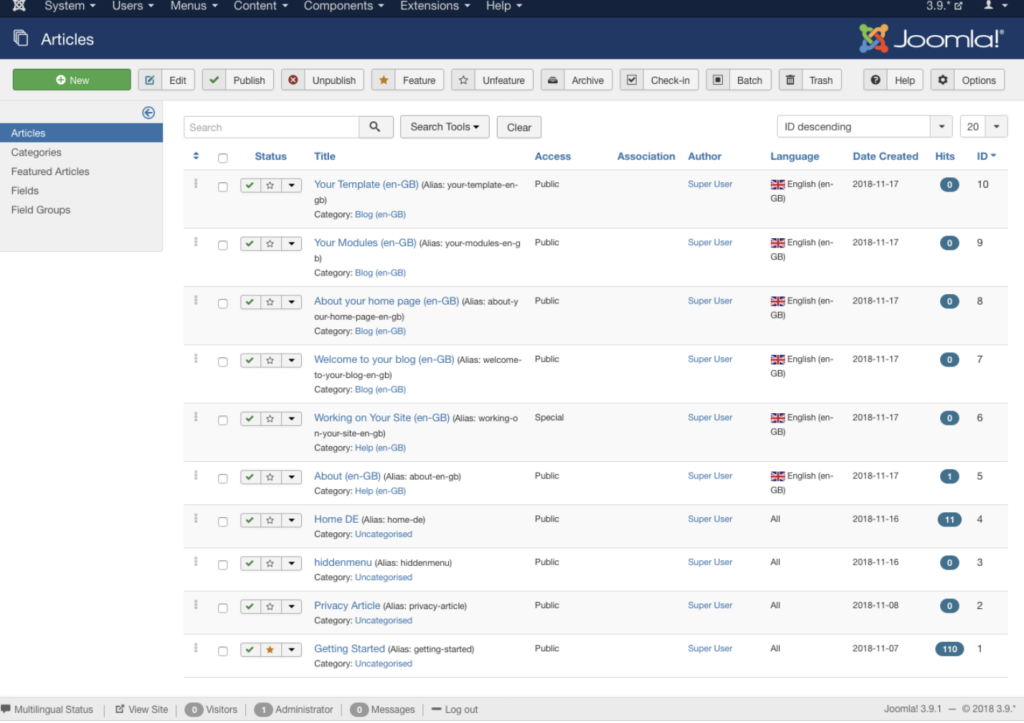
Create Articles
- Go to Content → Articles
- Click New
- Enter your title and content
- Select a category from the dropdown
- Set the article status to “Published”
- Click Save & Close
For longer articles: Use the “Read More” break (Insert → Read More) to show just a summary on listing pages. Visitors click through to read the full article.
Build Your Menu
Articles don’t appear on your site until they’re linked in a menu.
- Go to Menus → Main Menu (or create a new menu)
- Click New
- Enter the menu item title
- Click Select next to “Menu Item Type”
- Choose how to display the content:
Common Menu Item Types:
- Single Article: Shows one specific article (for About, Contact pages)
- Category Blog: Shows multiple articles from a category with intro text
- Category List: Shows article titles as a list
- Featured Articles: Shows articles marked as “Featured”
For your homepage, edit the existing “Home” menu item and change it to display your preferred content (a single article, featured articles, or a category layout).
Set Up a Contact Page
Joomla includes a built-in contact component:
- Go to Components → Contacts
- Click New
- Enter contact details (name, email, address, etc.)
- Save the contact
- Create a menu item: Menus → Main Menu → New
- Select Menu Item Type → Contacts → Single Contact
- Choose the contact you created
Customizing Your Joomla Site
Install a New Template
Joomla’s default template (Cassiopeia) is clean but basic. Thousands of free and premium templates are available.
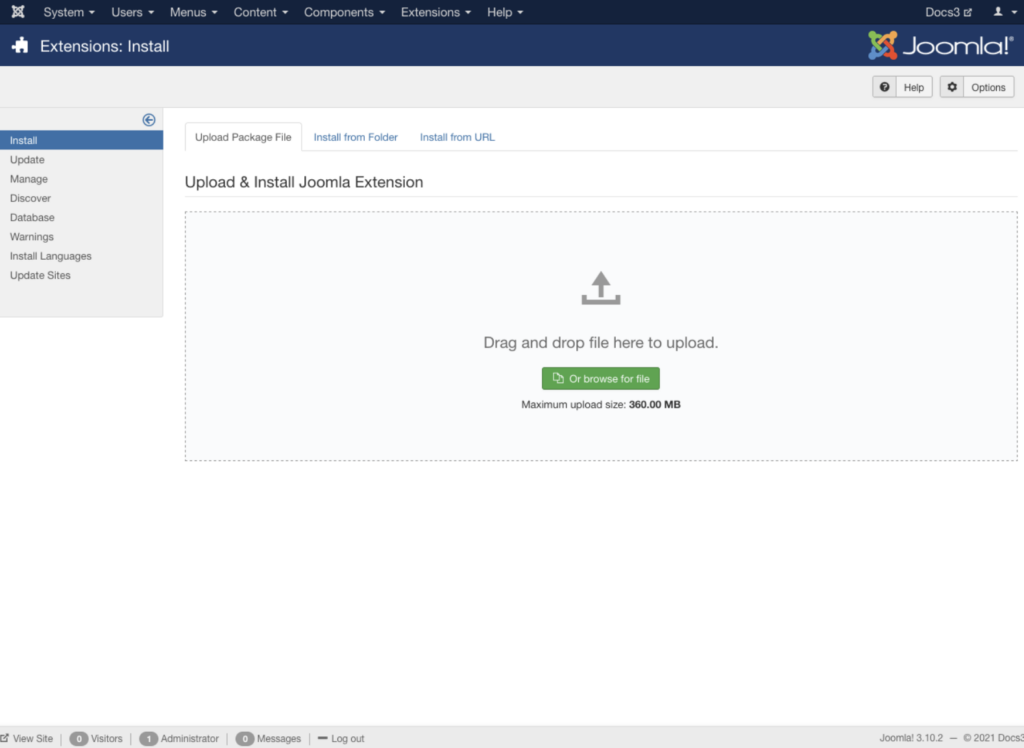
To install a template:
- Download the template package (ZIP file)
- Go to System → Install → Extensions
- Upload the ZIP file or drag it to the upload area
- Once installed, go to System → Templates → Site Template Styles
- Click the star icon next to your new template to make it default
Template sources:
- Free templates: JoomlaShine, JoomlArt, Joomla-Monster
- Premium templates: ThemeForest, TemplateMonster, RocketTheme
Install Extensions
Extensions add functionality: contact forms, galleries, e-commerce, SEO tools, and more. Over 5,000 extensions are available in the Joomla Extensions Directory.
To install an extension:
- Download the extension package from a trusted source
- Go to System → Install → Extensions
- Upload the ZIP file
- Configure the extension in its settings (usually under Components or Plugins)
Essential extensions to consider:
- Akeeba Backup: Full site backups
- Admin Tools: Security hardening
- JCE Editor: Enhanced content editor
- SP Page Builder: Drag-and-drop page building
Configure User Permissions
Joomla’s access control system is more powerful than WordPress out of the box. You can create user groups with specific permissions.
Go to Users → Groups to see default groups:
- Public: Visitors (not logged in)
- Registered: Basic logged-in users
- Author: Can create content
- Editor: Can edit others’ content
- Publisher: Can publish content
- Manager: Access to admin functions
- Administrator: Full backend access
- Super Users: Complete control
Create custom groups under Users → Groups → New for specific access needs (member-only content, staff-only sections, etc.).
Ongoing Maintenance
Keep Joomla Updated
Security updates are critical. Check for updates regularly:
- Go to System → Update → Joomla
- If an update is available, click Install the Update
- Also check System → Update → Extensions for extension updates
Always back up your site before major updates.
Regular Backups
Use Akeeba Backup (free) to create full site backups. Schedule automatic backups weekly at minimum. Store copies off-server (download or sync to cloud storage).
Monitor Performance
As your site grows, enable caching:
- System → Global Configuration → System Tab
- Set Cache to “Conservative caching” or “Progressive caching”
- Cache Handler: File (works on any hosting)
For better performance, consider VPS hosting or SSD hosting if your shared hosting struggles with traffic.
Security Hardening Basics
Beyond keeping Joomla updated:
- Enable two-factor authentication: Users → Manage → Edit your user → Two Factor Authentication tab
- Change the admin URL: Install Admin Tools (free) to rename /administrator to something custom
- Remove unused extensions: Each extension is a potential vulnerability. Uninstall what you don’t use.
- Set correct file permissions: Directories at 755, files at 644. Never use 777.
- Hide Joomla version: System → Global Configuration → disable “Display Joomla Version”
Troubleshooting Common Issues
White Screen After Installation
Usually a PHP error hidden by error reporting settings. Connect via FTP and edit configuration.php. Find public $error_reporting and set it to 'maximum'. Reload the page to see the actual error. Common causes: wrong PHP version, missing extensions, or incorrect database credentials.
Can’t Access Admin Panel
If you’re locked out, you can reset the admin password via phpMyAdmin. Find the #__users table (prefix varies), locate your admin user, and update the password field with a new MD5 hash. Search online for “MD5 hash generator” to create one.
SEO URLs Return 404 Errors
The .htaccess file isn’t working. Check that: (1) You renamed htaccess.txt to .htaccess, (2) mod_rewrite is enabled on your server, (3) AllowOverride is set correctly in Apache config. If using Nginx, you need custom rewrite rules since .htaccess doesn’t apply.
Extensions Won’t Install
Check folder permissions. The /tmp and /administrator/components directories need write permissions (755 or 775). Also verify your PHP upload_max_filesize is large enough for the extension package.
Site Running Slowly
Enable caching (System → Global Configuration → System Tab). Install a performance extension like JCH Optimize to combine and minify CSS/JS. Check for poorly coded extensions causing database bottlenecks. Consider upgrading hosting if server response times exceed 500ms.
Frequently Asked Questions
Is Joomla harder to learn than WordPress?
Yes, the learning curve is steeper. WordPress gets you publishing in minutes. Joomla requires understanding categories, articles, menus, and modules before your content appears. But that structure pays off for complex sites with multiple content types and user roles.
Can I migrate from WordPress to Joomla?
Yes, extensions like FG Joomla to WordPress (reversed) handle migration. The process involves exporting WordPress content and importing into Joomla’s structure. Expect to spend time reorganizing categories and recreating menus since the systems structure content differently.
Is Joomla secure?
Joomla’s core is secure and includes features like two-factor authentication and built-in SSL forcing. Security issues typically come from outdated installations or vulnerable third-party extensions. Keep everything updated and only install extensions from trusted sources.
What hosting is best for Joomla?
Any hosting meeting PHP 8.1+ and MySQL 8.0+ requirements works. For beginners, shared hosting with Softaculous makes installation easy. Growing sites benefit from cloud hosting for better performance. SiteGround, A2 Hosting, and Cloudways all offer Joomla-optimized hosting.
How do I add e-commerce to Joomla?
Install an e-commerce extension. VirtueMart is the most popular free option. HikaShop and J2Store are solid alternatives. These add product management, shopping carts, and payment processing to your Joomla site.
Can I use Joomla for a blog?
Yes, but WordPress is easier for pure blogging. Joomla handles blogs fine using categories as blog sections and articles as posts. The Category Blog layout displays posts with excerpts. For simple blogs, WordPress has less setup friction.
How do I make my Joomla site multilingual?
Joomla includes multilingual support in the core (no plugins needed). Go to Extensions → Languages, install additional languages, then enable the language filter and language switcher modules. Create content in each language and associate the translations.
How do I speed up my Joomla site?
Enable caching in Global Configuration. Install JCH Optimize to combine and minify CSS/JavaScript files. Optimize images before uploading. Use a CDN for static content. Remove unused extensions and modules. If your hosting has slow server response times (TTFB over 500ms), consider upgrading to cloud hosting or adding a caching layer.
What to Do Next
You now have a working Joomla site. The next steps depend on your goals:
For business sites: Install a professional template, set up your contact form, and create your essential pages (About, Services, Contact). Configure Google Analytics through a tracking extension.
For content sites: Plan your category structure carefully before adding lots of articles. Getting categories right early saves reorganization headaches later.
For membership sites: Explore Joomla’s user group system and access levels. You can restrict content to specific groups without any paid extensions.
If you haven’t chosen hosting yet, compare options in our shared hosting guide for budget-friendly options, or check cloud hosting if you expect significant traffic.