
On This Page: [hide]
Are you looking to elevate your WordPress management game? Discover the power of WP-CLI, the command-line tool that transforms the way developers and site administrators interact with WordPress. In this guide we have gathered the most important commands on WP-CLI so that you can become very well versed in it quickly.
This game-changer offers speed, efficiency, and the flexibility to perform nearly all administrative tasks you’d typically do in the dashboard, right from the command line. Whether you’re updating plugins, managing users, or securing your site against malware, WP-CLI streamlines your workflow, making it invaluable for projects under tight deadlines.
Dive into our comprehensive guide to mastering WP-CLI and unlock the potential to automate tasks, enhance productivity, and secure your WordPress sites more effectively.
The Foundations of WP-CLI
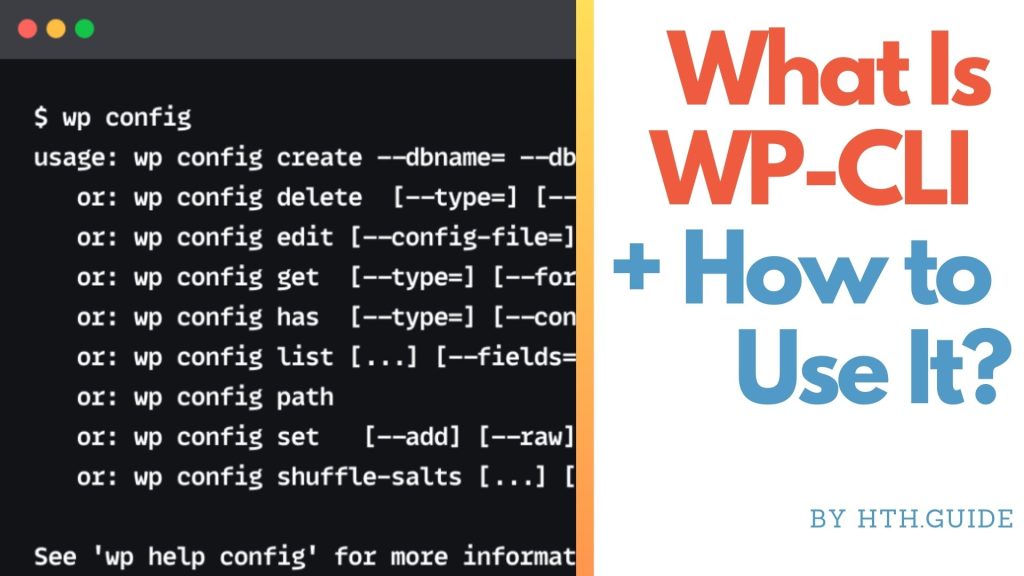
Entering the world of WordPress development introduces you to an array of tools designed to streamline your workflow and enhance productivity. Among these tools, WP-CLI stands out for its efficiency and power. WP-CLI, which stands for WordPress Command Line Interface, is an essential tool for developers and site administrators looking to manage their WordPress sites directly from the command line.
This robust tool enables you to perform nearly all administrative tasks that you would typically execute in the WordPress admin dashboard but with the added benefit of speed and flexibility that only the command line can offer.
Demystifying WP-CLI: What It Is and Why It Matters
WP-CLI is more than just a tool; it’s a game-changer for WordPress development. It allows you to update plugins, configure multisite installs, and much more, without ever needing to use a web browser. This speed and efficiency can significantly reduce development time, making WP-CLI invaluable for projects with tight deadlines.
The ability to automate tasks using scripts further extends its usefulness, making repetitive tasks a breeze. For developers and site managers, WP-CLI not just simplifies their workflow but also opens up new possibilities for automating and managing WordPress sites more effectively.
Essential Requirements to Use WP-CLI Effectively
To get started with WP-CLI, there are a few basic requirements. Firstly, you need command-line access to your WordPress server, which is typically provided by SSH (Secure Shell). You’ll also need PHP 5.4 or later installed on your server since WP-CLI is a PHP-based tool. Understanding basic command-line syntax and commands is crucial, as WP-CLI’s functionality is accessed entirely through the command line. Lastly, ensure you have administrative access to the WordPress sites you wish to manage, as WP-CLI commands often require admin-level privileges.
Securing Your First Steps: How to Access WP-CLI
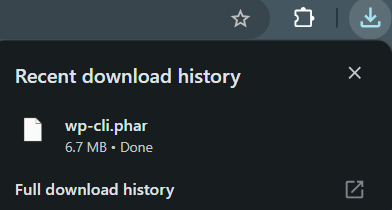
Accessing WP-CLI for the first time is straightforward. After ensuring that your hosting environment meets the necessary requirements, install WP-CLI by downloading the Phar file, a PHP Archive that is executable from the command line. Once installed, you can access WP-CLI by typing wp followed by the command you wish to execute.
How to Install WP-CLI
Installation Steps
Step 1: Open Your Terminal
Access your terminal application. On macOS, you can use the built-in Terminal app, and on Linux, you might use GNOME Terminal, Konsole, or any other terminal emulator.
Step 2: Download the WP-CLI Phar File
Navigate to a directory where you want to download the WP-CLI Phar file. Then run the following command:
curl -O https://raw.githubusercontent.com/wp-cli/builds/gh-pages/phar/wp-cli.phar
This command uses curl to download the latest WP-CLI Phar (PHP Archive) file from the official repository.
Step 3: Verify the Phar File
Before making the file executable, verify that it’s working correctly:
php wp-cli.phar --info
If everything is set up correctly, this command will display information about your PHP and WP-CLI versions.
Step 4: Make the Phar File Executable
Change the file permissions to make it executable:
chmod +x wp-cli.phar
Step 5: Move the Executable to a Directory in Your PATH
To use wp as a global command, move it to a directory that’s in your system’s PATH, such as /usr/local/bin:
sudo mv wp-cli.phar /usr/local/bin/wp
You may need to enter your administrator password because of the sudo command.
Step 6: Test the WP-CLI Installation
Run the following command to ensure that WP-CLI is installed correctly:
wp --info
This should output information similar to what you saw in Step 3, confirming that wp is now a recognized command.
Step 7: Complete the Setup (Optional)
Enable Tab Completion
If you want to enable command autocompletion for WP-CLI, follow these steps:
Download the Completion Script
curl -O https://raw.githubusercontent.com/wp-cli/wp-cli/master/utils/wp-completion.bash
Source the Script in Your Shell Configuration
Add the following line to your ~/.bashrc, ~/.bash_profile, or ~/.zshrc file, depending on your shell:
source /path/to/wp-completion.bash
Replace /path/to/ with the actual path where you downloaded the script.
Reload Your Shell Configuration
source ~/.bashrc
Or replace ~/.bashrc with the appropriate configuration file.
Add Alias for Convenience
You can add an alias to shorten commands:
Edit Your Shell Configuration File
Open your shell configuration file (e.g., ~/.bashrc) in a text editor.
Add the Alias
alias wp='php /usr/local/bin/wp'
Reload the Configuration
source ~/.bashrc
Step 8: Update WP-CLI When Necessary
To update WP-CLI to the latest version in the future, run:
wp cli update
Troubleshooting
Permission Denied Errors: If you encounter permission issues, ensure you’re using sudo where necessary and that you have the appropriate rights to modify directories like /usr/local/bin.
Command Not Found: If wp is not recognized, ensure that /usr/local/bin is in your system’s PATH. You can check your PATH variable with echo $PATH.
PHP Not Installed: If you receive errors related to PHP, verify that PHP is installed and accessible via the command line.
For example, wp plugin list will show you a list of all installed plugins on your WordPress site. As you become more comfortable with WP-CLI, you’ll discover that its vast array of commands can significantly speed up your WordPress management tasks, making it a must-have tool for anyone serious about WordPress development.
Advanced WP-CLI Commands for Developers
The WordPress Command Line Interface (WP-CLI) offers a vast array of advanced commands that cater to the specific needs of developers. By mastering these commands, you can streamline your development process, manage projects more efficiently, and troubleshoot with ease.
Let’s dive into some of the advanced uses of WP-CLI that can truly change the game for WordPress developers.
How to Migrate WordPress Websites with WP-CLI
Migrating a WordPress site from one server to another, or from a local development environment to a live server, can be simplified using WP-CLI. This process often involves transferring databases, changing URLs, and other potentially complex steps. However, with WP-CLI, these tasks can be performed with a few commands, reducing the potential for errors and saving time.
- Export the database from the original site using
wp db export. - Import the database to the new site using
wp db import. - Update the site’s URL with
wp search-replace 'oldurl.com' 'newurl.com'to ensure all links are functioning correctly.
Example:
$ wp db export --add-drop-table

Success: Exported to 'wordpress_dbase-db1123f32.sql'.
Example:
$ wp db import wordpress_dbase.sql

Success: Imported from 'wordpress_dbase.sql'.
Example:
$ wp search-replace 'http://example.test' 'http://example.com' --skip-columns=guid
This approach not only makes the migration process straightforward but also minimizes downtime for the website.
How to Automate Your Workflow: Scripting with WP-CLI
Scripting with WP-CLI allows developers to automate repetitive tasks, freeing up time to focus on more complex challenges. Whether it’s setting up a new WordPress site or configuring multiple plugins, scripting can significantly enhance your workflow. For instance, a script could automate the process of:
- Downloading and installing WordPress.
- Setting up the wp-config.php file.
- Installing and activating a predetermined set of plugins and themes.
This automation not only speeds up development but also ensures a consistent setup for every project, reducing errors and inconsistencies.
How to Debug in WordPress: A WP-CLI Approach
Debugging is an essential part of development, and WP-CLI offers commands that can assist in identifying and resolving issues within WordPress sites. Utilizing WP-CLI for debugging can simplify the process of finding problematic plugins or themes, or diagnosing configuration issues.
Some useful WP-CLI commands for debugging include:
wp plugin deactivate --all– Deactivates all plugins to quickly determine if a problem is plugin-related.wp theme switch my_theme– Switches themes to isolate theme-specific issues.wp eval 'phpinfo();'– Displays PHP configuration settings for advanced debugging.
Example:
$ wp plugin deactivate --all --exclude=hello,wordpress-seo

Plugin 'yoast-seo' deactivated.

Plugin 'rankmath' deactivated.

Success: Deactivated 2 of 2 plugins.
Example:
user@wordpress [~/public_html]$ wp theme list

+------------------+----------+--------+---------+

| name             | status   | update | version |

+------------------+----------+--------+---------+

| theme0               | inactive | none  |1.24.3|

| theme0.5             | active   | none   |2.1.3|

| theme1                | inactive | none   |1.4 |

| cooltheme            | inactive | none   |2.2  |

| anothercooltheme    | inactive | none   | 2.0  |

+------------------+----------+--------+---------+
Then type the command to change the theme you want
user@wordpress [~/public_html]$ wp theme activate cooltheme

Success: Switched to 'Cool Theme' theme.
These commands allow for rapid testing and troubleshooting, making WP-CLI a valuable tool for WordPress developers facing a wide range of issues.
How to Manage WordPress Plugins Via WP-CLI: Installing, Updating, and Removing
Plugins extend the functionality of your WordPress site. With WP-CLI, managing these plugins becomes a straightforward task, allowing you to focus more on content and less on site maintenance.
- Listing Plugins:
wp plugin listprovides an overview of all installed plugins, including their status and available updates, offering a clear snapshot of your site’s plugin ecosystem. - Activating and Deactivating Plugins: Easily activate plugins with
wp plugin activate [plugin-slug]or deactivate them withwp plugin deactivate [plugin-slug], managing site features quickly. - Installing New Plugins: Use
wp plugin install [plugin-slug] --activatefor installation and activation in a single step. For exploration,wp plugin search [keyword]helps in finding the perfect plugin to meet your site’s needs. - Updating Plugins: Regular updates are vital for security and functionality.
wp plugin update [plugin-slug]or--allfor updating every plugin ensures your site stays current and secure. - Deleting Plugins: To declutter your site,
wp plugin delete [plugin-slug]removes unwanted plugins. Remember, a plugin must be deactivated before deletion.
Example:
$ wp plugin list --status=active --format=json

[{"name":"dynamic-hostname","status":"active","update":"none","version":"0.4.2","update_version":"","auto_update":"off"},{"name":"tinymce-templates","status":"active","update":"none","version":"4.8.1","update_version":"","auto_update":"off"},{"name":"wp-multibyte-patch","status":"active","update":"none","version":"2.9","update_version":"","auto_update":"off"},{"name":"wp-total-hacks","status":"active","update":"none","version":"4.7.2","update_version":"","auto_update":"off"}]
Example:
$ wp plugin update yoastseo --version=dev

Installing yoastseo (Development Version)

Downloading install package from https://downloads.wordpress.org/plugin/yoastseo.zip...

Unpacking the package...

Installing the plugin...

Removing the old version of the plugin...

Plugin updated successfully.

Success: Updated 1 of 2 plugins.
Example:
$ wp plugin delete yoastseo

Deleted 'yoastseo' plugin.

Success: Deleted 1 of 1 plugins.
By mastering these WP-CLI commands for plugin management, site administrators can easily enhance their site’s capabilities and ensure a robust, secure experience for users.
Mastering Database Operations with WP-CLI
For many WordPress developers and site administrators, mastering WP-CLI’s database operations can significantly enhance efficiency, from routine backups to extensive database cleanups.
Backup and Restore WordPress Databases Like a Pro
Managing backups is fundamental to website maintenance, ensuring that your site’s data is preserved and can be restored in the event of unexpected issues or data loss. With WP-CLI, you can easily automate these essential tasks.
- Database Backup: To create a backup of your WordPress database, use the
wp db exportcommand. This command generates a .sql file containing your entire database, which can be stored safely. For automated backups, consider integrating this command into a scheduled task or a cron job. - Database Restore: If you ever need to restore your site from a backup, WP-CLI simplifies the process with the
wp db importcommand. By specifying the path to your .sql backup file, you can replace the current database with one from your backup, effectively restoring your site’s previous state.
Regularly backing up and knowing how to efficiently restore your WordPress database will safeguard your website against data loss and minimize downtime.
Efficient Database Cleaning and Optimization with WP-CLI
Over time, WordPress databases can accumulate unnecessary data that may slow down your website. WP-CLI offers commands for cleaning and optimizing your database, directly impacting site performance and loading times.
- Cleaning Up: WordPress sites often gather transient options and post revisions that, if left unchecked, bulk up the database. With WP-CLI commands like
wp transient delete --allandwp post delete --force $(wp post list --post_type='revision' --format=ids), you can clean these items out of your database efficiently. - Database Optimization: The command
wp db optimizeallows you to defragment your database, reclaiming unused space and making it run more efficiently. This operation is particularly helpful after a major cleanup or before a website migration to ensure the database is lean and performant.
Example:
$ wp transient delete --all

Success: 14 transients deleted from the database.
Understanding and utilizing these WP-CLI commands for database operations not only streamlines your workflow but also contributes to a faster, more reliable website. Practice and familiarity with these commands allow WordPress administrators to deliver optimal website experiences with ease.
Remember, a well-maintained database is crucial for the overall health and performance of your WordPress website. Regularly backing up, cleaning, and optimizing your database using WP-CLI will contribute significantly to a smoother, faster website that delights your visitors.
User Management Through WP-CLI
WP-CLI simplifies many aspects of managing a WordPress site, with user management standing out as one of its most valuable features. For administrators who seek efficiency and the ability to quickly adapt to changing needs, WP-CLI offers straightforward commands for managing users, their roles, and permissions. This section explores how to create, list, and delete users with ease, alongside managing user roles and permissions effectively.
Create, List, and Delete Users with Ease
Creating, listing, and deleting users are fundamental tasks that can be time-consuming through the WordPress graphical user interface. However, with WP-CLI, these tasks can be accomplished swiftly through simple commands. This streamline of processes not only saves time but also enhances productivity, allowing more focus on content management and site improvement.
- Creating Users: To add a new user, a command like
wp user create john [email protected] --role=editorcan be used. This instantly creates a user with the email [email protected] and assigns the role of an editor. - Listing Users: To view all users,
wp user listprovides a neat table listing every user, making it easy to overview the site’s users and their roles at a glance. - Deleting Users: Removing a user is as straightforward as
wp user delete john. If reassigning content is necessary, WP-CLI prompts for the ID of the user who will receive the former user’s posts, ensuring no content is lost.
This functionality not only aids in quick adjustments to user access but also in maintaining the security and efficiency of the site.
Managing User Roles and Permissions without Hassle
Ensuring users have the correct roles and permissions is crucial for site security and functionality. WP-CLI facilitates this by providing simple commands to navigate through user roles and permissions, making adjustments as needed with minimal effort.
- Setting User Roles: Assigning or changing a user’s role is made simple with commands like
wp user set-role john editor, instantly updating John’s role to an editor. - Viewing User Capabilities: Understanding what each user can do is essential. Commands like
wp cap list editordisplay the capabilities assigned to the role of an editor, giving insight into what users assigned to this role can and cannot do.
These commands not only streamline the management of user permissions but also enhance site security. By ensuring users have only the access necessary for their role, the risk of accidental or malicious changes to the site is minimized. For administrators and developers, WP-CLI’s user management commands offer a powerful and efficient tool for maintaining optimal operation and security of WordPress sites.
Optimizing WordPress Performance with WP-CLI
One of the key advantages of using WP-CLI for WordPress site management is its ability to streamline performance optimization tasks. This command-line tool enables site administrators and developers to execute complex operations with simple commands, significantly reducing the time and effort required for site maintenance and optimization.
Caching Commands to Speed Up WordPress
Caching is a crucial strategy for enhancing WordPress website performance. By storing copies of files or database queries in a temporary storage area, caching reduces the amount of time needed to load pages on your website. Fortunately, WP-CLI provides commands that make managing caching solutions simpler and more efficient. Here are the steps to leverage caching commands:
- Check Cache Status: Begin by checking the cache status with WP-CLI to understand whether caching is currently enabled and functioning on your WordPress site.
- Enable Caching: If caching is not enabled, use WP-CLI to activate it. This operation can vary depending on the caching plugin you are using, but the command generally involves specifying the caching type to enable.
- Clear Cache: Clearing the cache is often necessary after updating content on your site to ensure that users see the most current version of your pages. WP-CLI allows you to clear the site’s cache with a single command.
- Customize Caching Behavior: Advanced options are also available for tailoring caching behavior to your site’s specific needs, such as excluding certain pages from the cache or adjusting the cache expiry period.
Example:
$ wp cache add key groupvalue 200

Success: Added object 'KEY' in group 'VALUE'.
Example:
$ wp cli cache clear

Success: Cache cleared.
Managing caching through WP-CLI not only accelerates your website but also simplifies the process, allowing you to handle caching directly from the command line without navigating through plugin settings.
Finding and Fixing Broken Links Across Your WordPress Site
Broken links can significantly impair the user experience and harm your site’s SEO rankings. Identifying and fixing these links manually across numerous pages can be incredibly time-consuming. However, WP-CLI offers a streamlined, efficient approach to tackle this issue:
- Identify Broken Links: Use WP-CLI to execute a command that scans your WordPress site for broken links. This includes links within posts, pages, comments, and even custom fields.
- Review and Plan: Once WP-CLI presents a list of broken links, review them to decide whether to update, remove, or redirect each link.
- Batch Fix Broken Links: With WP-CLI, you can batch fix broken links by either updating them to the correct URLs or setting up redirects to the appropriate destination. This is done through simple command-line operations, significantly speeding up the process.
This method not only saves time but ensures that your WordPress site remains navigable and free from the detrimental effects broken links can have on your SEO efforts and user satisfaction.
Incorporating WP-CLI into your WordPress site management routine offers a powerful means to optimize performance and maintain site health. By leveraging commands specifically designed for tasks like caching optimization and broken link repair, you can ensure that your site is fast, efficient, and free of common issues that could affect its performance and user experience.
How to Customize WP-CLI to Fit Your Needs
Customizing WP-CLI not only streamlines workflow but also enhances productivity, allowing for a more personalized development experience. Below, we explore how to tailor WP-CLI through writing custom commands and integrating it with other tools and services.
Writing Custom Commands for Specific Tasks
Custom commands in WP-CLI empower developers to automate specific tasks, thereby increasing efficiency. Here’s a simplified guide to creating your own commands:
- Identify the Need: Pinpoint repetitive or complex tasks that could benefit from automation.
- Plan Your Command: Sketch a basic outline of what your command will do. Decide on the name, parameters, and the expected output.
- Develop the Command: Utilize the WP-CLI’s ability to extend its built-in functionality by writing a plugin or a script that adds your custom command.
- Register Your Command: Follow WP-CLI’s guidelines to register your custom command, ensuring it’s recognized and executable through WP-CLI.
- Test Thoroughly: Ensure your command works as expected in different scenarios to avoid errors. Pay attention to security and performance implications.
- Document Your Command: Create clear, concise documentation to help yourself and others understand how to use your new command effectively.
By creating custom commands, developers can turn lengthy, manual processes into simple, one-line commands that save time and reduce the chance for errors.
Integrating WP-CLI with Other Tools and Services
WP-CLI’s versatility allows it to work seamlessly alongside other tools and services, further expanding its utility. Below are strategies to integrate WP-CLI for an enhanced development environment:
- Version Control Systems: Integrate WP-CLI with FTP or Git to manage your WordPress codebase, enabling automation of tasks like deployments and plugin updates.
- Continuous Integration (CI) Services: Use WP-CLI in CI pipelines, such as Jenkins, Travis CI, or GitHub Actions, to automate testing and deployment processes.
- Local Development Environments: Combine WP-CLI with tools like Docker, Vagrant, or Local by Flywheel to streamline the setup, configuration, and management of local development instances.
- Third-party APIs: Extend WP-CLI to interact with external APIs, automating tasks like content import/export, data synchronization, or integrating with various services including CRM systems, social media platforms, and more.
These integrations not only enhance WP-CLI’s functionality but also create a more efficient and cohesive development workflow. As each tool or service brings its own set of features, understanding how they can complement WP-CLI will result in a more productive development process, customized to fit the unique needs of each project.
To conclude, customizing WP-CLI by writing specific commands or integrating it with other tools and services significantly enhances workflow efficiency. It allows for a tailored development process, making it an indispensable tool for WordPress developers. By leveraging WP-CLI’s full potential, you can streamline your development processes, ensuring your projects are both efficient and effective.
Maximizing Productivity with WP-CLI: Tips and Tricks
Improving productivity while managing WordPress sites is a goal for many administrators and developers. WP-CLI, a command-line tool for WordPress, offers a wealth of commands to streamline your workflow. Here are some tips and tricks to enhance your productivity:
- Automate repetitive tasks: Use WP-CLI to automate updates, backups, and maintenance routines. Setting up cron jobs can save hours of manual work.
- Create custom commands: If your workflow has specific needs, WP-CLI allows the creation of custom commands to suit your unique requirements. This means you can tailor your toolset precisely to what you do most often, enhancing efficiency.
- Utilize Bash scripts: For complex or multi-step tasks, Bash scripts that call WP-CLI commands can reduce potential errors and simplify processes. Scripts can perform a series of actions with a single command, ensuring consistency and reliability in your work.
- Explore interactive mode: Using WP-CLI’s interactive mode can speed up your work by allowing you to remain in the command line between tasks, reducing the overhead time of starting up the tool for each new command.
- Keep WP-CLI updated: Regularly update WP-CLI to leverage the latest features and improvements. New versions often include optimizations and additional commands that can further improve your productivity.
By implementing these strategies, you can take full advantage of WP-CLI’s powerful feature set to manage WordPress sites more efficiently and effectively.
Where to Find Additional WP-CLI Resources and Community Support
Embarking on mastering WP-CLI is an ongoing journey. While the information provided here is a strong foundation, exploring additional resources and engaging with the WP-CLI community can enhance your skills and knowledge further. Here’s where you can find more help:
- Official WP-CLI Documentation: The first place to look is the official WP-CLI website. It contains comprehensive guides, command references, and tutorials to deepen your understanding and skills.
- Community Forums: Forums such as Stack Overflow and the WordPress support forums host vibrant communities where you can ask questions, share experiences, and find solutions to common (and uncommon) challenges.
- GitHub Repository: WP-CLI’s GitHub repository is not only the place to contribute code but also to report issues, request features, and interact with the developers behind WP-CLI.
- Online Courses and Tutorials: Various online platforms offer courses ranging from beginner to advanced levels. These resources can provide structured learning paths and practical projects to help you master WP-CLI.
- Social Media and Blogs: Many experienced WP-CLI users and developers share their knowledge through social media platforms and personal blogs. Following these can provide you with tips, tricks, and insights into advanced uses of WP-CLI.
Engaging with these resources and the WP-CLI community not only enhances your technical skills but also keeps you updated with the latest developments in the world of WordPress management.