
On This Page: [hide]
Are you looking to launch or upgrade your website with a platform that combines flexibility, ease of use, and powerful features? WordPress emerges as a top contender, especially for CentOS 7 users.
This article digs into the reasons why WordPress is the go-to choice for creating a range of websites, from personal blogs to sprawling business platforms. With its user-friendly nature, extensive customization options via plugins, and SEO-friendly architecture, WordPress meets the diverse needs of website owners and developers alike.
Furthermore, we will explore the benefits of pairing WordPress with Nginx on CentOS 7, promising improved performance and security – essential components of a successful online presence.
Why Choose WordPress for Your CentOS 7 Website?
WordPress stands as the premier choice for a vast array of websites, ranging from personal blogs to comprehensive business platforms.
What sets WordPress apart is its ease of use coupled with powerful features, offering an open-source platform that’s both free and user-friendly. For those managing a CentOS 7 website, WordPress aligns perfectly, providing a flexible, scalable solution without the need for extensive coding knowledge.
The platform supports an unlimited number of pages, posts, and products, presenting full control over your site’s customization and management. With the addition of thousands of plugins, users can further extend WordPress’s functionality, catering to their unique needs. Security features, automatic backups, and the assurance of stability and reliability make WordPress a wise choice. Moreover, its SEO-friendly codebase ensures your site ranks well on search engines, adding to its appeal.
The Benefits of Using WordPress on Nginx
Choosing Nginx as the web server for your WordPress site on CentOS 7 comes with a multitude of advantages. Renowned for its efficiency, Nginx thrives in environments requiring high concurrency, thanks to its low memory usage and the ability to handle numerous connections simultaneously. This makes it particularly suited for high-traffic websites, where performance and speed are critical. Furthermore, Nginx’s support for reverse proxy, media streaming, and load balancing enhances the overall functionality of a WordPress site, offering an optimized web experience.
Another critical feature of Nginx is its native IPv6 support, ensuring that your WordPress site remains accessible to users on the latest internet protocol. The inclusion of FastCGI caching means that content is served to your audience faster, improving site speed and user satisfaction. Together, WordPress and Nginx offer a robust solution for building and managing dynamic, high-performance websites on CentOS 7.
Preparing Your CentOS 7 System for WordPress
Setting up WordPress on a CentOS 7 system requires a series of preparatory steps to ensure the server environment is optimized for the installation and running of WordPress. This begins with understanding the specific system requirements WordPress entails, followed by updating your system and installing some essential packages. By closely following these initial steps, you can lay a sturdy foundation for your WordPress website, ensuring its seamless operation and security.
System Requirements for WordPress on CentOS 7
Before diving into the installation process, it’s crucial to ensure your CentOS 7 system meets the minimum requirements for running WordPress. These include:
- Web Server: Apache or Nginx
- PHP: Version 7.2 or higher
- Database: MySQL version 5.6+ or MariaDB version 10.1+
- At least 512MB of RAM
- Minimum of 1GB disk space; more is recommended for media content
Ensuring these requirements are met not only facilitates a smooth WordPress installation but also optimizes your site’s performance and security. In addition, the compatibility with future WordPress updates is significantly improved.
Update System and Install Essential Packages
With the system requirements checked, the next move is to update your CentOS 7 system to the latest version. This task can be accomplished with a simple command in the terminal:
yum update -y
Updating your system ensures that all the software on your CentOS is up to date, minimizing security risks and compatibility issues. After the update, the installation of essential packages that WordPress requires to function correctly is the next step.
Among these, installing a LAMP (Linux, Apache, MySQL, and PHP) stack is fundamental. If you prefer Nginx over Apache, this combination is often referred to as LEMP instead of LAMP. The choice between Apache and Nginx depends on your specific needs and preferences; both are fully compatible with WordPress.
The essential PHP extensions that WordPress requires also need to be installed. These extensions allow WordPress to perform various functions such as connecting to your database and managing sessions. Install these PHP extensions using the following command:
yum install php php-mysql php-fpm php-xml -y
After the PHP extensions are installed, setting up the database comes next. Whether you choose MySQL or MariaDB, the goal is to create a database that WordPress will use to store all its data, including your post content, user information, and settings.
Finally, ensuring your PHP and database services are enabled and running is crucial. systemctl commands help you start these services and enable them to launch at boot, ensuring your WordPress site is always operational.
Securing Your CentOS 7 System Before WordPress Installation
Before embarking on the journey to install WordPress on your CentOS 7 system, prioritizing security measures is paramount. This entails a balanced approach to configuring a firewall and setting up SELinux (Security Enhanced Linux), alongside ensuring that your website is secured with an SSL certificate. By taking these precautions, you not only safeguard your WordPress installation but also assure your site visitors of a secure browsing experience.
Setting Up a Firewall and SELinux for Enhanced Security
Starting with the firewall, it acts as the first line of defense against unauthorized access to your system. On CentOS 7, configuring the firewall to allow only necessary traffic (such as HTTP and HTTPS) and blocking all other ports can significantly reduce your vulnerability to attacks. The commands to adjust your firewall settings are straightforward and can be executed with minimal complexity.
Similarly, keeping SELinux in enforcing mode rather than disabling it is vital for security. SELinux provides an additional layer of security by applying strict access controls and policies. Admittedly, configuring SELinux for WordPress might require additional steps, such as adjusting file contexts and permissions. However, these steps are critical in maintaining robust security without compromising functionality. For WordPress specifically, setting the correct SELinux contexts ensures that the web server has the necessary permissions to serve the WordPress files and to interact with the database securely.
Why SSL Certificate Is Essential for Your WordPress Site
An SSL (Secure Sockets Layer) certificate encrypts data transmitted between your website and your visitors, safeguarding sensitive information from interception or tampering. Particularly for WordPress sites, where users might submit personal information or login details, SSL encryption is not optional – it’s essential.
Installing an SSL certificate on your WordPress site boosts your credibility and assures your visitors that their data is secure. Furthermore, search engines like Google give preference to encrypted sites, directly impacting your site’s search engine rankings – a crucial consideration in today’s competitive digital environment.
Procuring and installing an SSL certificate can be done in several ways, including through free providers like Let’s Encrypt, which offer certificates at no cost. However, ensuring that your web server is configured correctly to serve content over HTTPS requires careful attention to details in your web server’s configuration files. This process enhances not only security but also the trust and confidence of your website’s users.
In conclusion, setting up a firewall, configuring SELinux properly, and securing your WordPress site with an SSL certificate are indispensable steps in safeguarding your CentOS 7 system before WordPress installation. These measures create a secure foundation for your website, protect user data, and contribute to a more secure and trustworthy internet ecosystem.
Installing Nginx on CentOS 7: The First Step
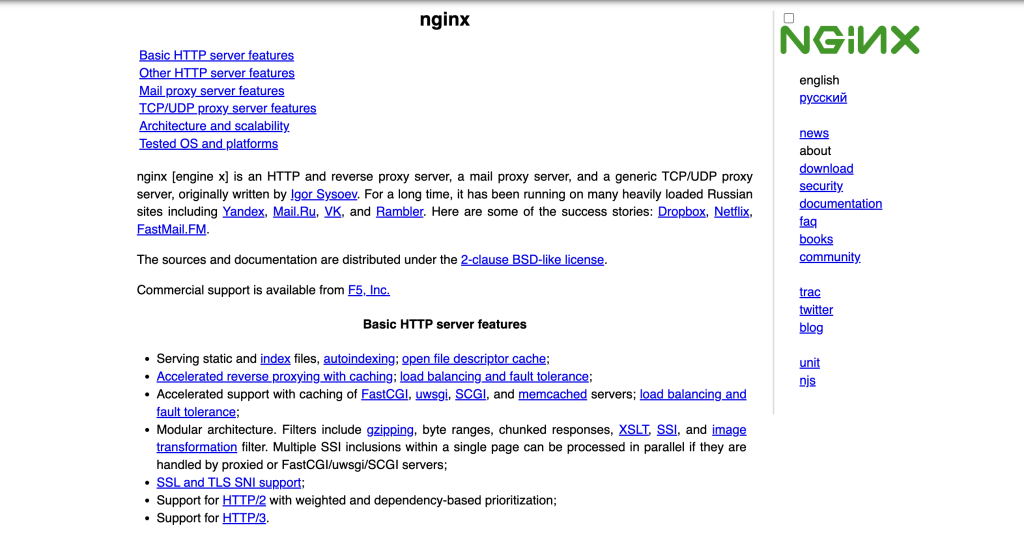
Initiating the installation process of Nginx on CentOS 7 is straightforward and marks the beginning of setting up a robust web server. Nginx, known for its high performance and low resource consumption, can be installed using the Yum package manager, which is an efficient way to handle packages in CentOS. The steps involve logging in as the root user, executing the yum installation command, and then enabling Nginx to start automatically upon system boot using the systemctl command. This procedure not only installs the Nginx web server but also positions your system for secure and efficient web service delivery. For users transitioning to CentOS 7, this process simplifies the approach to setting up a server capable of handling dynamic website content.
Configuring Nginx for Optimal Performance
After successfully installing Nginx on CentOS 7, the next step focuses on configuration for peak performance. Tweaking the Nginx settings can greatly enhance your server’s capability to serve web content efficiently. This involves editing the Nginx configuration file, typically found at /etc/nginx/nginx.conf. Key performance settings include worker processes and connections, which should align with your server’s hardware capabilities to handle concurrent connections smoothly.
Adjusting these settings helps in optimizing resource usage and improving response times for your websites. It’s essential to balance performance with resource availability, ensuring that Nginx runs optimally without straining server resources.
Testing Nginx Configuration to Ensure Stability
Following the optimization of Nginx settings for enhanced performance, it is crucial to test the configuration to ensure server stability. This validation phase involves checking the syntax of the configuration files to catch any errors that might have been introduced during the configuration process. The command nginx -t proves invaluable here, providing a quick way to verify that your edits are syntactically correct and that the server is ready to handle web traffic without issues.
Confirming the stability of your Nginx configuration safeguards your website’s uptime and guarantees a seamless browsing experience for your visitors. It’s a preventive step that mitigates potential downtime resulting from configuration errors, securing your online presence.
Setting Up MariaDB for WordPress on CentOS 7
Creating a solid foundation for any WordPress site begins with setting up a reliable database, and MariaDB offers a highly compatible and robust option. Going through the process of installing and securing MariaDB, followed by creating a dedicated database for your WordPress installation, might seem complex at first. However, breaking down these steps can simplify the process, ensuring your WordPress site has a strong database backbone to rely on.
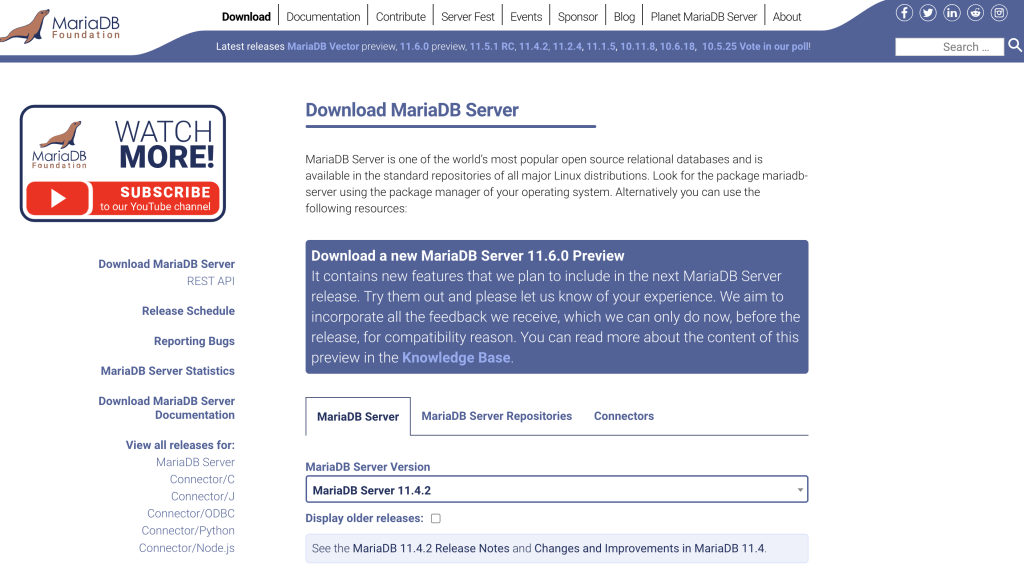
How to Install and Secure MariaDB
Installing MariaDB on CentOS 7 is a straightforward process that begins with a simple installation command. However, securing your MariaDB installation is a crucial next step to protect your database from unauthorized access. Here’s how to accomplish these tasks:
- Install MariaDB: Start by installing the MariaDB database server and its related packages using the yum command. This process pulls the necessary files from the repository and installs them on your system.
- Enable and Start the Service: Once installed, it’s important to enable MariaDB to start on boot and then start the service immediately, ensuring that your database server is running and accessible.
- Secure the Installation: After installation, running a security script helps in setting a root password, removing anonymous users, and restricting remote root logins. This step is vital in fortifying your database’s security posture against potential threats.
By following these steps, your MariaDB installation will not only be up and running but also secured against the basic threats, setting a solid foundation for your website or application.
Creating a Database for Your WordPress Site
With MariaDB installed and secured, the next crucial step is creating a database specifically for your WordPress site. WordPress uses this database to store all site content, including posts, pages, comments, and user information. Establishing a dedicated database for WordPress is thus essential. Here’s how to create one:
- Access MariaDB Shell: Log in to the MariaDB shell using the command line. This is where you will input further commands to manage MariaDB.
- Create the Database: Once inside the MariaDB shell, use the SQL command to create a new database intended for WordPress. Choose a name that you will easily recognize related to your site.
- Create a User: For security reasons, it’s best to create a unique user for your WordPress database instead of using the root user. This step involves creating a new user and setting a password for it.
- Grant Permissions: After creating the user, the next step is to grant this user full access to the newly created WordPress database. This permission is crucial for WordPress to be able to store and retrieve data from the database.
- Flush Privileges and Exit: Flushing privileges reloads the grant tables, ensuring the new permissions take effect immediately. Once done, you can exit the MariaDB shell.
Completing these steps prepares a functional and secure database, ready for your WordPress installation. Each step ensures not only a secure environment for your website’s data but also optimal performance and reliability for your online presence.
Setting up MariaDB for WordPress on CentOS 7 might require a bit of effort, but the reliability and performance payoff for your website are well worth it. By following the detailed steps to install and secure MariaDB, along with creating a dedicated database for WordPress, you ensure your site has a strong, efficient, and secure database foundation. Remembering to keep security in focus during setup can save a lot of headaches down the line.
PHP Installation and Configuration for WordPress
For many, setting up WordPress is a straightforward process that leads to the joy of having a personal or business website live on the internet. However, the technical groundwork such as choosing and configuring the right PHP version, arguably one of WordPress’s core components, can be a bit tricky. Let’s break down these steps to make them accessible to everyone.
Choosing the Right PHP Version for WordPress
WordPress, the world’s most popular content management system, requires PHP to function. PHP, a scripting language, plays a vital role in generating dynamic page content. Given how frequently PHP and WordPress are updated, choosing the correct PHP version is crucial for both security and website performance.
As of the latest updates, WordPress recommends using at least PHP 7.1. However, for better security and efficiency, PHP 7.2 is most advisable. Newer versions like PHP 7.2 offer several enhancements that improve the speed and security of websites. Installing all necessary PHP extensions can be accomplished with a single command, ensuring WordPress has everything it needs to run smoothly.
To check the current PHP version, creating a phpinfo.php page in your web server’s root directory is a handy technique. This file, accessible via your web browser, provides detailed information about your server’s PHP settings. Updating to the recommended PHP version ensures compatibility with WordPress’s latest versions, enhancing your site’s overall performance.
Configuring PHP-FPM to Work with Nginx
PHP-FPM (FastCGI Process Manager) is an alternative to the older PHP FastCGI implementation with some additional features useful for sites of any size, especially busier sites. For WordPress sites using Nginx as a web server, configuring PHP-FPM is an essential step to ensure PHP code is executed correctly, allowing dynamic content to be served efficiently.
To start, PHP-FPM needs to be installed and running. This is usually straightforward, with package managers like yum making the process seamless. The default configuration might need adjustments, especially concerning which user runs the PHP-FPM process and how Nginx communicates with PHP-FPM. By default, PHP-FPM runs as the user ‘apache’, but this should be changed to ‘nginx’ to align with the Nginx server:
- Open the PHP-FPM configuration file located at /etc/php-fpm.d/www.conf.
- Find and change the user and group settings from ‘apache’ to ‘nginx’.
- Adjust the listening parameter from a TCP socket to a Unix socket for improved performance and resource utilization.
- Ensure the /var/lib/php directory has correct ownership, reflecting the changes made in the configuration file.
- Finally, restart PHP-FPM and Nginx to apply the changes.
By following these steps, you’ll configure PHP-FPM to work harmoniously with Nginx, offering an optimized environment for your WordPress site. This configuration enhances your ability to serve dynamic content quickly and reliably, providing a better experience for your site’s visitors.
Where to Download WordPress Latest Version

Downloading the latest version of WordPress ensures that you have access to all the newest features and security updates. To download WordPress, visit the official WordPress site and look for the “Download WordPress” section. Here, you’ll find a link to download the latest version of WordPress in a .tar.gz file. Once the download is complete, you can proceed to prepare the server environment for WordPress installation.
Using commands like wget, you can easily fetch the latest WordPress package directly to your server. If wget isn’t already installed on your CentOS system, you can swiftly acquire it using yum with sudo yum install wget. This command not only downloads but also saves the file to your server, ready for the next steps of the installation process.
Finalizing WordPress Installation on CentOS 7
Now that WordPress is downloaded, the final stretch of the installation process involves setting up the WordPress configuration. Begin by extracting the WordPress package and moving its contents to the desired web directory on your server, which will serve as the root directory of your website.
An important step is to rename the wp-config-sample.php file to wp-config.php. This file is vital as it contains your website’s base configuration details, such as database connection settings. Edit wp-config.php with a text editor of your choice by filling in the database name, user, and password you created previously. These steps integrate your WordPress installation with the underlying MySQL (or MariaDB) database, bridging your files and database together.
After these configurations, navigating to your website’s domain in a browser will direct you to the WordPress installation wizard. This web interface guides you through the final touches like setting up an admin account, choosing the site language, and finalizing the installation. Upon completion, you’ll be greeted with the WordPress dashboard, marking the successful installation of WordPress on your CentOS 7 server.
In summary, installing WordPress on CentOS 7 involves downloading the software, preparing server configurations, and completing the setup through the WordPress web interface. These steps lay the foundation for a robust, secure, and easily manageable website.
Optimizing WordPress Performance on Nginx
Optimizing WordPress for speed on an Nginx server involves a multifaceted approach that goes beyond basic setup. It includes tweaking Nginx’s configuration to better serve WordPress pages, leveraging caching, and ensuring your WordPress themes and plugins are optimized for the fastest possible loading time. Implementing FastCGI caching as mentioned can significantly reduce response times by serving cached pages instead of querying the database and generating the page on each request.
Cache Plugins: Do You Need Them?
When running WordPress on Nginx, especially with FastCGI caching enabled, the need for additional caching plugins might seem redundant. However, using cache plugins can still offer advantages. Plugins like WP Super Cache or W3 Total Cache can provide an easy-to-manage interface for detailed cache settings, including page, object, and database caching. For websites that demand dynamic content, caching plugins offer a fine-tuned control over what is cached and what remains dynamic, enhancing both performance and user experience. Nonetheless, it’s crucial to configure these plugins correctly to avoid content mismatch or outdated information being served to visitors.
Optimizing WordPress Settings for Speed and Efficiency
To optimize WordPress settings for enhanced performance on an Nginx server, start by focusing on the WordPress backend. Reduce the number of plugins to only those essential for functionality. Each additional plugin can add overhead by making extra database queries or loading additional resources. Opt for lightweight themes that are optimized for speed and test the site’s performance after each significant change.
On the Nginx side, ensure that static resources like images, JavaScript, and CSS files have expiring headers to leverage browser caching. This minimizes the number of requests a browser needs to make when recurring visitors access your site. In addition, minimizing and concatenating CSS and JavaScript files can reduce the number of HTTP requests and the overall size of resources that need to be loaded.
Implementing these strategies can greatly improve the performance of a WordPress site on an Nginx server, leading to faster load times and a better user experience. Remember, optimizing a website is an ongoing process that involves monitoring, testing, and updating your strategies to meet the ever-evolving web standards and user expectations.
Troubleshooting Common WordPress Installation Issues
Setting up WordPress on a CentOS 7 server with Nginx can sometimes feel like navigating through a maze, especially when unexpected issues pop up. Let’s simplify this process and address common hurdles you might encounter, particularly focusing on permissions errors and Nginx configuration challenges.
Fixing Permissions Errors on CentOS 7
Permissions issues are a common stumbling block when installing WordPress on CentOS 7, often preventing plugin installations or updates. Fortunately, with a clear approach, these can be resolved effortlessly.
- Check SELinux Status: Begin by checking if SELinux is active. Use the command
sestatusto see if it’s enabled. If it is, it might be overriding your file permissions, which could lead to problems with WordPress functionality. - Correct File Permissions: Ensure your WordPress directory has the right permissions set up. Directories should have a permission value of 755, while files should be set at 644. You can achieve this by running
find . -type d -exec chmod 755 {} \;for directories andfind . -type f -exec chmod 644 {} \;for files from within your WordPress root directory. - Adjust SELinux Policies: For WordPress to function correctly, adjust SELinux policies to allow proper access. Use the command
chcon -t httpd_sys_rw_content_t wp-content -Rto set the appropriate context for the wp-content directory, enabling WordPress to write to it.
Remember, while changing permissions can solve immediate access issues, maintaining proper security standards is crucial. Never resort to using insecure permissions like 777, as this exposes your site to vulnerabilities.
Dealing with Nginx Configuration Problems
Nginx configuration issues can lead to inaccessible websites or a failure to serve WordPress pages correctly. Let’s outline steps to ensure your Nginx setup aligns with WordPress needs.
- Verify Nginx Configuration: Start by reviewing your Nginx configuration for mistakes. Specifically, look for the root directive to ensure it points to your WordPress installation directory. Also, ensure that the
location /block in your configuration is correctly set up to handle WordPress’s permalink structure. - Check PHP Processing: WordPress requires PHP, so your Nginx server must be configured to pass PHP requests to a processor like PHP-FPM. Verify that the
location ~ \.php$block within your Nginx config is correctly set up to handle these requests. - Restart Nginx: After making any configuration changes, don’t forget to restart Nginx to apply them. Use the command
systemctl restart nginxto ensure your new settings take effect immediately.
When adjusting your Nginx configuration, it’s vital to test changes incrementally. This approach helps isolate any issues quickly, ensuring a smoother WordPress setup process.
Conclusively, while setting up WordPress with Nginx on a CentOS 7 server involves several carefully orchestrated steps, adhering to these guidelines can significantly streamline the process. Ensuring correct file permissions and a well-tuned Nginx configuration are critical steps towards a seamless and secure WordPress installation.
Enhancing WordPress Security on CentOS 7 and Nginx
Building a WordPress site on CentOS 7 with Nginx provides a solid foundation for a fast and secure online presence. However, no system is impervious to risks. Enhancing security measures further protects your site from potential threats. This section explores simple yet effective strategies to fortify your WordPress installation.
Key WordPress Security Best Practices
Implementing best practice security measures is crucial for safeguarding your WordPress site. Consider the following steps to create a more secure environment:
- Regular Updates: Keep WordPress, plugins, and themes up to date. Each update often includes security fixes for vulnerabilities.
- Strong Passwords: Use complex passwords for the WordPress admin, database, and hosting account to prevent unauthorized access.
- Two-Factor Authentication: Add an extra layer of security by implementing two-factor authentication for WordPress logins.
- Limit Login Attempts: Prevent brute force attacks by restricting the number of login attempts allowed before locking out the user.
- Secure File Permissions: Set proper file and directory permissions on your server to protect against unauthorized changes.
- Use SFTP Instead of FTP: When transferring files to and from your server, use Secure File Transfer Protocol (SFTP) to encrypt the data.
- Backup Regularly: Maintain regular backups of your WordPress site and database to ensure you can recover in the event of a security breach or data loss.
These steps form the foundation of a robust security strategy for any WordPress site hosted on CentOS 7 with Nginx.
Maintaining and Updating WordPress on CentOS 7
Keeping your WordPress site up-to-date is crucial for ensuring security and optimal performance. Regular updates help protect your website from vulnerabilities and add new features to enhance user experience. However, the process needs to be handled carefully to prevent any issues that could bring your site down.
Automating WordPress Updates for Security and Performance
Automating WordPress updates is a strategy that simplifies the maintenance of your site. Here’s how you can enable automatic updates for WordPress core, plugins, and themes:
- WordPress Core: By default, WordPress automatically installs minor updates. For major releases, add the following line to your wp-config.php file:
define('WP_AUTO_UPDATE_CORE', true); - Plugins and Themes: You can automate plugin and theme updates by installing a reliable auto-update plugin from the WordPress repository. Ensure the plugins and themes are from reputable developers to avoid compatibility issues.
While automation makes upkeep easier, always backup your website before updates to safeguard your data against any unexpected errors.
When and How to Safely Update Nginx and PHP
Updating your web server and PHP version is essential for security and efficiency. It’s best to schedule these updates during low-traffic periods to minimize impact on your site’s visitors. Here are steps to follow:
- Backup Your Site: Ensure you have a recent backup of your entire website, including databases and content.
- Check Compatibility: Verify that your WordPress setup, including plugins and themes, is compatible with the newer versions of Nginx and PHP.
- Update Nginx: Use your CentOS package manager to update Nginx. Typically, you can update it with the command
sudo yum update nginx. - Update PHP: Similarly, update PHP through your CentOS package manager with the command
sudo yum update php. Remember to restart your PHP processor and Nginx to apply the changes. - Test Your Site: After updating, thoroughly test your site for any errors or issues. Pay close attention to site functionality and loading speed.
Regularly maintaining your web server and PHP setup helps in keeping your WordPress site running smoothly and securely. When done correctly, these updates can significantly improve your site’s performance without negatively affecting its uptime.
Conclusion: Your Next Steps After Installing WordPress on CentOS 7 with Nginx
Congratulations on successfully setting up WordPress with Nginx on your CentOS 7 server! This initial step lays the foundation for launching a dynamic, engaging website or blog that meets your personal or business needs. Now that the installation is complete, it’s essential to focus on making your WordPress site uniquely yours. Customization and security are two critical aspects that you should address immediately to ensure your site stands out and remains protected.
Customizing Your WordPress Site
Beyond its ease of installation, WordPress offers a world of themes and plugins allowing you to create a site that reflects your style or brand. Begin by exploring the WordPress Theme Directory for designs that align with your vision. With thousands of options, you’re sure to find a theme that suits your site’s purpose, whether it’s for blogging, showcasing a portfolio, or operating an online store.
Plugins extend your site’s functionality, offering features like SEO tools, social media integration, and enhanced security. However, select plugins cautiously to avoid overloading your site. Key plugins for beginners include those for caching, to speed up your site, and for creating contact forms, to connect with your visitors.
Engaging with Your Audience
Your site’s success heavily relies on your relationship with your audience. Encourage visitor engagement by consistently creating and sharing quality content that adds value. Use social media platforms to broadcast your posts and engage with feedback or comments promptly to foster a vibrant community around your site.
Remember, launching your WordPress site is just the beginning of your online journey. By customizing your site, prioritizing security, and actively engaging with your audience, you set the stage for a thriving, dynamic web presence. Embrace the ongoing process of learning and adaptation, and watch your site grow and evolve. Feel free to share your experiences or seek advice in the comment section below as you embark on this exciting adventure.