On This Page: [hide]
Vultr.com is a hosting company found in 2014. Vultr.com web hosting is one of the biggest hosting providers all over the world, they are ranking in the TOP 100 list for best-hosting providers in the world. It has 16 data centers all over the world and thus it provides reliable and fast hosting services to all of its customers. For 6 years the Vultr team expanded to over 50 people, and their customers are already over 200,000 all over the world. Vultr applications use modern software packages, which can be deployed with specific versions of the software.

Vultr Hosting Summery
| Targeting Locations | USA, Singapore, Amsterdam, Tokyo, London, Paris, Frankfurt, Toronto, Sydney |
| Price Range | Hosting services from 2.59$, 1.00$, 60$, 120$ |
| Products | Cloud, Bare Metal, Oject Storatge, Block Storage, Dedicated Cloud, Load Balancer |
| Support | Email Support |
| Suitable for | Websites, WordPress Websites , Online Stores, Big Web Apps |
Also Read Install WordPress 5.4 – it doesn’t Work. Why? (Steps)
How to Host WordPress Website on Vultr Cloud
As a big hosting company, which provides different types of hosting Vultr is a very promising and reliable web hosting provider in the Cloud Web Hosting area. Vultr has low latency servers available in over 6 counties around the continents, great computing power, and solid drive storage. That’s the reason why Vultr hosting plans offer all these features.
Vultr WordPress Instalation Steps
Vultr offers a fast and easy way that allows its customers to deploy WordPress installation on their servers in the matter of minutes. The whole process in simple and everybody can host WordPress with Vultr.com
Follow the steps to make a proper WordPress instalation in Vultr.com
1. Installation Step 1 (Registation)
2. Installation Step 2 (Location)
3. Installation Step 3 (Choosing WordPress)
4. Installation Step 4 (Server Size)
5. Installation Step 5 (Creating Acount in WordPress)
Installation Step 1 (Registation)
First, you will need to register your account in Vultr. Then log in and find the blue button “Deploy New Server”

Installation Step 2 (Location)
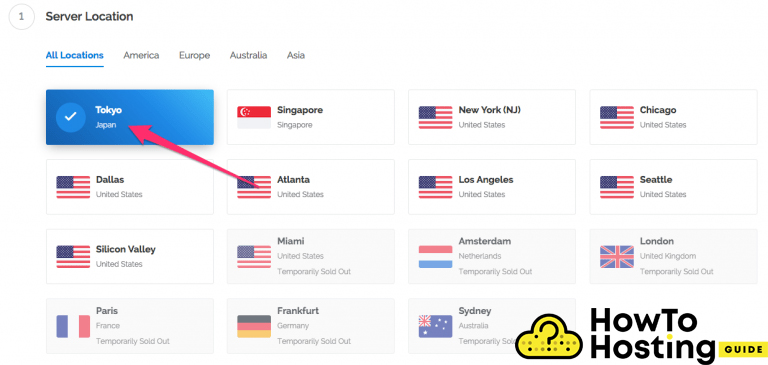
Then, you will see a page that let you choose a location that is closest to yours (select your location).

Installation Step 3 (Choosing WordPress)
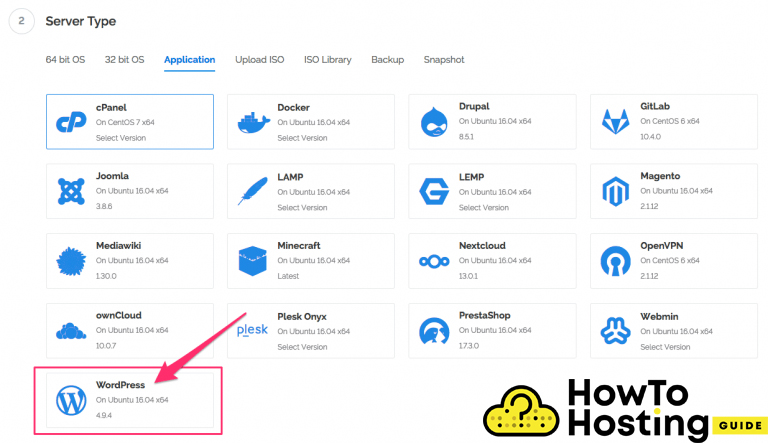
On step 3 lets you find and install the WordPress on their servers. Find the WordPress icon and click on it.

Installation Step 4 (Server Size)
On the next step, you will be able to choose your server size and server configuration, depending on the needs of your website.
Then, click on the Deploy now button.

Installation Step 5 (Creating Acount in WordPress)
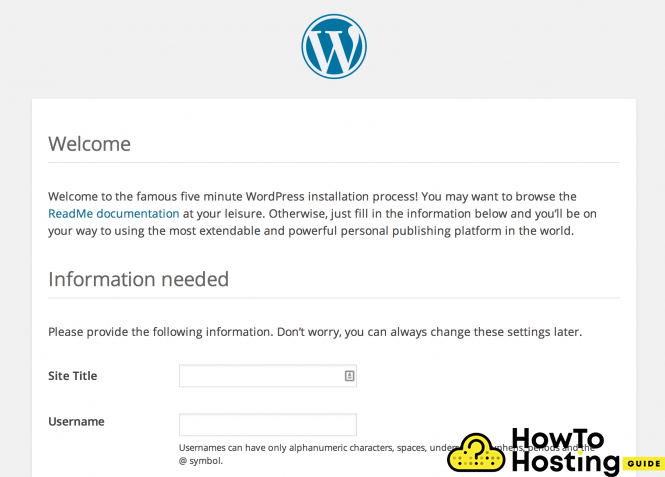
After this is done you will be introduced to the WordPress installer application. You don’t need to worry about database components or any other more advanced type of configuration. All you have to do is to create your WordPress admin username and set a Title for your WordPress.

Then your installation will be ready, and you will be able to log into your admin dashboard from yoursite.com/wp-admin.
Here you can find extra tips:
How to create your first blog in proper way
How to install wordpress with PuTTy and FileZilla
Why you have to use shared hosting for your first website
