On This Page: [hide]
Joomla is a mobile-ready and user-friendly content management system (CMS) used for website creation. Along with WordPress – Hostgator quick installer, and Prestashop, Joomla is one of the top-rated content management systems in the world. It has a great community and it is pretty easy to set up and work with. Almost every hosting provider nowadays offers fast and easy ways of Joomla installation and in this article, we are going to guide you and show you How to Install Joomla on Hostgator.
Start Your Website NOW! Get HostGator Plan and Start Only for $2.75/month.
You Should Also Read: How to Create Website on Joomla
How To Install Joomla on Hostgator
Hostgator offers a very easy and convenient quick installer that allows you to install Joomla very easily. There is some difference in the installation process of Joomla on the Shared server and Reseller, VPS, or dedicated server and we are going to explain both of them.
How To install Joomla using Quick Install on a Shared Server
The installation process of Joomla by the quick installer on the Shared server is a very easy job, that can be achieved by the Hostgator’s quick install software. To do that, log into your cPanel and find the Software section and click on the “QuickInstall” icon.
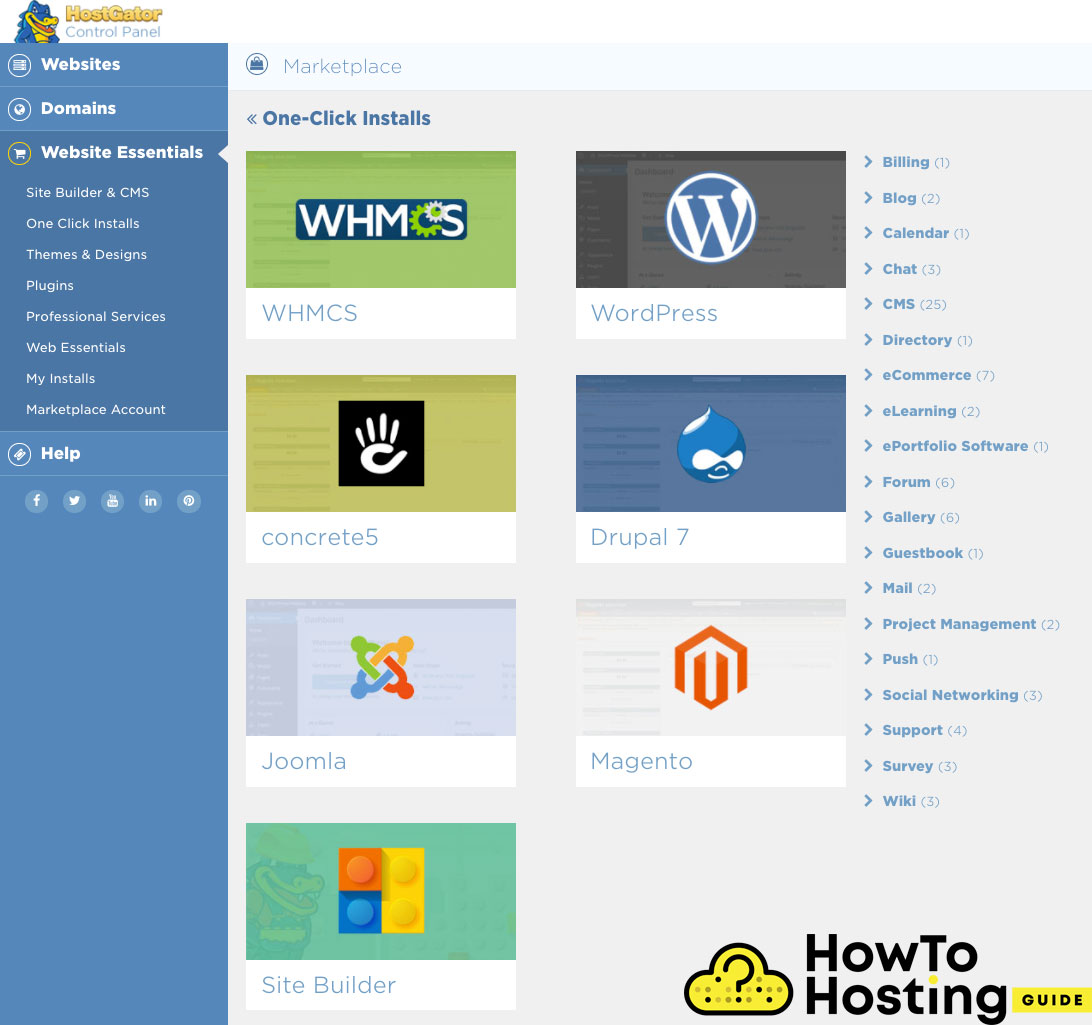
Once you click on that icon you will see a page with lots of Quick install options, including WordPress, Website builder, and more.
Find the Joomla icon and click on it. By using the drop-down menu you can choose the domain where Joomla should be installed, as well as any subdirectory if you wish to do that.
Once you select your preferred options, you can proceed with entering the details for your website including admin username, site name, admin email. You can set them to your personal preferences, and make sure that you check the terms of service agreement box.
Click ‘Install‘ and wait for the software to be installed.
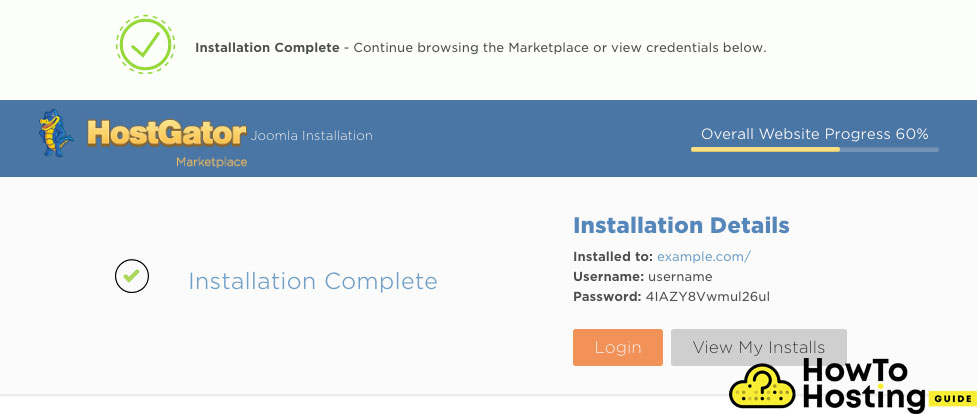
When the installation is completed you will be notified and you will see the installation details that include your website address, username, and password and that’s it. You’ve now successfully installed Joomla on the Shared server on Hostgator.
Installing Joomla using Quick Install on a VPS, Reseller or Dedicated Server
To install Joomla on a VPS, reseller, or dedicated server is a straightforward task. You should start with logging into your cPanel and then find the Quick Install icon under the Software/Services section.
Once you click on QuickInstall icon you will see:
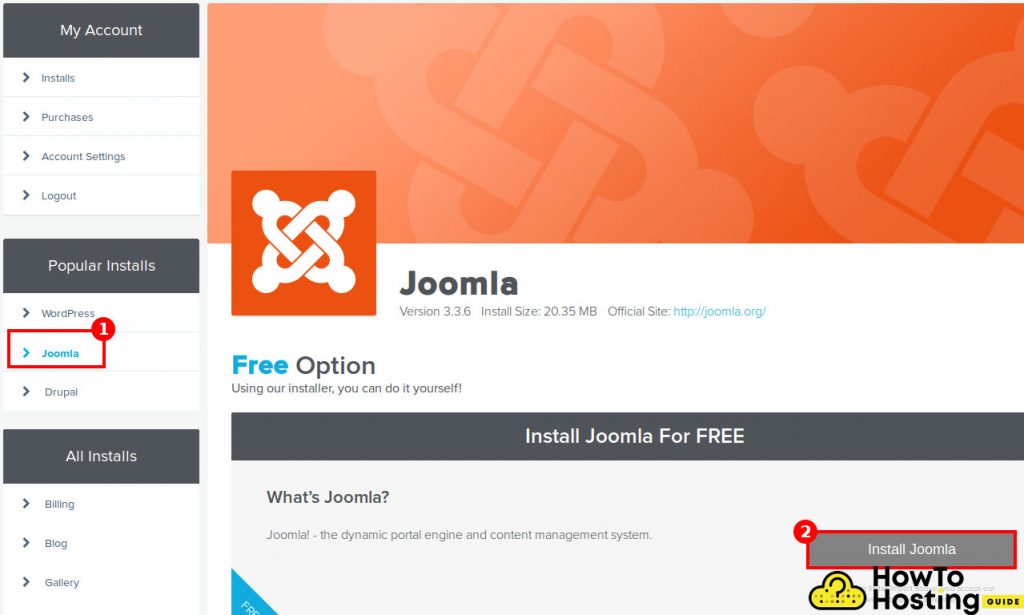
In the left menu, you will find a Joomla link, just under Popular Installs. Click on it and then click “Install Joomla“.
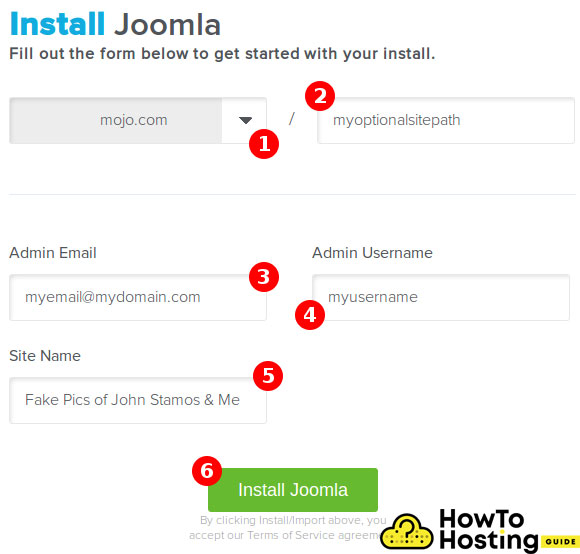
You will have to fill some details regarding your installation such as username, password, site name, and email. Write them down and then click on the “Install Joomla” button.
1. It is the base domain of your current installation.
2. This is the subdirectory where you can also install Joomla if you want to do that.
3. The administrator email.
4. Preferred admin username
5. Site name – this is going to appear in the header of your site.
Click Install and you are ready to proceed with the installation.

While Joomla is pretty good, it’s a bit outdated. Wouldn’t it be better to take advantage of a modern headless CMS like ButterCMS?