On This Page: [hide]
HostGator is a hosting company that provides many different hosting solutions such as shared hosting, reseller, VPS and dedicated web hosting. The company was founded in 2002 and since then it has over 1,000,000 customers from all over the world.
Start Your Website NOW! Get HostGator Plan and Start Only for $2.75/month.
HostGator.com
| Targeting Locations | Houston, Texas, Provo, Utah |
| Price Range | Hosting services from 3.84$, 5.95$, 11.95$, 89.98$ per month |
| Products | Website Builder, WordPress Hosting, VPS Hosting, Dedicated Hosting |
| Support | 24/7 chat support |
| Suitable for | WordPress, Custom Websites, Online Stores |
How To Install WordPress On HostGator
WordPress is the most popular CMS platform in the world and its installation on HostGator is quite easy.
HostGator offers a quick installation process of WordPress on shared and also on Reseller, VPS, or Dedicated server.
WordPress Installation On Shared Server
Installing WordPress on a Shared server on HostGator is easy and it takes just a few minutes.
First, Log in to your HostGator account and click on the “QuickInstall” icon.
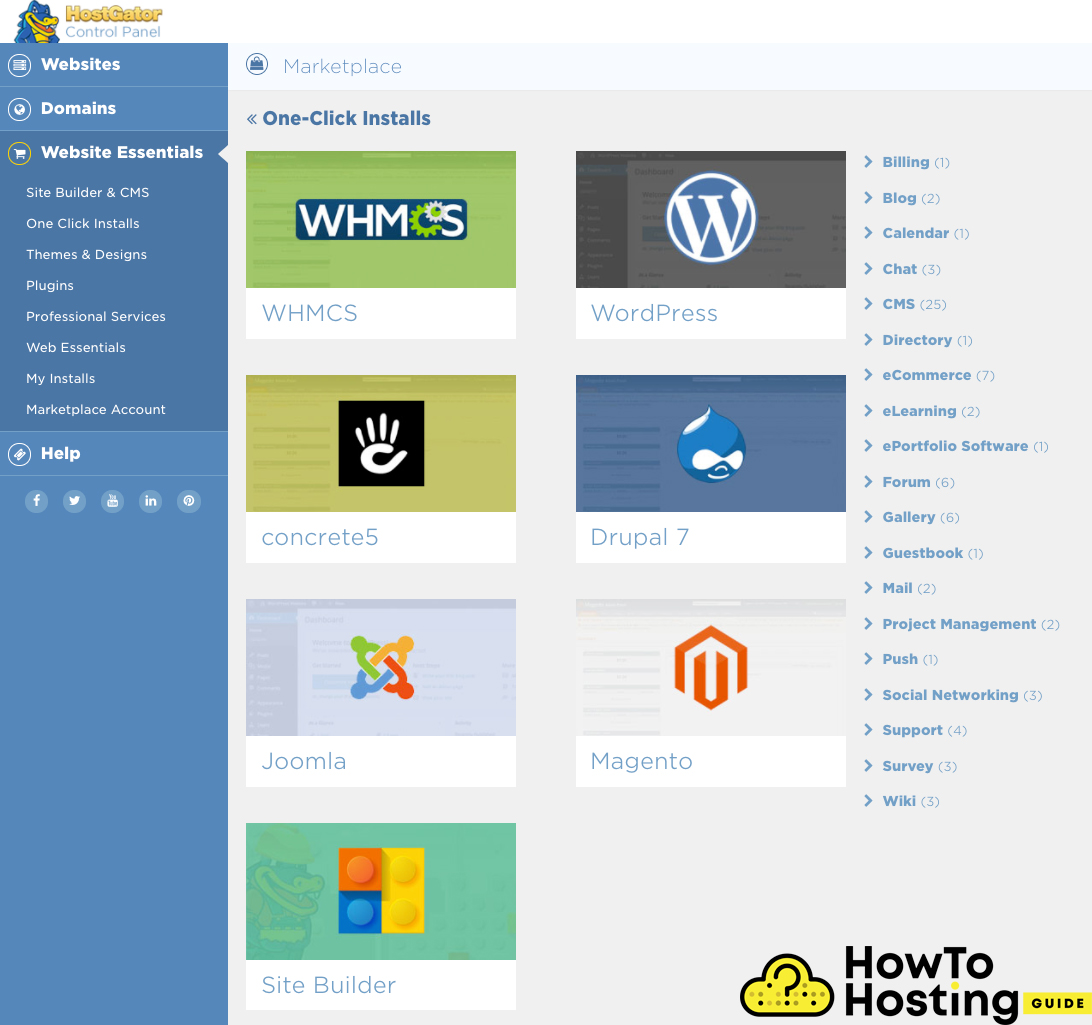
Then you will see a few one-click install options, where you should choose the “WordPress” icon.
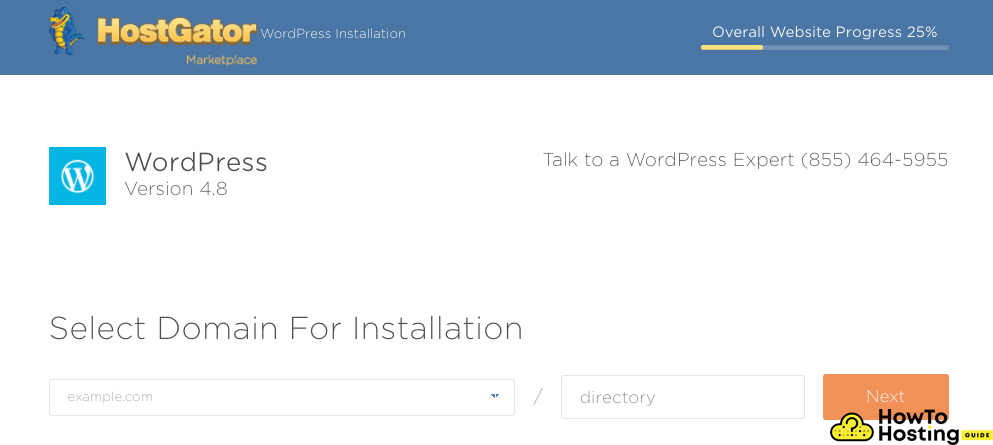
Domain Selection
Using the dropdown menu, you can choose where to install your WordPress, for example on your main domain or in any subdirectory.
Installation Settings
On the next window, you will see lots of details concerning your website.
Fill in these details and make sure that you are using a username different from admin, and a strong password.

After you’ve successfully filled all of these fields, click on the Install button and wait for the installation to be completed.
Once your installation is done you can log in to your website with the username and password that you’ve just created.
WordPress Installation On Reseller, VPS or Dedicated Server
Installing WordPress on a reseller, VPS or dedicated server is very similar to the installation on the shared server.
To do that, log into your Cpanel, and on the section called “Software/Services” and click the “QuickInstall” icon.
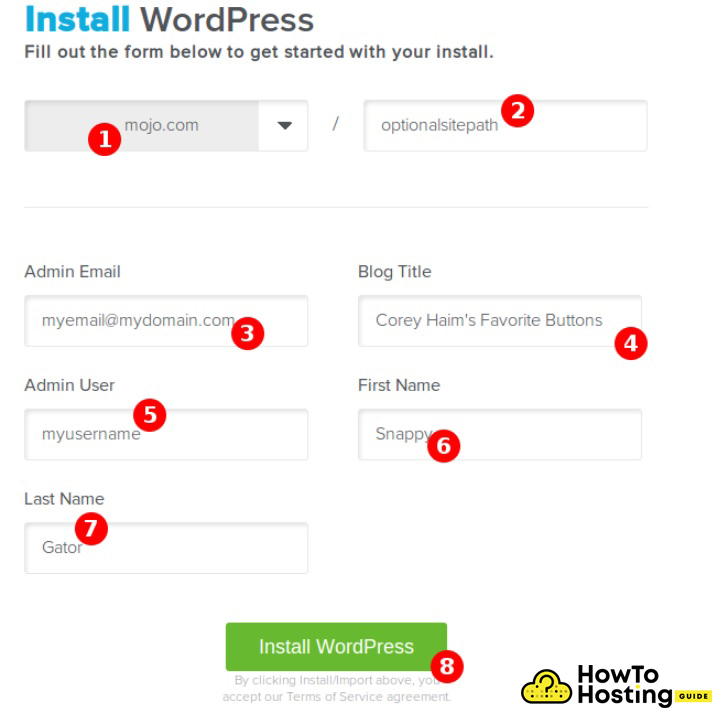
Quick Guide
On the next window, you will see some fields that you should fill in.
1. The first is the base domain for your installation
2. This is a subdirectory. You can leave it blank and your website will be installed in your main folder. If you want to create a separate blog of your website, for example, you can write /blog/ and your WordPress will be installed there.
3. Your admin email should be here.
4. The title of your blog – this will appear in search engine results as well.
5. Your admin username
6. Your first name
7. Your last name
After you’ve filled all of these fields, click on the install button and wait for the progress bar to note you when the installation is completed.
Here you can find extra tips:
How to create your first blog in proper way
How to install wordpress with PuTTy and FileZilla
Why you have to use shared hosting for your first website
HOW TO INSTALL JOOMLA ON HOSTGATOR
