
On This Page: [hide]
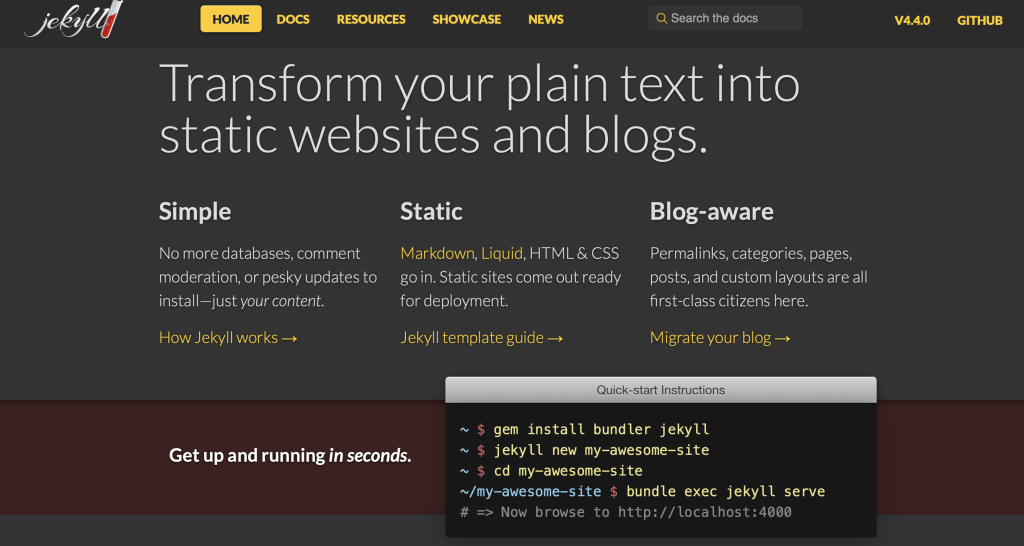
Are you a website owner that’s looking for an easy way to build fast sites? While most of the popular content management systems such as WordPress are commonly used for such tasks, they are definitely time-consuming and heavy. These platforms rely on databases, heavy scripts and plugins in order to finally deliver on the page. But what if there is a more simple way? Jekyll is so much better than other similar choices! It is a static site generator — all you need to do is take your posts, format it accordingly and run it through the engine. This will result in the creation of HTML-compliant files that can be easily uploaded to any host.
The Jekyll software program is a great choice for building static websites, offering a blend of simplicity, efficiency, and integration capabilities with GitHub Pages. If you’re pondering over why Jekyll should be your go-to for static site development, and how its features can turbocharge your online presence, then this article promises to be an insightful journey. You are on the cusp of discovering how leveraging this dynamic platform can elevate your web development project from concept to reality.
Why Choose Jekyll for Your Static Site Development?
Among various static site generators available, Jekyll distinguishes itself as a formidable option for many, particularly those valuing simplicity, integration capabilities, and cost-effectiveness. One of the significant advantages of Jekyll comes from its seamless integration with GitHub Pages, allowing developers to host their sites directly on GitHub without incurring extra hosting fees. This integration not only simplifies the deployment process but also significantly reduces the costs associated with web hosting, providing more budget flexibility for other project areas.
Jekyll’s simplicity is another compelling reason to choose it for static site development. Built on Ruby, Jekyll offers an intuitive setup process and straightforward site management, making it an accessible option even for beginners. By focusing on the essentials, Jekyll facilitates a swift transition from development to deployment, streamlining the workflow for developers and content creators alike.
What Makes Jekyll Stand Out Among Static Site Generators?
Jekyll’s unique proposition lies in its balance between simplicity and functionality. It leverages the Ruby programming language to offer a light yet powerful platform for generating static websites. Unlike dynamic website generators that require databases and server-side processing, Jekyll compiles files and produces a complete, static website ready for hosting. This approach significantly enhances loading times and reduces server strain, translating to better performance and lower costs.
Another standout feature of Jekyll is its support for markdown and various markup languages, making content creation efficient and straightforward. The platform’s Liquid templating language facilitates dynamic content creation within the static site framework, enabling users to generate templates that auto-populate with content. This feature is particularly beneficial for bloggers and content creators who regularly update their sites with new posts or articles.
Finally, Jekyll’s extensive plugin library and theme customization options allow developers to enhance their site’s aesthetics and functionality. Whether it’s adding social media integration, improving SEO, or customizing the site’s layout, Jekyll’s ecosystem supports a wide range of modifications to tailor your site to your specific needs.
The Pros and Cons of Using Jekyll
Understanding both the strengths and limitations of Jekyll is crucial for evaluating its suitability for your project. A key advantage of using Jekyll is its cost-effectiveness. Hosting on platforms like GitHub Pages can significantly reduce the expenses associated with running a website. Moreover, Jekyll’s efficiency in processing and serving static content leads to faster site load times, a crucial factor for user experience and SEO ranking.
From a developer’s perspective, Jekyll’s simplicity in site setup and management is a substantial benefit. It requires less time to learn compared to more complex site generators, making it an ideal choice for beginners or those preferring to focus on content rather than technical complexities.
However, Jekyll is not without its drawbacks. Its reliance on Ruby might be a hurdle for those not familiar with the language, necessitating a learning curve that could deter some users. Moreover, Jekyll might not be the best fit for large-scale projects or sites requiring dynamic content, where other static site generators or CMS platforms could offer better functionality.
In conclusion, Jekyll offers an appealing mix of features for individual bloggers, content creators, and small businesses seeking an efficient, cost-effective solution for establishing their online presence. While it may not cater to all project scales or complexity levels, its advantages in simplicity, performance, and cost savings make it a worthy contender in the realm of static site development.
Getting Started with Jekyll
This flexible, static site generator offers a simplified way to build and manage a website without the need for complex coding or databases. Whether you’re setting up a blog, a portfolio, or a business website, Jekyll provides the tools you need to create a professional-looking site easily.
Preparing Your Development Environment
Before diving into the world of Jekyll, it’s crucial to prepare your development environment. This preparation ensures that you have all the necessary tools and software for a smooth installation and operation of Jekyll. Let’s explore the essentials.
System Requirements for Jekyll
Jekyll is compatible with GNU/Linux, Unix, macOS, and thanks to recent advancements, Windows as well through the Windows Subsystem for Linux (WSL). Before proceeding, make sure your system meets these requirements to avoid any potential installation issues. For Windows users, leveraging WSL allows you to run Linux alongside your Windows environment, offering the best of both worlds for Jekyll installation and usage.
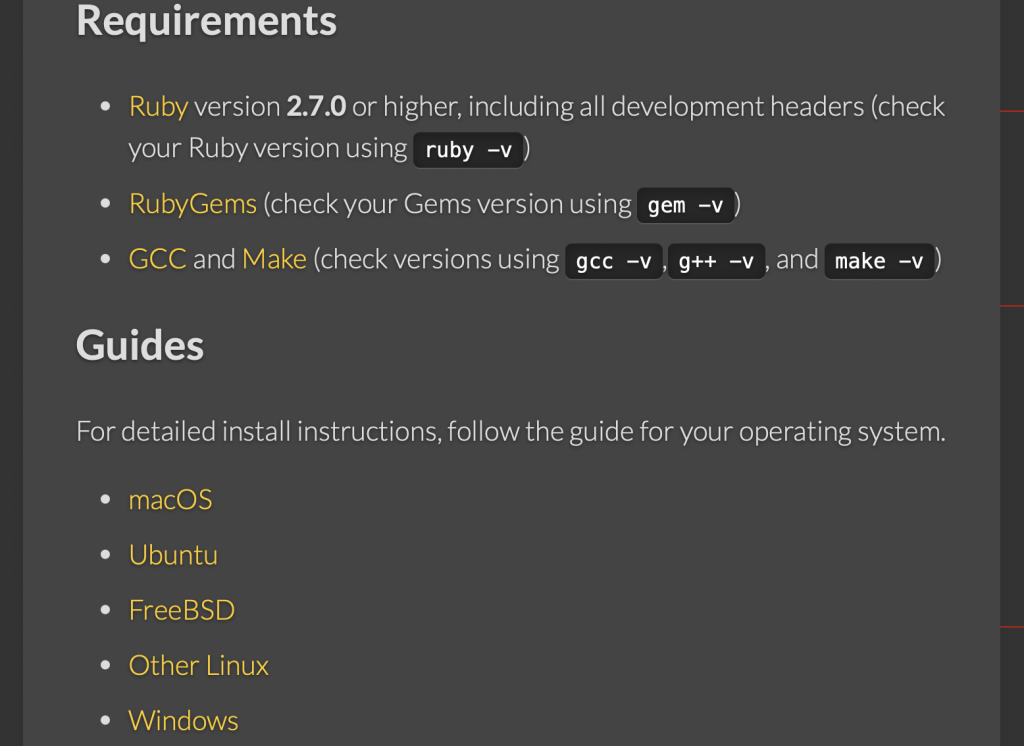
Installing Ruby and Jekyll on Different Operating Systems
The installation process varies slightly depending on your operating system. For macOS and Linux users, Ruby typically comes pre-installed, though you might need to update to a newer version. Windows users, on the other hand, will need to install Ruby from scratch. Downloading the Ruby DevKit from the official RubyInstaller for Windows site is a great starting point. This kit includes everything necessary to get Ruby up and running on a Windows system. After ensuring Ruby is installed and properly configured, you can proceed to install Jekyll and Bundler via the command line by running gem install jekyll bundler. This simple command installs Jekyll alongside Bundler, a tool that manages Ruby application dependencies, thus setting the stage for your first Jekyll project.
Creating Your First Jekyll Project: A Step-by-Step Approach
With your development environment ready, it’s time to create your first Jekyll project. This process can be broken down into manageable steps to help you get started with ease.
- Creating a new Jekyll site: Begin by opening your terminal or command prompt. Use the command
jekyll new myblogto create a new site named ‘myblog’. This command generates all the necessary files and directories for your new site. - Changing directory: Move into your new site’s directory using the command
cd myblog. This step is crucial for the following commands to work correctly. - Building your site: Now, build your site and serve it locally by running
bundle exec jekyll serve. This command compiles your site and makes it accessible through a local server, allowing you to preview your work in real time. - Automatic page refresh: To enhance your development experience, add the
--livereloadoption to the serve command. This feature automatically refreshes your browser page whenever you make changes to your site, offering immediate feedback on your adjustments.
Following these steps, your first Jekyll site will be up and running, available for you to customize and expand. Explore Jekyll’s theming system and plugin ecosystem to tailor your site to your needs and preferences.
Jekyll’s Structure and Configuration
Creating a website with Jekyll involves more than just writing content and adding images. It’s about understanding the framework’s structure and how it uses its configuration file to shape your site. Jekyll is built with simplicity in mind, making it accessible even for those with a minimal background in web development. Let’s dive into the core aspects that make up a Jekyll website and how they can be configured to your liking.
Key Components of a Jekyll Website
Jekyll websites have a standard structure that includes several directories and files. Each plays a critical role in the generation and organization of your site. For instance, the _posts directory is where your blog content lives. Each post is a markdown or HTML file named with a specific date and title format. The _layouts directory contains HTML templates that define the structure of pages, while _includes holds reusable code snippets such as headers or footers. Then there’s assets, where static files like CSS, JavaScript, and images are kept. Understanding how these components interact is crucial for managing your site effectively.
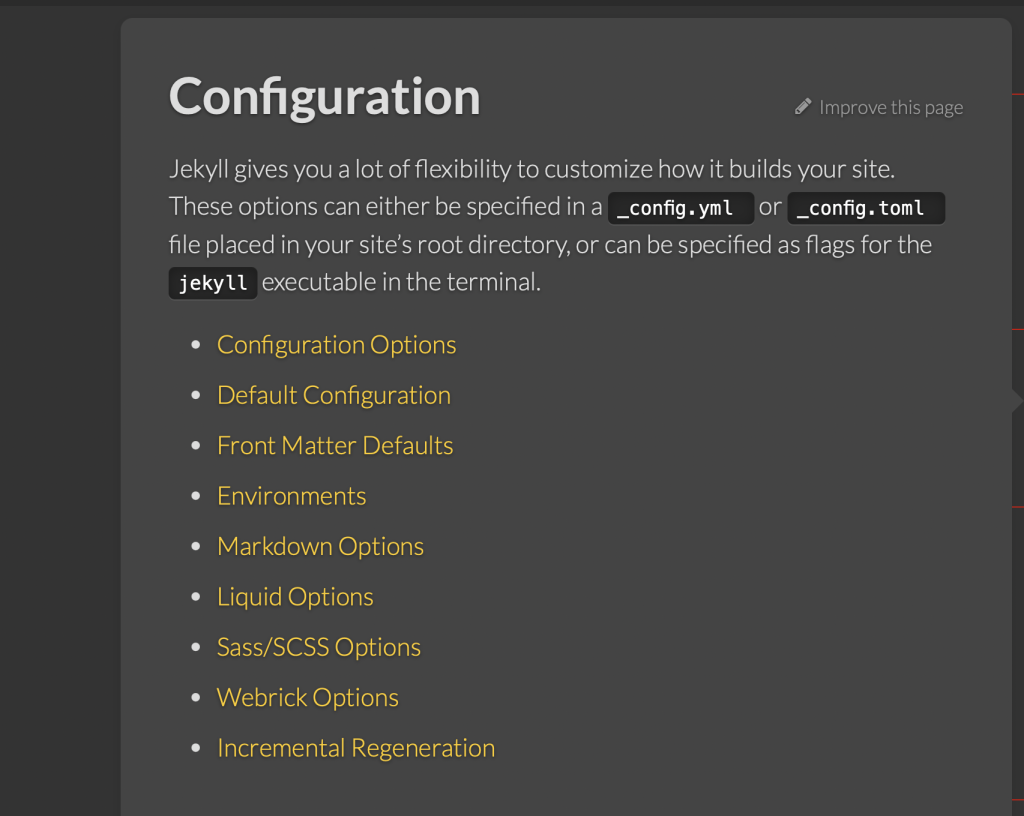
Configuring Your Site’s Settings with ‘_config.yml’
The _config.yml file is the heart of your Jekyll configuration, allowing you to customize your site’s title, description, URL, and much more. Editing this file is straightforward but requires a restart of Jekyll to see the changes. Remember to follow the YAML syntax closely, using two spaces for indentation. This file not only lets you define global settings but also allows you to specify options for plugins and themes, giving you the flexibility to design your site as you see fit.
Organizing Your Content: Posts, Pages, and Collections
Content in Jekyll can be broadly categorized into posts, pages, and collections. Posts are meant for dynamic content such as blog entries. They are stored in the _posts directory and follow a naming convention that includes the publication date. Pages, on the other hand, are static and can be located anywhere in your project, except for a few reserved directories. Collections allow you to go beyond posts and pages by grouping related content together. Whether you’re sharing portfolio items, case studies, or tutorials, collections can be tailored to organize your content effectively. By mastering the organization of content, you can ensure your site remains easy to navigate and manage.
By grasively organizing your content and mastering the configuration of your site’s settings, your Jekyll site will not only reflect your personal or brand’s identity but also offer a seamless user experience. With these foundations in place, your static website can evolve and grow effortlessly over time.
Design Your Site with Jekyll Themes
Designing a website can be an exciting journey, allowing you to express creativity and share content with the world. Jekyll themes greatly simplify this process, providing a foundation upon which you can build and customize your site. This section will guide you through finding and installing a Jekyll theme, and then tailoring it to fit your style and needs.

How to Find and Install a Jekyll Theme
Finding the perfect theme for your Jekyll site starts with understanding your site’s purpose and audience. Are you creating a personal blog, a portfolio, or perhaps a documentation site? This will influence your choice of theme. Here’s how to find and install a Jekyll theme:
- Explore Jekyll Themes: Start by browsing through collections of Jekyll themes. Official directories, GitHub repositories, and community-curated lists are great places to look. Pay attention to themes that are optimized for mobile devices and have good browser compatibility.
- Select a Theme: When you find a theme that aligns with your vision for the site, check its documentation and demo if available. This gives you a better idea of how your site can look and function.
- Download the Theme: Once you’ve settled on a theme, you can generally download it directly from GitHub. This might involve cloning the repo or downloading it as a ZIP file, depending on your preference and the instructions provided by the theme creator.
- Install the Theme: For gem-based themes, you’ll need to add the gem to your site’s Gemfile and run the ‘bundle install’ command. For non-gem-based themes, you’ll replace your site’s existing directories and files with those from the theme, carefully following the theme’s installation guide.
After installation, you might want to run your site locally to ensure the theme is installed correctly and looks as expected. Adjustments or updates to configurations might be required based on the theme’s documentation.
Customizing Your Jekyll Theme to Fit Your Style
With your Jekyll theme installed, the next step is to customize it. Customizing your theme can range from simple tweaks like changing fonts and colors to more complex adjustments such as modifying the layout or adding new functionality. Here’s how to make your Jekyll theme truly yours:
- Understand the Theme Structure: Familiarize yourself with the theme’s file structure and content organization. Look into the ‘_config.yml’ file, which is crucial for global settings, and study how layouts, pages, and posts are structured.
- Modify the Look: Start with simple changes. Adjust the theme’s color scheme, fonts, and header images to match your brand or personal taste. This usually involves modifying CSS files or specifying changes in the ‘_config.yml’ file.
- Adjust Page Layouts: Depending on your needs, you might want to alter the layout of specific pages or posts. This could mean changing how blog posts are displayed, customizing the homepage layout, or even adding new sections to existing pages.
- Add or Remove Features: Some themes come packed with features, while others are more minimalist. Depending on your preference, you may want to add new functionalities like social media buttons, or remove unnecessary features to simplify your site.
- Test Responsiveness: Ensure your site looks good on various devices, including desktops, tablets, and smartphones. Making your site responsive may require adjusting CSS or tweaking the theme’s HTML templates.
As you customize your theme, remember to preview changes by running your site locally. This way, you can tweak and adjust until you’re happy with the result.
Customizing a Jekyll theme is not just about aesthetics – it’s about creating a comfortable and engaging space for your visitors. Take your time to experiment with different looks and functionalities until you find what works best for your project. With these steps, you’ll be well on your way to designing a Jekyll site that stands out and truly reflects your personal or brand identity.
Adding Dynamic Content to Your Jekyll Site
Creating a Jekyll site brings the simplicity and elegance of static sites into the hands of bloggers and content creators. With its straightforward setup and compilation process, Jekyll allows for the easy integration of dynamic content without the need to delve into complicated web development techniques. This guide aims to demystify the process of enhancing your Jekyll site with dynamic content by focusing on writing blog posts using Markdown, enhancing your pages with Liquid templating, and integrating data files for dynamic content creation.
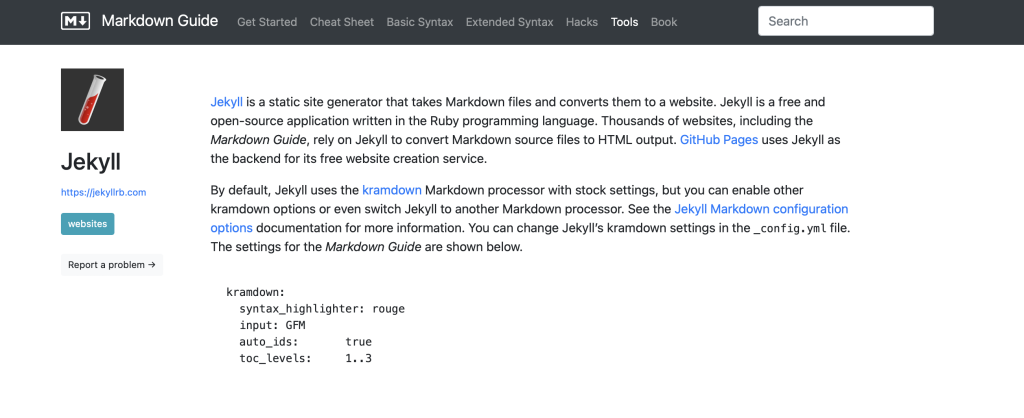
Writing Blog Posts in Markdown
Markdown is a writer-friendly syntax that lets you format text on the web easily. It uses simple symbols to indicate formatting options, enabling the creation of well-structured documents without needing to write HTML code. Jekyll pages and posts can be written in Markdown, allowing anyone with basic typing skills to start blogging immediately. Here’s how you can begin:
- Create a new file within the
_postsfolder of your Jekyll site. The file should follow the naming convention:YYYY-MM-DD-your-post-title.md. - At the top of your file, add a block of front matter. Front matter is a snippet of YAML used to set variables like your post’s title, layout, and date. An example front matter might look like this:
- Below the front matter, begin writing your post using Markdown syntax. For headings, use the
#symbol, for bullet lists use*, and for bold text, use**bold text**. - Save your file, and Jekyll will automatically process it as part of your site. This simplicity allows you to focus on content creation rather than the technicalities of web publishing.
---
layout: post
title: "My First Post"
date: 2023-03-08
---
Markdown’s ease of use serves to lower the barrier to content creation, inviting more voices to share their ideas and stories on the web.
Enhancing Your Pages with Liquid Templating
Liquid templating is a powerful tool for adding dynamic content to static sites. It uses placeholders to insert content, making your website more interactive and tailored to visitors without complicating the development process.
- Personalization: Use Liquid to personalize page content based on user actions or time of day, generating a more engaging user experience.
- Data Integration: Dynamically insert data from site variables or external sources, keeping your content fresh and relevant.
- Control Structures: Implement control structures such as loops and conditionals with Liquid to automate content creation based on specific conditions or datasets.
With Liquid templating, your Jekyll site can display varied and complex data in a clean, organized manner, significantly enhancing the user’s interaction with your content.
Integrating Data Files for Dynamic Content Creation
Jekyll supports the use of data files to manage and display dynamic content. These files, stored in the _data directory, can be in YAML, JSON, or CSV formats, allowing you to externalize data management from your site’s codebase. Here are steps to integrate data files:
- Place your data file (e.g.,
events.yaml) in the_datadirectory. - In your site’s pages or posts, access this data using Liquid templating. For example, to display a list of events from a YAML file:
- This code snippet automatically generates a list of events on your page, drawing from the
events.yamlfile.
<ul>
{% for event in site.data.events %}
  <li>{{ event.name }} on {{ event.date }}</li>
{% endfor %}
</ul>
Through the integration of data files, your Jekyll site can dynamically update content based on the data stored in these files, streamlining the process of maintaining up-to-date and relevant content for your viewers.
This approach to content management makes Jekyll an ideal platform for those looking to maintain a dynamic website with ease. Whether you’re documenting your personal journey, sharing professional insights, or running a community blog, these strategies ensure your content remains engaging, current, and valuable to your audience.
Improving Your Site’s SEO and Performance
Optimizing your Jekyll website for search engines (SEO) and enhancing its performance are crucial steps towards increasing website visibility and user satisfaction. Whether you’re managing an e-commerce platform, a digital portfolio, or a blog, these strategies play an integral role in attracting more visitors and providing them with a seamless experience.
Essential SEO Tips for Jekyll Websites
SEO is vital for any website to stand out in the vast sea of online content. Here are key strategies specifically for Jekyll sites:
- Utilize Semantic HTML: Use header tags (like
<h1>to<h6>) to structure your content logically. This helps search engines understand the hierarchy and importance of your content. - Improve URL Structure: Ensure your URLs are clean and descriptive. Use hyphens to separate words and include keywords that reflect the page content.
- Optimize Title Tags and Meta Descriptions: Add unique and descriptive title tags and meta descriptions to each page to improve click-through rates from search engine results pages (SERPs).
- Incorporate Alt Text for Images: Describe each image on your site with accurate alt text. This improves accessibility and helps search engines index your content more effectively.
- Mobile Responsiveness: Ensure your site is responsive and loads efficiently on various devices and screen sizes. Google prioritizes mobile-friendly sites in its rankings.
- Internal Linking: Use internal links wisely to help visitors navigate your site and to assist search engines in discovering more of your pages.
Incorporating Social Media Sharing Options
Integrating social media sharing capabilities on your Jekyll site can drastically improve its reach and engagement. By adding social media buttons to your posts and pages, you enable visitors to effortlessly share your content, increasing its visibility. Tools like AddThis or ShareThis offer customizable widgets that can be easily incorporated into your site’s layout. Furthermore, engaging with your audience on social media and sharing your content can drive more traffic back to your site.
Optimizing Site Speed with Effective Practices
The speed of your site significantly affects user experience and SEO. Here’s how to ensure your Jekyll website loads swiftly:
- Optimize Images: Use tools like ImageOptim or TinyPNG to reduce the file sizes of your images without sacrificing quality.
- Enable Compression: Use Gzip or Brotli compression to reduce the size of your CSS, JavaScript, and HTML files.
- Minify Resources: Minify CSS, JavaScript, and HTML to remove unnecessary characters and whitespace without affecting functionality.
- Use CDNs: Serve your static assets (like images, JavaScript, and CSS files) from a Content Delivery Network (CDN) to reduce loading times for users worldwide.
- Leverage Browser Caching: Set up caching rules to tell browsers how long to store your website’s assets, reducing load times for repeat visitors.
How to Update Jekyll and Plugins Safely
Updating Jekyll and its plugins is crucial for security, performance, and accessing the latest features. However, doing so carelessly can break your site. Here’s a safe approach to updates:
- Backup Your Site: Before making any updates, back up your entire site. This step ensures you can restore your site to its previous state if anything goes wrong.
- Test Updates Locally: Always test new updates on a local version of your site. This strategy helps detect potential issues that could affect your live site.
- Update One at a Time: When updating multiple components, do them one at a time. This way, if something breaks, you’ll know exactly which update caused the issue.
- Check for Dependencies: Some plugins might depend on specific versions of Jekyll or other plugins. Update dependencies accordingly to avoid compatibility issues.
- Consult Documentation: Before updating, read the release notes or documentation for the new versions. They may include important information about breaking changes or new configurations.
- Run a Final Test: After updating, test your live site comprehensively to ensure everything works as expected.
Securing Your Jekyll Site Against Common Threats
When leveraging Jekyll to build static websites, you enjoy a foundational layer of security due to the absence of server-side processing and databases that are common targets for cyber threats. However, the internet’s evolving threat landscape means additional steps should be considered to fortify your site’s defenses effectively.
Security Aspects of Static Sites
Static sites, like those generated by Jekyll, inherently reduce risk by serving pre-built HTML files to browsers. This simplicity minimizes the attack surface as there are no database queries or dynamic content processing where the majority of web vulnerabilities emerge. Despite this, static sites are not completely immune to online threats. Phishing attempts, cross-site scripting (XSS), and code injections are still potential risks, particularly through comments sections or contact forms that may be added to enhance user interaction.
Recommended Tools for Keeping Your Site Safe
Ensuring your static website remains secure encompasses a few vital practices. Regularly updating dependencies and plugins can shield against known vulnerabilities. Utilizing Content Security Policies (CSP) can help prevent XSS attacks. Moreover, employing a reliable web hosting service that provides built-in security measures can offer an additional layer of protection. For personal diligence, using tools like security scanners to check for vulnerabilities and implementing HTTPS via SSL certificates ensures data integrity and secure data transfer over the internet.
Choosing the Right Platform for Hosting Your Site
Choosing the right hosting platform for your Jekyll site is crucial for ensuring performance, reliability, and ease of use. While numerous platforms offer static site hosting, GitHub Pages and Netlify stand out for their integration with Jekyll, making them popular choices. GitHub Pages is directly integrated with GitHub, offering a seamless deployment process for repositories hosted on GitHub. On the other hand, Netlify provides a more comprehensive suite of features, including continuous deployment from GitHub, GitLab, or Bitbucket, and advanced server-side functions. Consider your project’s needs, such as custom domains, HTTPS, and continuous integration, when selecting a platform.

Deploying to GitHub Pages: A Beginner’s Guide
GitHub Pages offers a straightforward way to deploy Jekyll sites, directly from your GitHub repository. To start, push your Jekyll site code to a repository in GitHub. Then, enable GitHub Pages in the repository settings, selecting the branch where your site’s code resides. GitHub automatically builds and deploys your site, available at “yourusername.github.io/your-repository”. For a custom domain, add a CNAME file to your repository with your domain name. The simplicity of GitHub Pages makes it a go-to option for beginners looking to deploy their Jekyll site with minimal hassle.
Automating Deployment with Continuous Integration Tools
For those looking to streamline the deployment process, continuous integration (CI) tools like Travis CI, Jenkins, or CircleCI can automate the building and deployment of your Jekyll site to various hosting platforms. By configuring a CI tool with your repository, any push to the master or specified branch can trigger an automated build and deploy process. This ensures that your website is always up-to-date with the latest changes without manual intervention. Automating deployment can save time and reduce the potential for errors, making it an advanced strategy for maintaining a dynamic and updated Jekyll site.
Common Jekyll Challenges and How to Overcome Them
When embarking on the journey of creating a static website with Jekyll, users often encounter a variety of challenges. Whether it’s debugging errors or dealing with deployment issues, it’s important to approach these challenges with a straightforward strategy. Below, we explore common hurdles and provide clear, simple solutions to help you overcome them effectively.
Debugging Common Jekyll Errors
One of the most common areas where new users face difficulties is in debugging errors that occur during the building process. These errors often stem from minor issues that can be resolved with a few simple steps.
- Check Your Configurations: Start by revisiting your
_config.ymlfile. A typo or incorrect setting here can cause the build process to fail. Ensure all paths and configurations are correctly set. - Validate Your Code: HTML and Markdown errors can also lead to build failures. Use an online validator to check your code for any syntactical mistakes and correct them.
- Review Dependencies: If you’re using plugins, make sure they are all compatible with your version of Jekyll and properly installed. Sometimes, updating or rolling back a plugin can fix the issue.
- Consult the Logs: Jekyll provides detailed error logs when the build fails. These logs can offer clues to what’s wrong. Look for error messages and warnings, and research them for solutions.
- Seek Community Help: If you’re still stuck, Jekyll’s large community and resources like StackExchange can provide answers. Often, someone else has faced (and solved) a similar problem.
Dealing with Deployment Issues
After successfully building your site locally, the next step is to deploy it. However, deployment can also present its own set of challenges, particularly for those new to platforms like GitHub Pages.
- Follow GitHub Pages Guidelines: Make sure your repository is correctly set up for GitHub Pages. Names, branch settings, and repository visibility all play a role in successfully deploying your site.
- Understand the Deployment Process: Familiarize yourself with how GitHub Pages deploys Jekyll sites. Unlike local builds, GitHub Pages has certain restrictions and uses a specific version of Jekyll.
- Use a Continuous Integration (CI) Service: For complex Jekyll sites, or when using unsupported plugins on GitHub Pages, consider using a CI service like Travis CI or GitHub Actions to build your site and push the static files to GitHub Pages.
- Check Your
_config.yml: Some settings in your configuration file might need to be adjusted for deployment. For example, thebaseurlsetting can affect how your site’s URLs are generated. - Test Locally, Deploy Gradually: Before pushing major changes to your live site, test them locally. Use feature branches to deploy changes in stages, verifying each step of the way.
With these strategies, you can address the common challenges faced when working with Jekyll, making the process of creating and deploying your static site smoother and more enjoyable.
Taking Your Jekyll Skills Further
Once you’re comfortable with the basics of Jekyll, the real fun begins as you dive deeper into what this powerful tool can do. Expanding your Jekyll skills involves exploring advanced features and integrating plugins that bring new functionalities to your website. Whether you’re aiming to enhance your site’s aesthetics, add dynamic elements, or streamline your content management process, Jekyll’s extensible platform is designed to accommodate a wide range of needs. Here’s how you can take your Jekyll skills to the next level.
Advanced Jekyll Features and Plugins to Explore
Jekyll’s simplicity as a static site generator belies its potential for complexity and customization. Once you’ve mastered the basics, consider exploring these advanced features and plugins:
- Data Files: Utilize Jekyll’s data files to manage content more dynamically. Separate your site’s content from its structure by storing data in YAML, JSON, or CSV files and easily load it into your templates.
- Collections: Go beyond posts and pages by setting up collections. Collections are perfect for categorizing documents that don’t fit into the blog post paradigm, such as portfolio items, products, or team member bios.
- Custom Filters and Liquid Tags: Dive into creating custom Liquid filters and tags for tasks unique to your site. This is particularly powerful for formatting output or manipulating data in ways not covered by the default set of Liquid filters and tags.
- Static Site Search: Enhance site navigation with a search plugin. While GitHub Pages limits plugin usage, self-hosted Jekyll sites can incorporate more complex search functionalities to improve user experience.
- SEO Enhancements: Improve your site’s visibility with plugins designed to optimize your SEO. From sitemap generators to SEO tag libraries, these tools can help your website rank higher on search engines.
Exploring these features not only enhances your website but also deepens your understanding of how Jekyll functions under the hood.
Community Resources and Support for Jekyll Developers
One of Jekyll’s greatest strengths is its vibrant and supportive community. Whether you’re seeking solutions to specific problems, looking for inspiration, or aiming to keep up with the latest developments, numerous community resources are at your disposal:
- Jekyll Talk: Join the official Jekyll forum to ask questions, share your projects, and help others.
- GitHub: Explore thousands of Jekyll themes and plugins shared by developers around the world on GitHub. Contributing to or forking these projects can accelerate your site development.
- Tutorials and Blogs: From official documentation to community-written guides, there’s a wealth of knowledge available to help you tackle any Jekyll project.
- Workshops and Meetups: Participate in Jekyll-related workshops and meetups to learn from experienced developers and network with peers. These events are invaluable for gaining new insights and sharing your own experiences.
Engaging with the Jekyll community not only helps you solve problems but also connects you with like-minded individuals passionate about open-source development and static site generation. By diving into advanced features, experimenting with plugins, and drawing on the collective wisdom of the Jekyll community, you’ll unlock new potentials for your web projects and elevate your skills as a developer.
Conclusive Thoughts
Embarking on your journey with Jekyll might initially appear intimidating, especially with its blend of web development concepts and static site generation. However, by peeling back the layers, you’ll find that Jekyll is an incredibly user-friendly tool, perfectly suited for both newcomers to web development and seasoned coders alike. This guide has walked you through the essentials, from setting up your environment to pushing your site live on GitHub Pages. Now, it’s time for a quick recap and to contemplate your next steps in this exciting adventure.
Firstly, understanding Jekyll’s core – the creation of static websites from plain text – unlocks a world of possibilities. By leveraging Markdown, Liquid, and HTML/CSS, Jekyll simplifies the web development process without sacrificing flexibility or control. You’ve seen this firsthand as you’ve transformed text into a fully functioning website, customized its appearance, and published content with ease.
The beauty of Jekyll doesn’t end with its simplicity and power. Hosting your site on GitHub Pages not only provides a seamless integration but also offers a free and reliable platform to share your content with the world. Whether it’s a personal blog, project documentation, or a portfolio, Jekyll coupled with GitHub Pages caters to a wide array of web publishing needs.
As you continue to explore Jekyll, don’t hesitate to dive into the vibrant community and wealth of resources available. Experiment with different themes, plugins, and customizations. Jekyll’s flexibility means there’s always something new to learn or a way to enhance your site further.