On This Page: [hide]
JustHost is a hosting company that offers reliable and cheap hosting services. They are located in Chicago, Illinois and they offer lots of great features in their plans. Some of these features are the free Domain name registration, the unlimited domains count, the great outstanding uptime, their amazing customer support, the free script library, and last but not least the one-click WordPress installation. In the steps down below we will show you how to install JustHost in the proper way.
JustHost.com
| Targeting Locations | USA, Chicago |
| Price Range | Hosting services from 3,58 €, 6.31 €, 13.56 € |
| Products | Cloud, WordPress, VPS, Dedicated hosting, Domains, SSL |
| Support | 24/7 chat support |
| Suitable for | WordPress, Websites, Online Stores, Email services |
Also Read 10 Best Cheap WebHosting Companies In USA
How to Install JustHost.com on WordPress
Installing WordPress on Justhost is quite an easy job with the WordPress installer that they provide and it will take you less than 10 minutes. We will take you through a few steps and guide you during the whole process.
1. Log in (step 1)
2. Pick Domain Name (step 2)
3. Check Domain Name (step 3)
4. Create Site Name (step 4)
5. Final Steps
Log in To JustHost.com (instalation step 1)
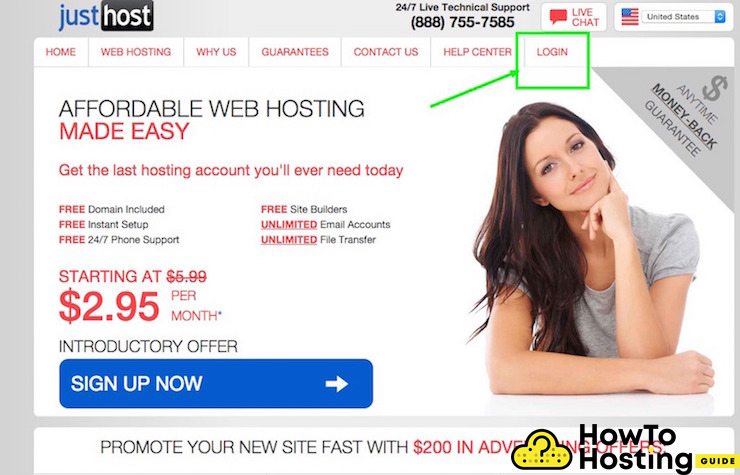
Your WordPress installation process starts with a sign up to their website. Click on the Login button on the top right corner and then you will be asked for your username and password.
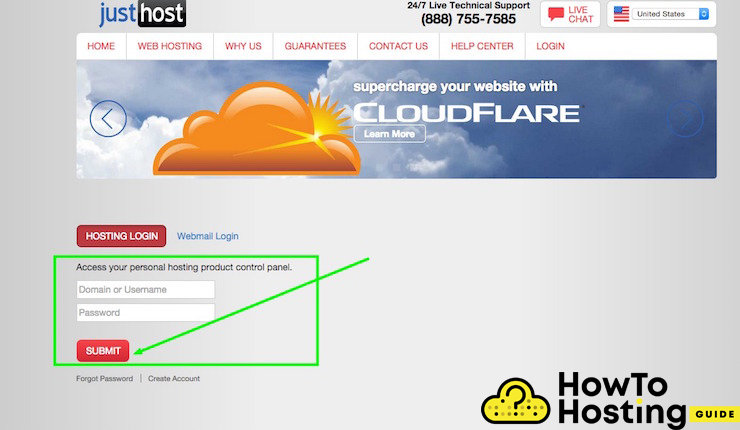
After you fill in your details click Submit and you will be taken to a page of JustHost, where you can choose to install your WordPress.
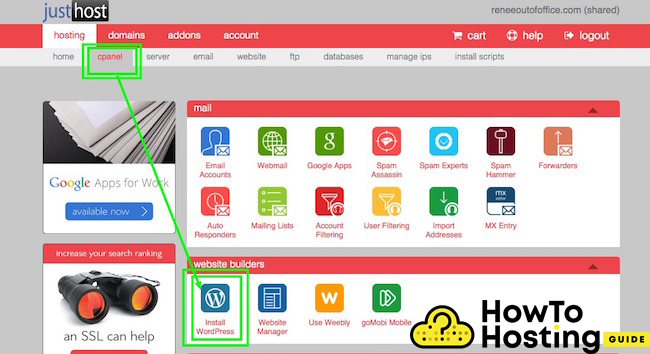
After you click on the WordPress icon, you will see the next window with some information about WordPress. Click the “Install” button and proceed with the next steps.
Pick Your Domain Name in JustHost.com (instalation step 2)
Generally speaking, WordPress’ installation does not need to be in any folder. You can leave it in your outer directory and install it on your root domain. If you choose something like /myblog/ for example, when people try to visit your domain, they will not be able to see your website. This is important to be noted because you might find yourself in an unpleasant situation.
Check Domain (instalation step 3)
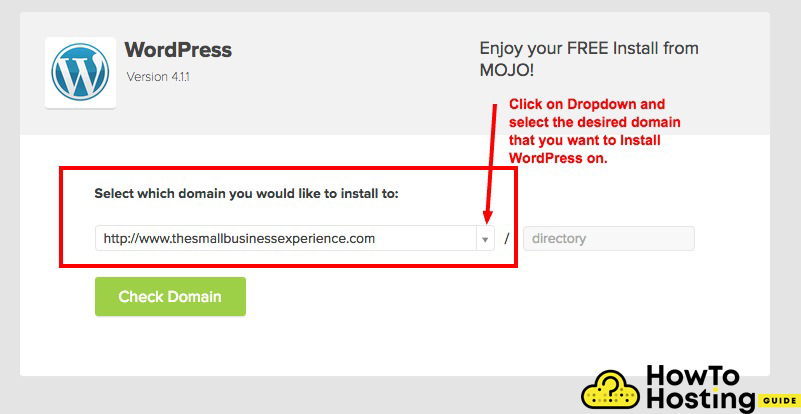
On this window, you should decide on which domain you want to install your WordPress. If you have only 1 domain name this will not really matter.
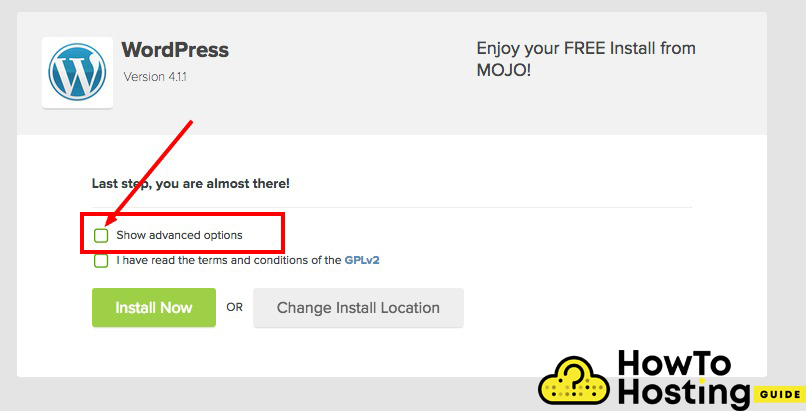
Then, click on the check domain button and you will see the final window, where you have 2 checkboxes – Show Advanced Options and terms and conditions. Mark both of them and click Install now. Then, you will be asked for your username – choose something different from “admin” and it is also advisable to use letters and numbers for your admin username for extra security measurements.
Create Your Sitename And Admin Password (instalation step 4)
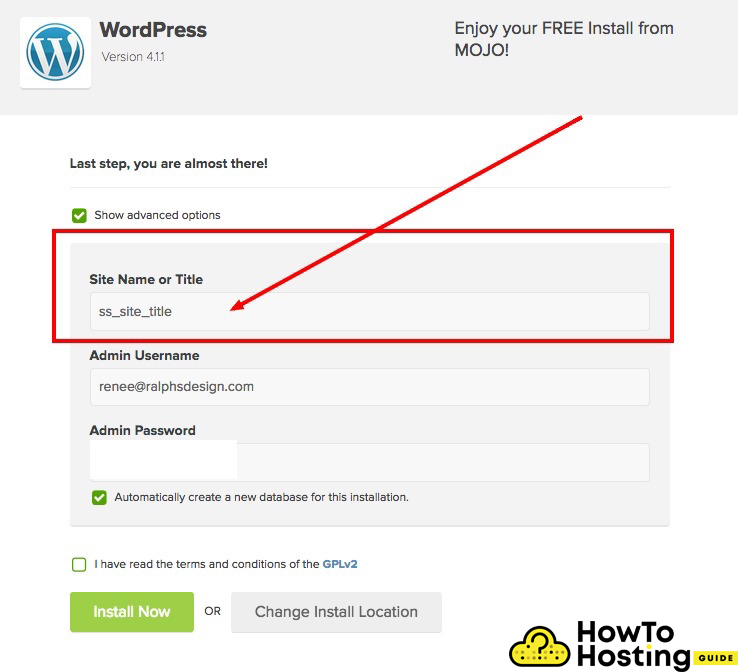
On the final window, you will have to change the title of your website, this is the title that is going to appear when search engines are crawling through your website, and people will see this title in the results of Google. Then, type your password and once again, try to use letters, numbers and special characters such as “!@#$*%(“. It is very important to use a strong password.
After you’ve done that click on the Install Now button and wait for the installation process to be completed.
Final Steps
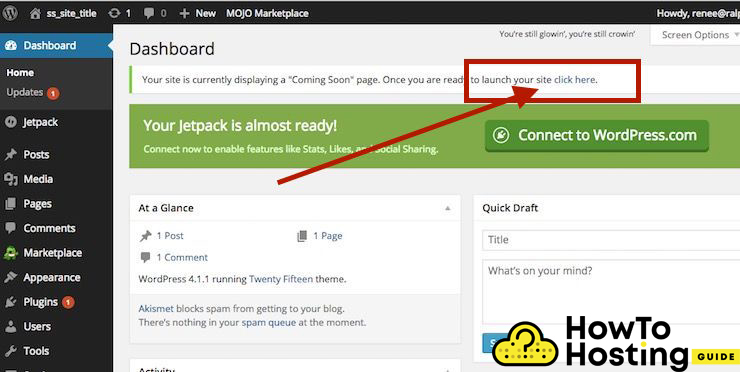
Now your WordPress website is installed and you can open it. Go to the dashboard and click on the “click here” link as it is shown in the picture above. This will take off maintenance mode and your website will now be visible for everyone across the world.

