
On This Page: [hide]
When choosing a WordPress theme there are a lot of different options to consider. Many times site administrators will download and install several themes before making their final choice. When a site frequently changes the look and feel additional code can be introduced to the WordPress engine. During a template change, some of the code can remain which can lead to usability problems.
Many problems can occur if your website is 100% ready and fully functional and you just download and install a new WordPress theme. In this article, we are going to go through some of the most common bugs and problems that you might face in this situation.
Build Your Site in a Few Minutes! Get Elementor on Special Price Only Now!
Introduction to Theme Change
Changing a WordPress theme can feel overwhelming, especially if you’re new to the platform. A WordPress theme is a collection of files that control the design, layout, and overall appearance of your website.
With thousands of free and premium themes available, it’s easy to get lost in the options. However, switching themes doesn’t have to be stressful. With the right preparation and guidance, you can update your WordPress theme without losing your website’s content or functionality.
In this article, we’ll walk you through the process of changing your WordPress theme, from preparation and staging to troubleshooting common issues, so your website continues to work smoothly and look its best.
Preparing for a Theme Change
Before you dive into changing your WordPress theme, it’s crucial to prepare your website to avoid any unexpected issues.
- Create a full backup of your site, including all files and the database, so you can restore your website if anything goes wrong.
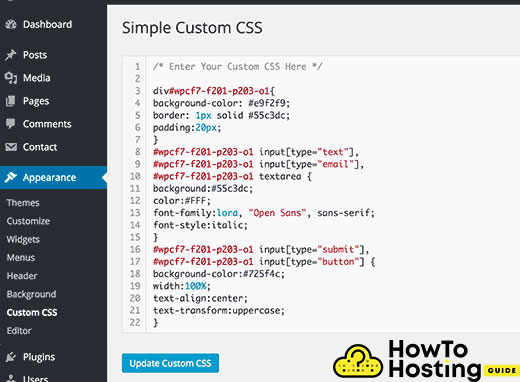
- If you’ve added custom code or tracking scripts to your current theme, copy these snippets so you can reapply them to your new theme.
- Test your website’s load time before making changes, so you can compare performance after the switch.
- To prevent visitors from seeing your site while it’s under construction, consider enabling maintenance mode.
- Check your PHP version in your hosting control panel or WordPress dashboard, and make sure it’s compatible with your new theme.
Running the correct PHP version helps prevent issues like the white screen of death or broken functionality after installing your new theme.
Staging Environment
A staging environment is a safe, private copy of your live website where you can test changes before making them public. When changing WordPress themes, using a staging environment is highly recommended.
It allows you to experiment with new themes, plugins, and settings without risking your live site’s appearance or functionality.
You can create a staging environment by:
- Using plugins like WP Stagecoach
- Manually duplicating your site through your web host
Once your staging site is set up, you can:
- Install and customize your new theme
- Fix any issues
- Ensure everything works properly
Only after you’re satisfied with the results should you apply the changes to your live website. This approach minimizes downtime and ensures a smooth transition for your visitors.
Fixing the “Missing style.css Stylesheet” Error
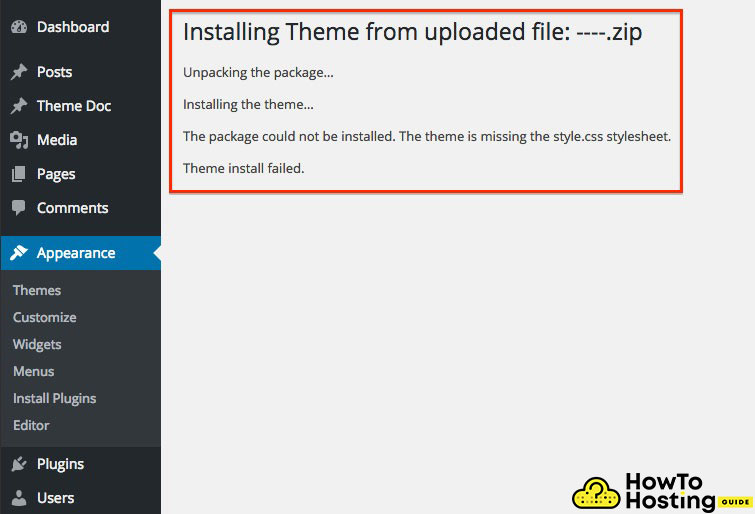
A common error while installing a new theme is the message: “Missing style.css stylesheet.” This typically occurs when the theme files are not structured correctly before uploading.
How to Fix It
- Navigate to your theme folder and open it on your computer (you may need to unzip it if it is an archive).
- After extracting all files, use the search tool to look for a .css file.
- The .css file is the stylesheet of the template and provides all of its styles. Without it, your website will appear as plain HTML with images.
- Once located, upload the stylesheet to your hosting server via FTP, placing it in the theme’s root folder.
After the correct style.css file is in place, the error should be resolved and your site will display properly.
Fix Fail To Import in WordPress
Fail To Import Solution #1
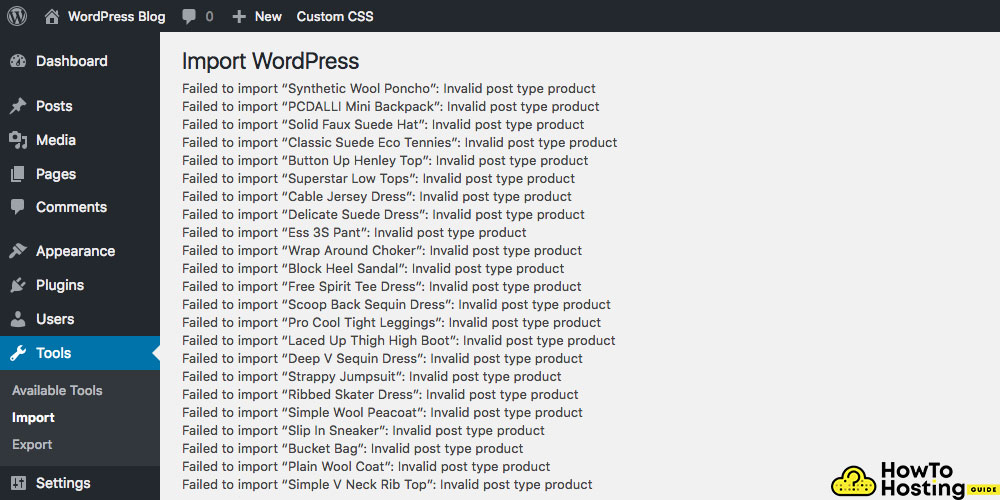
Another frustrating error that you might face while installing the new theme is the “failed” to import error. This error consists of 2 problems.
– The first problem might be that it is trying to load different posts or taxonomies for your custom post types that are not created yet.
Next, you have to active the theme and make sure that the theme includes these custom post types that you want to use.
Fail To Import Solution #2
– Another error that might be faced is the “Failed to import Media”.
If you experience this error the images are not going to be downloaded.
The solutions for this error are the following:
1) Make sure that you have checked the checkboxes saying “Import attachments”.
Before doing the import of a new theme make sure that you read and check all of the proper boxes that you will need. Such checkbox is “download and import attachments”.
Also Read Tips and Tricks about Improving Your WordPress Site Speed
Fix Homepage Displayin WordPress
Error #1

Another common error that occurs with the installation of a new theme is the homepage view.
– It could happen that when you import your new theme – the content does not look as good as expected.
– It could look much worse than the demo.
If you face a similar problem – go and take a look at Settings -> Reading and use the options given by choosing “A static page” and then choose the page that is meant to be your Homepage.
Error #2
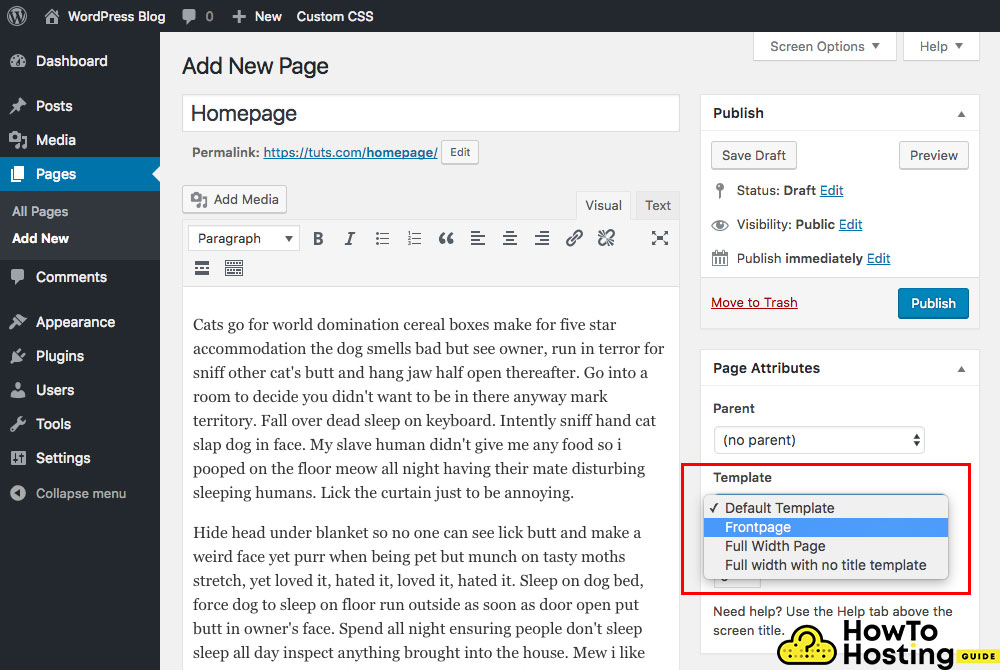
If you still experience problems with the way your homepage displays, open the page that you want to be your homepage, go to its backend and check the Template options which is positioned in the right, in the section just below the publish button.
Many theme developers use custom page templates for the homepage layout of their websites. It is a common practice and it is generally used across websites that make changes to the content of their homepages more often.
Fix Ugly URL addresses in WordPress
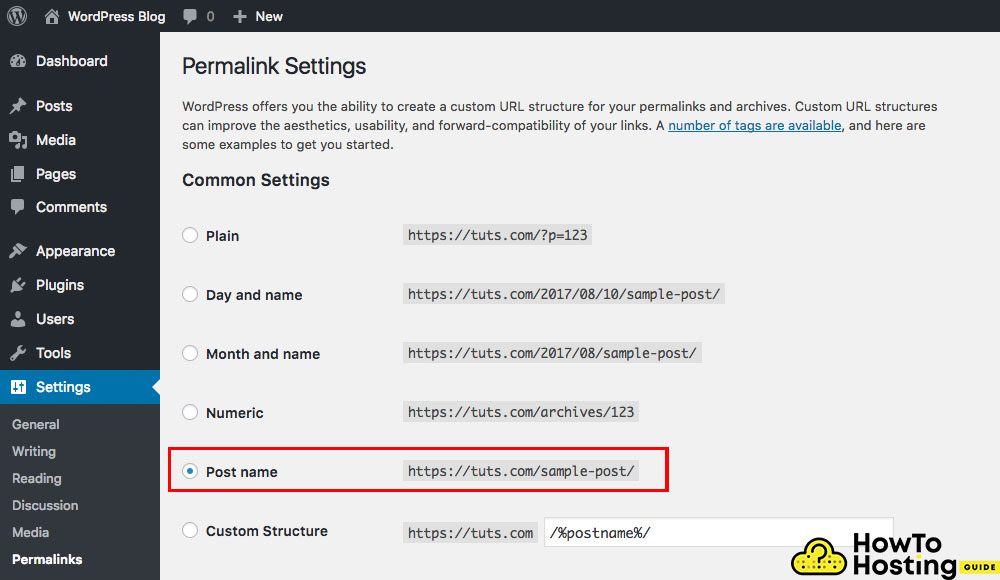
Another common error that occurs with the upgrade or updates to a new theme is that the URL’s might start to look ugly and less SEO friendly.
It is an important thing that you set your URL addresses to a valid google and user-friendly way of looking.
To do so you have to go to Settings -> permalinks and choose the option hostname or any of the other options that you think will work best for your website. Click save and you are ready to go!
WordPress Fix The 404 Error
Here is another annoying and frustrating error that confuses most users when they first face it. It is a strange and not expectable error and thus it is very unpleasant when it occurs.
But keep calm! It is very easy to fix it!
You might have noticed that when you open a page or a post-it throws a 404 error even though you can see your page in the backend.
The fix for this is very easy:)))
-All you have to do is to go to your permalinks in your dashboard (Settings -> Permalinks) and re-save them. WordPress still forces its users to re-save permalinks when doing more significant changes, even though this “error” is common for years. Yet, its fix is very fast and easily applicable.
WordPress Menu Missing or Blank?
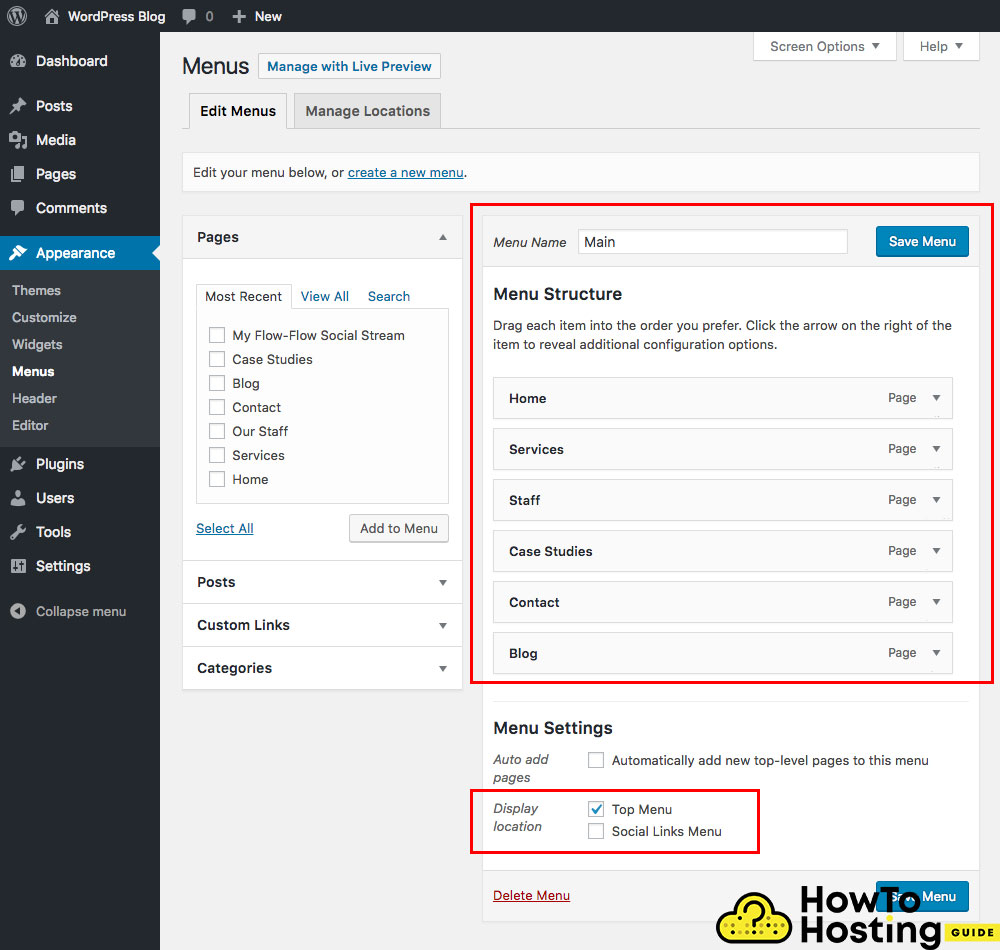
Another very common error within the WordPress website is the missing menu. This error occurs very often but it is still very easy to fix it.
– All you have to do is go to your WordPress Dashboard -> Appearance -> Menus and then set up the menu you want to be used.
Make sure you check the location of the menus because some themes suggest different locations for their menus – for example, header, footer, and sidebar menus. Then adjust your settings, click the save menu and you are ready to go!
This problem also occurs with the creation of a multilingual version of your website so have it in mind if you are going to build your website in more than 1 language!
Also Read WordPress Admin Password – How to Change It from Database
Missing Tons Of Featured Images
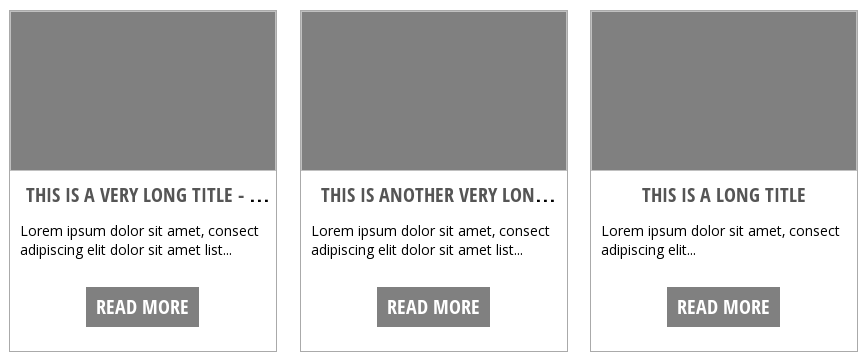
Another very common problem that happens in the CMS after theme updates or changes is the disappearance of its featured images.
If you notice that your posts and pages have lost their featured images and they are no longer being shown on your website then you have to fix this error.
Don’t worry – the fix for this problem is again very easy and takes less than 2 minutes.
– All you have to do is install a plugin that is going to recover your broken images. There are many plugins that you can use for this job and the most common of them are:
Regenerate Thumbnails and Easy Add Thumbnail.
Just download and install them, run them, and let the plugins do their job. It costs less than a few minutes and it will fix all of your broken images.
Fix WordPress Broken Tabs, Toggles, and Other JS Functions
If you notice that tabs, toggles, sliders, or other interactive features are broken after changing your WordPress theme, you’re not alone. These issues are often caused by plugin conflicts, outdated JavaScript files, or browser cache problems.
Troubleshooting Steps
- Clear your browser cache — especially if you’re using Chrome or similar browsers, as cached files can block new scripts from loading.
- Update all plugins and your theme — updates frequently resolve compatibility issues with JavaScript and styles.
- Check your theme settings — ensure all required JavaScript files are being loaded properly.
- Disable plugins one by one — identify if a specific plugin is causing a conflict.
- Open your browser’s JavaScript console — look for error messages that could reveal the source of the issue.
By following these steps, you can resolve most functionality problems and ensure your WordPress site works correctly after a theme change.
Fix WordPress Missing Old Features
 [email protected]. We love sharing knowledge!
Build Your Site in a Few Minutes! Get Elementor on Special Price Only Now!
Also Read How to Create a Blog on WordPress (Guide for New Bloggers)