On This Page: [hide]
With more than 300,000 active installations and over 2 million downloads, the LiteSpeed Cache plugin is one of the best WordPress caching plugins available, and it is free for use.
The cache contains recent temporary internet files like images, data, and documents that are being stored locally on the computer of the site visitors, and thus the next time they come across your pages, your website will load much faster.
Website caching is crucial for its load speed and WordPress’s developers have created many different plugins that come very handy for browser caching and speed optimization. LiteSpeed Cache is one of them.
LiteSpeed Cache Options

LiteSpeed Cache plugin offers a large variety of options that you can use to optimize your website such as:
Purge
DB Optimization
CDN, General
Cache and many other optimization options.
Purge
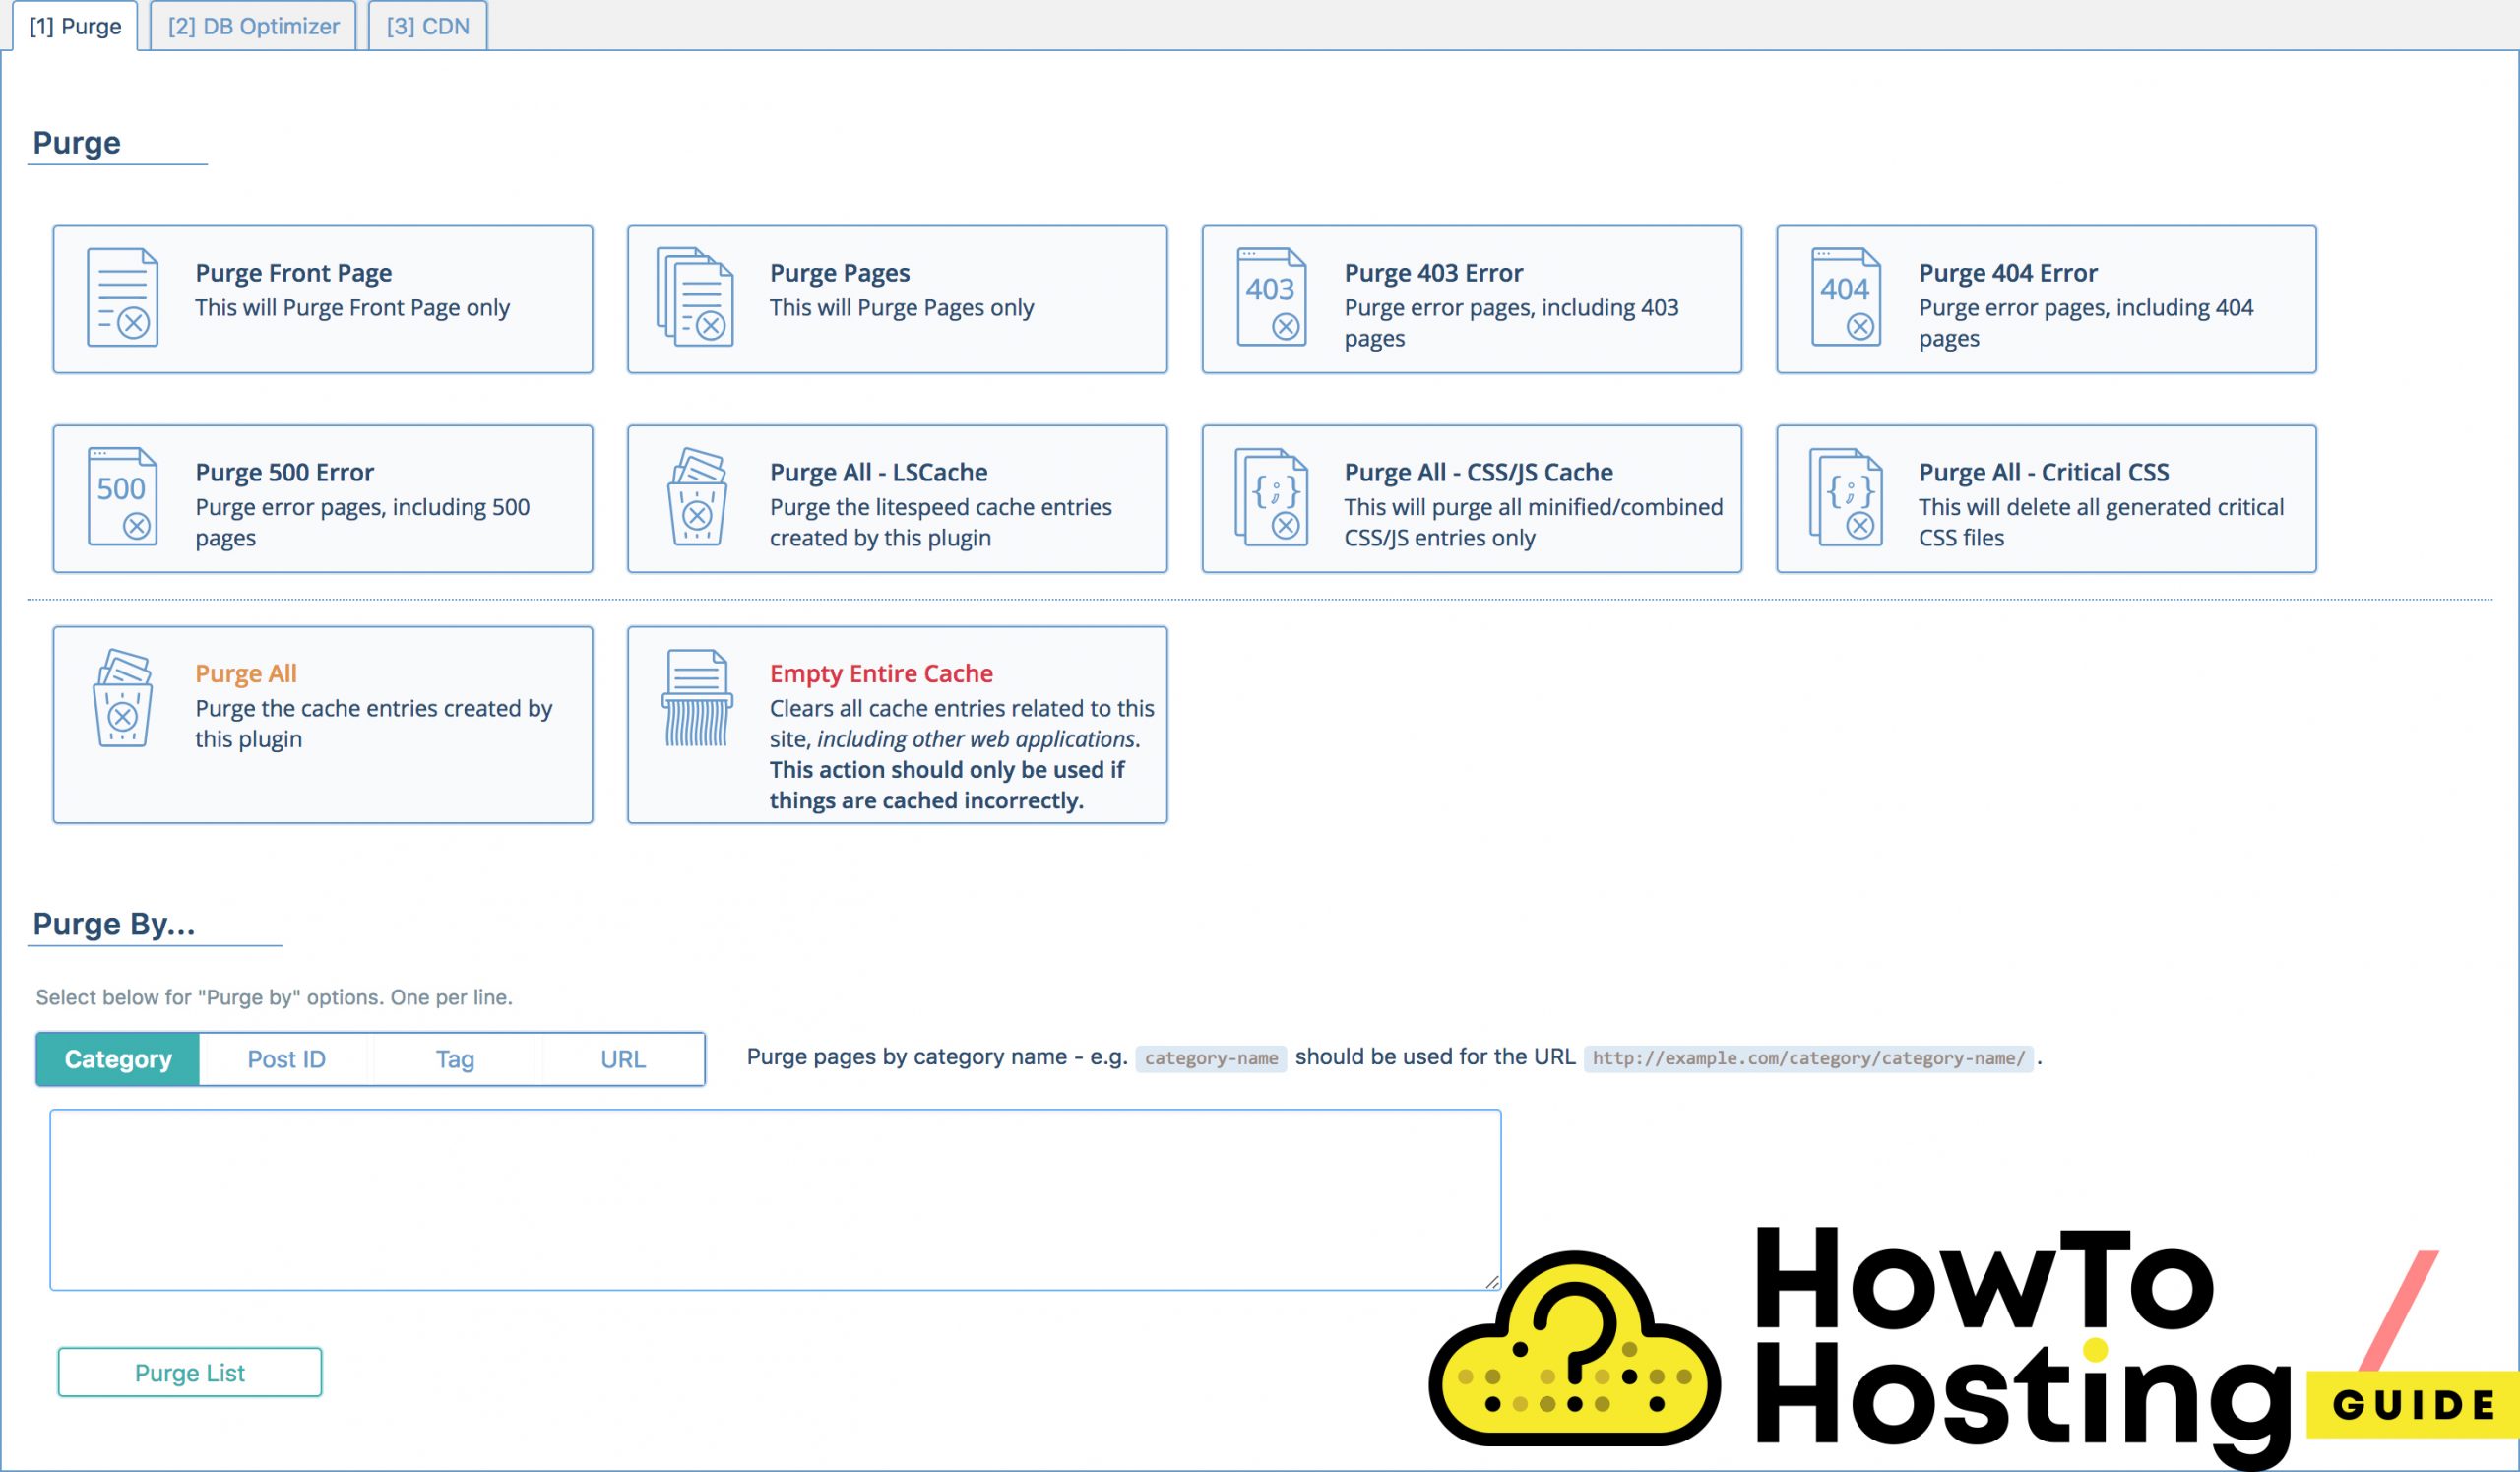
You can use “purge” options to force purging process over a page, post, some 403, 404, 500 errors or use the Purge All option. What the purge does is that it forces the selected post, for example, to show its most recent version instead of any of the cached previous versions.
Purge is available and can be used on all of the pages, on the author archive, on the post-type, and it also offers options to be excluded from separate URLs in case you want to do that.
DB Optimizer

Db Optimizer stands for Database optimizer and it is the tool that you can use to remove unnecessary data from your website. It provides a bunch of options such as:
Clean All
Post Revisions
Trash Posts
Spam Comments
and others, but we suggest using the first “Clean All” option if you are not really familiar with databases.
CDN
From the CDN section you can control your Cloudflare CDN (in case you have one) and adjust it in the best way, set:
Enable CDN to ON, CDN URL to http://cdn.yourdomain.com, and Original URL to //yourdomain.com. From this section, you can control your CDN Mapping and select the files that you want to be included – such as images, CSS files, and javascript files.
Best Settings
In the settings section of LiteSpeed Cache plugin, you have more access to all of the settings that you need to configure your cache in every way possible. To see all of the sections, click on the “Advanced View” button and it will expand to more options.
General LiteSpeed Cache Settings
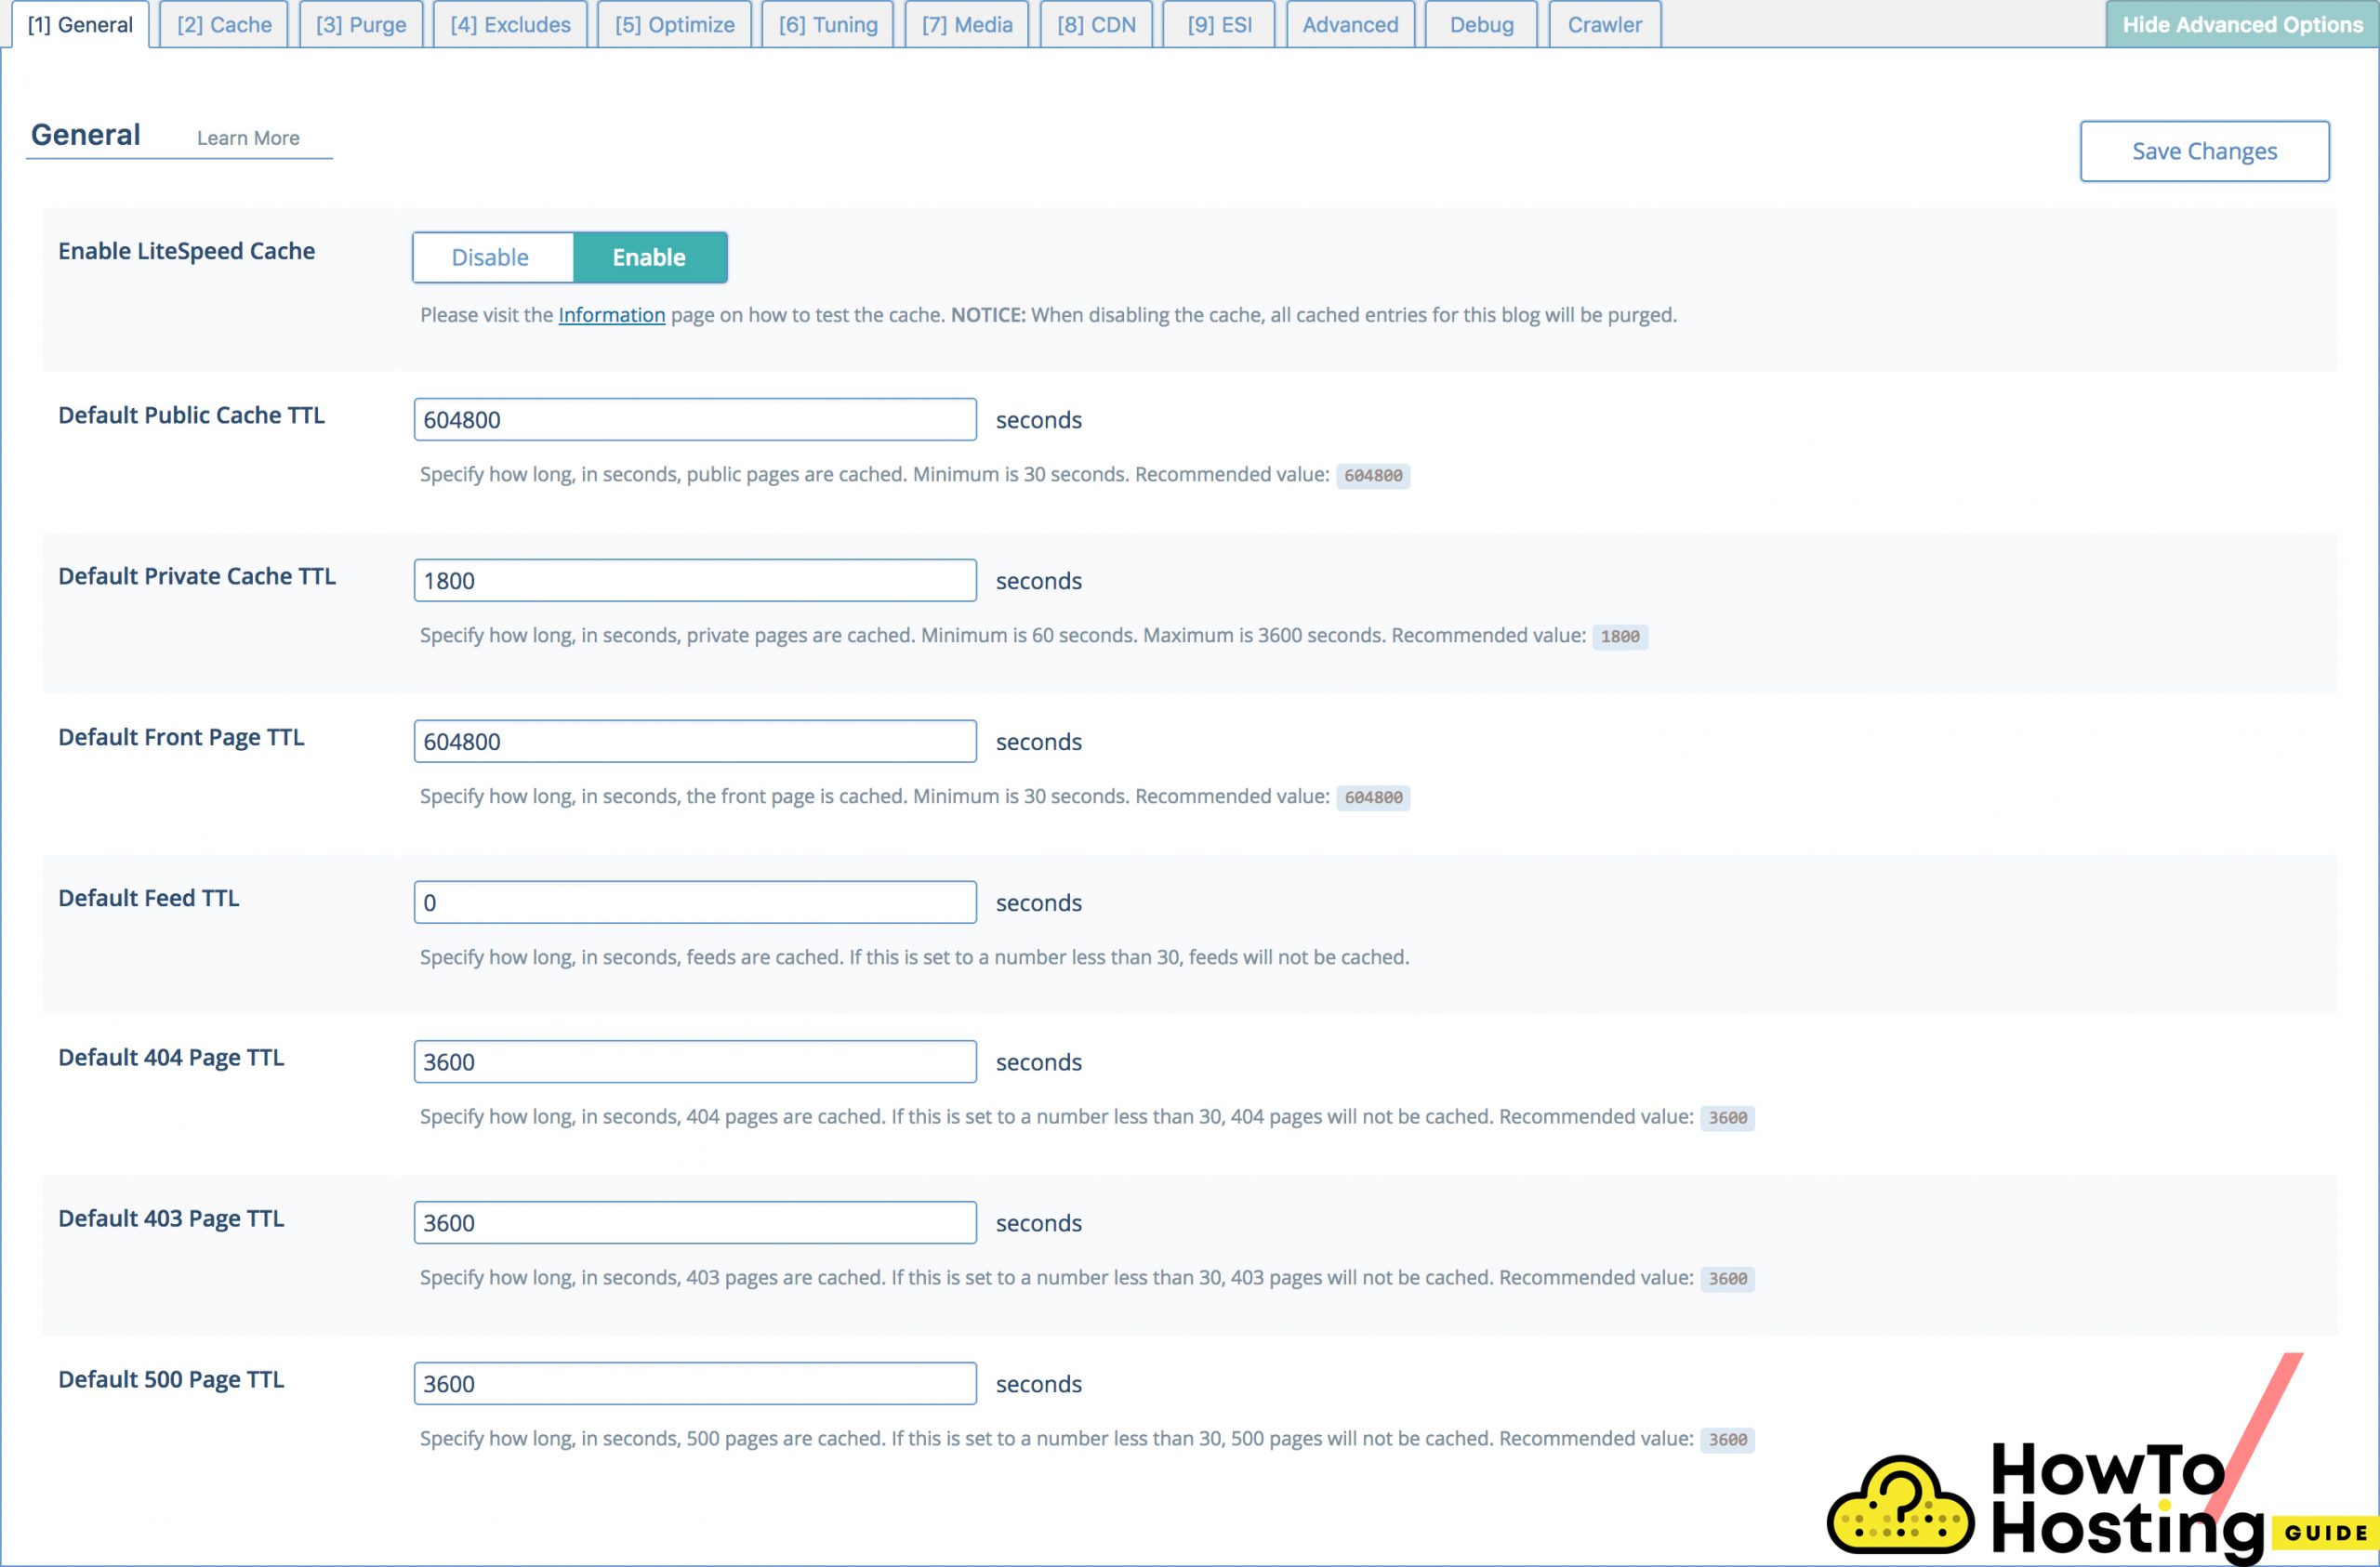
From the General tab, you can choose if you want to disable or enable the plugin, and also specify how long your public pages are cached (in the Default Public Cache TTL). We suggest that you use the recommended values for all of the fields, in case you are not absolutely sure what you do, and you do it on purpose.
Cache
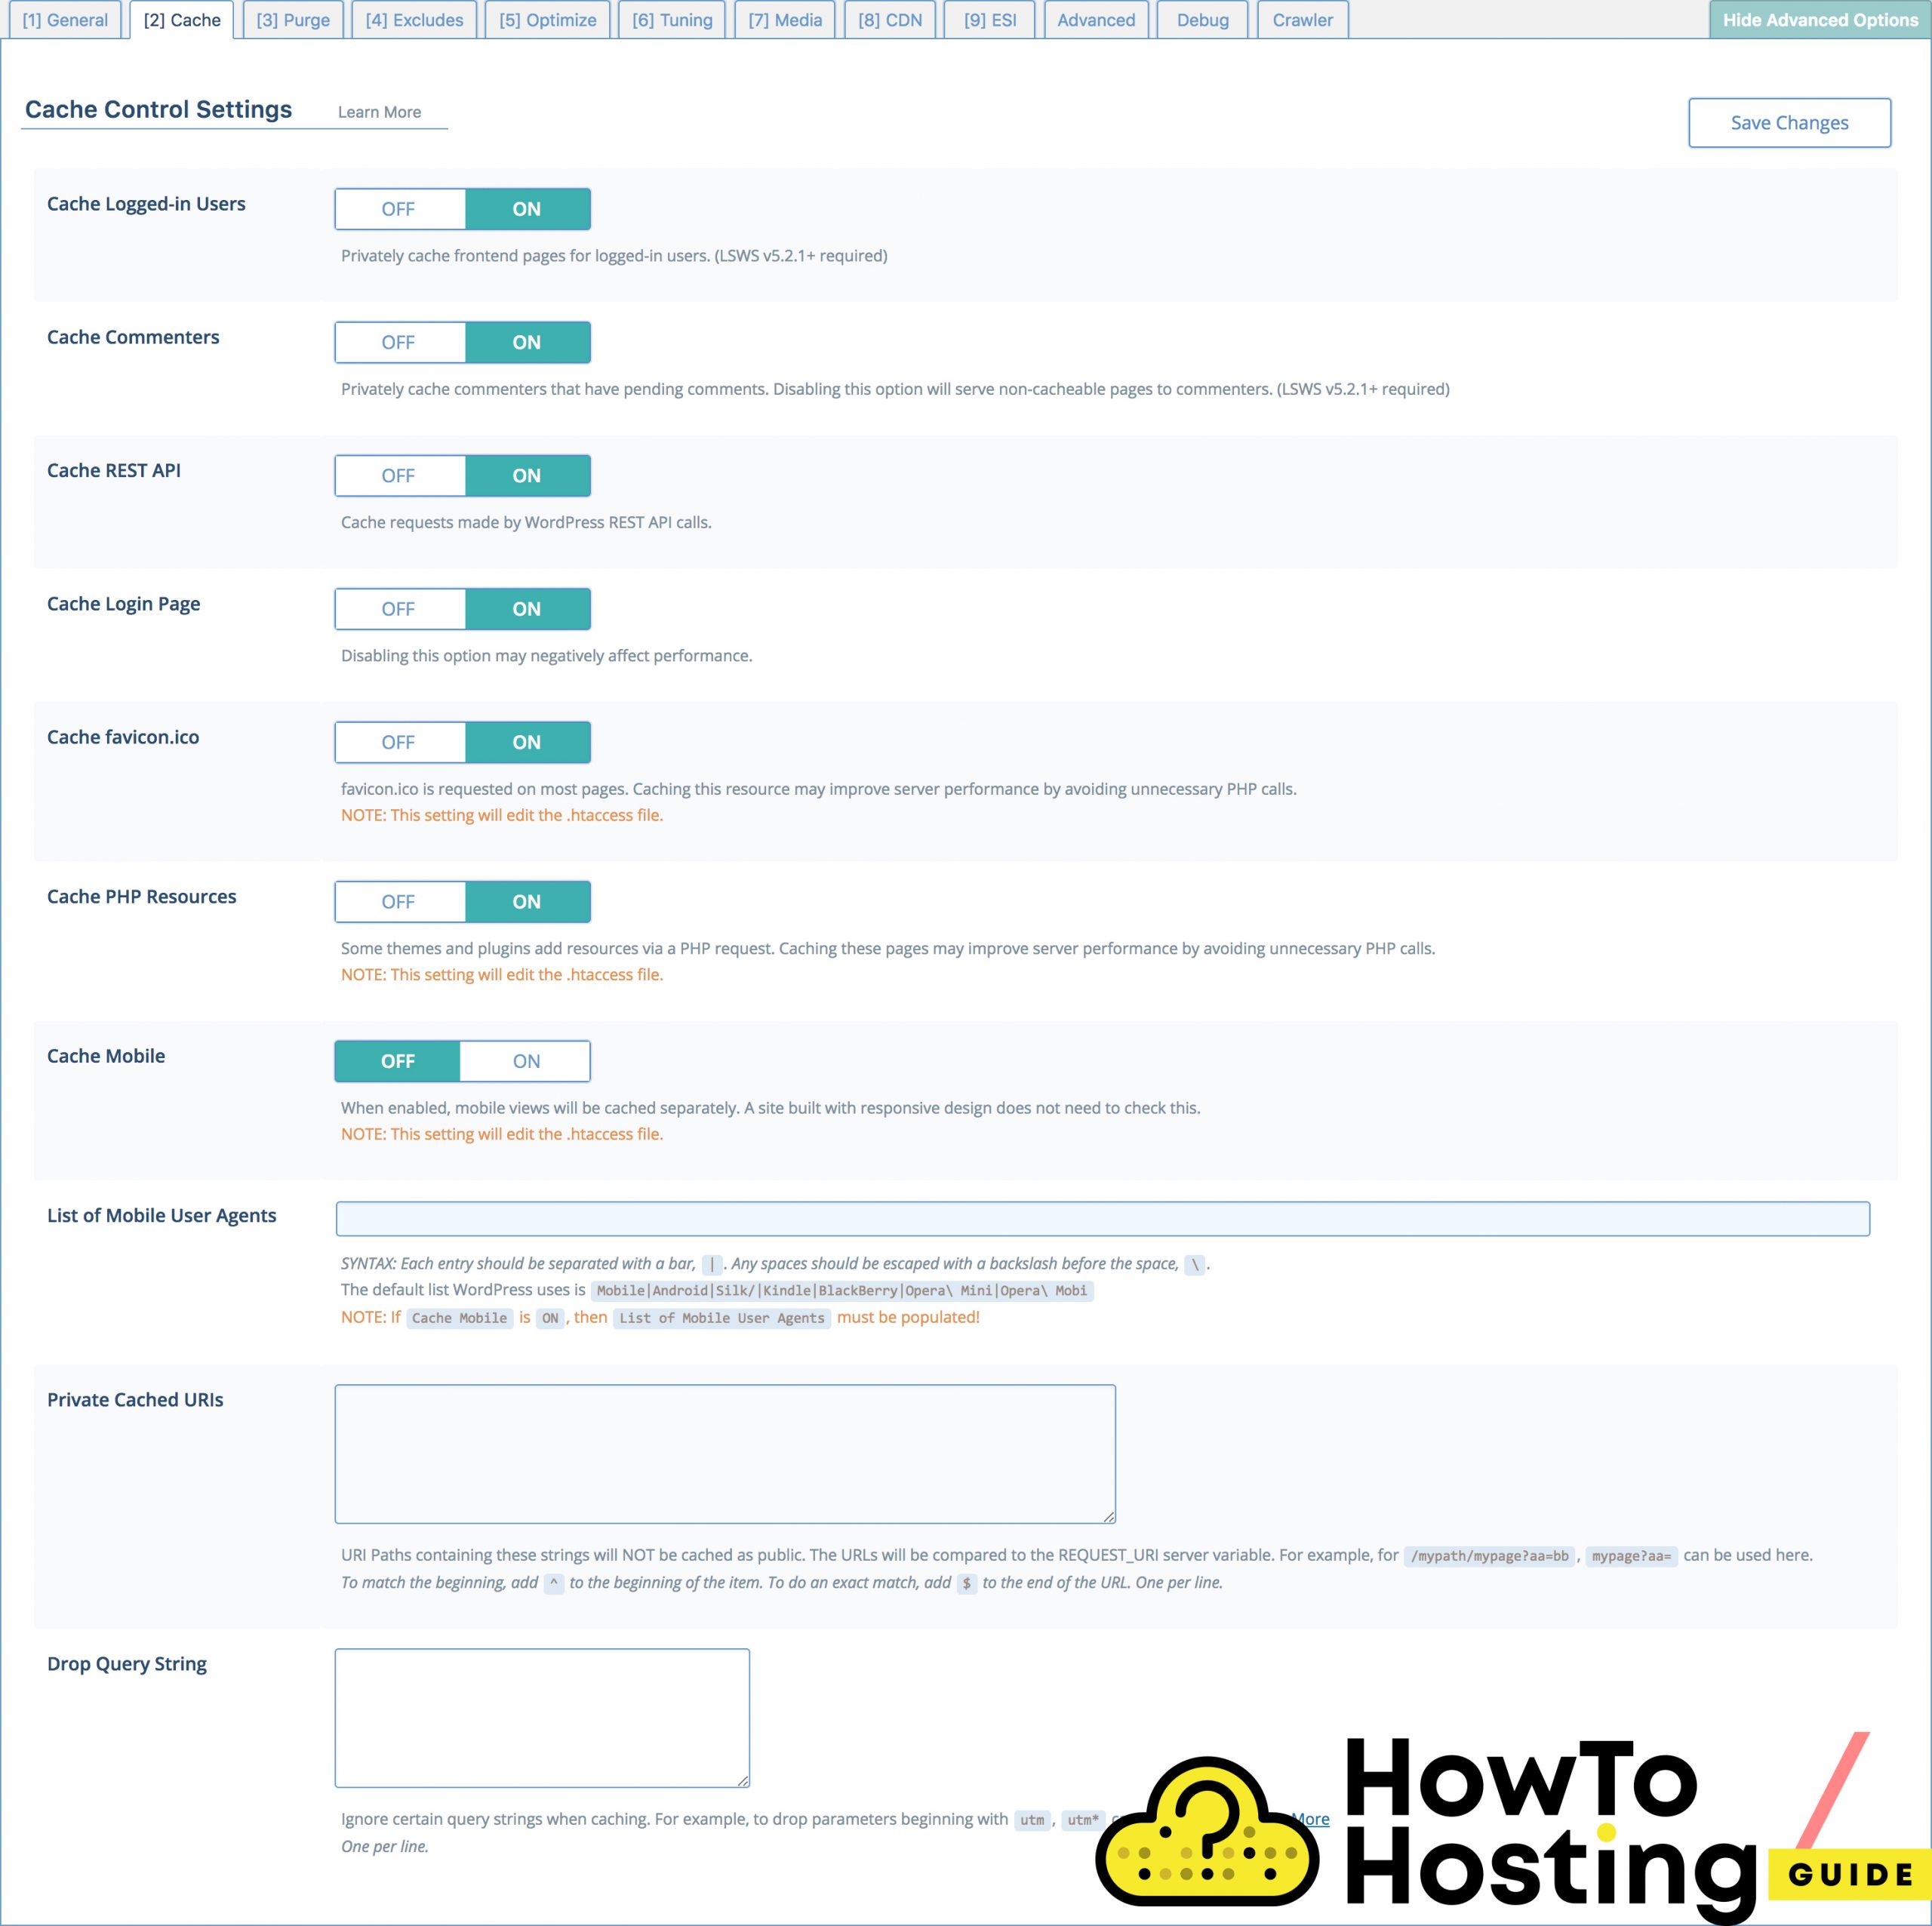
The cache section allows you to enable or disable cache for several instances such as:
Optimize
On the optimize tab, you will see plenty of options that allow you to implement many different optimization alternatives such as:
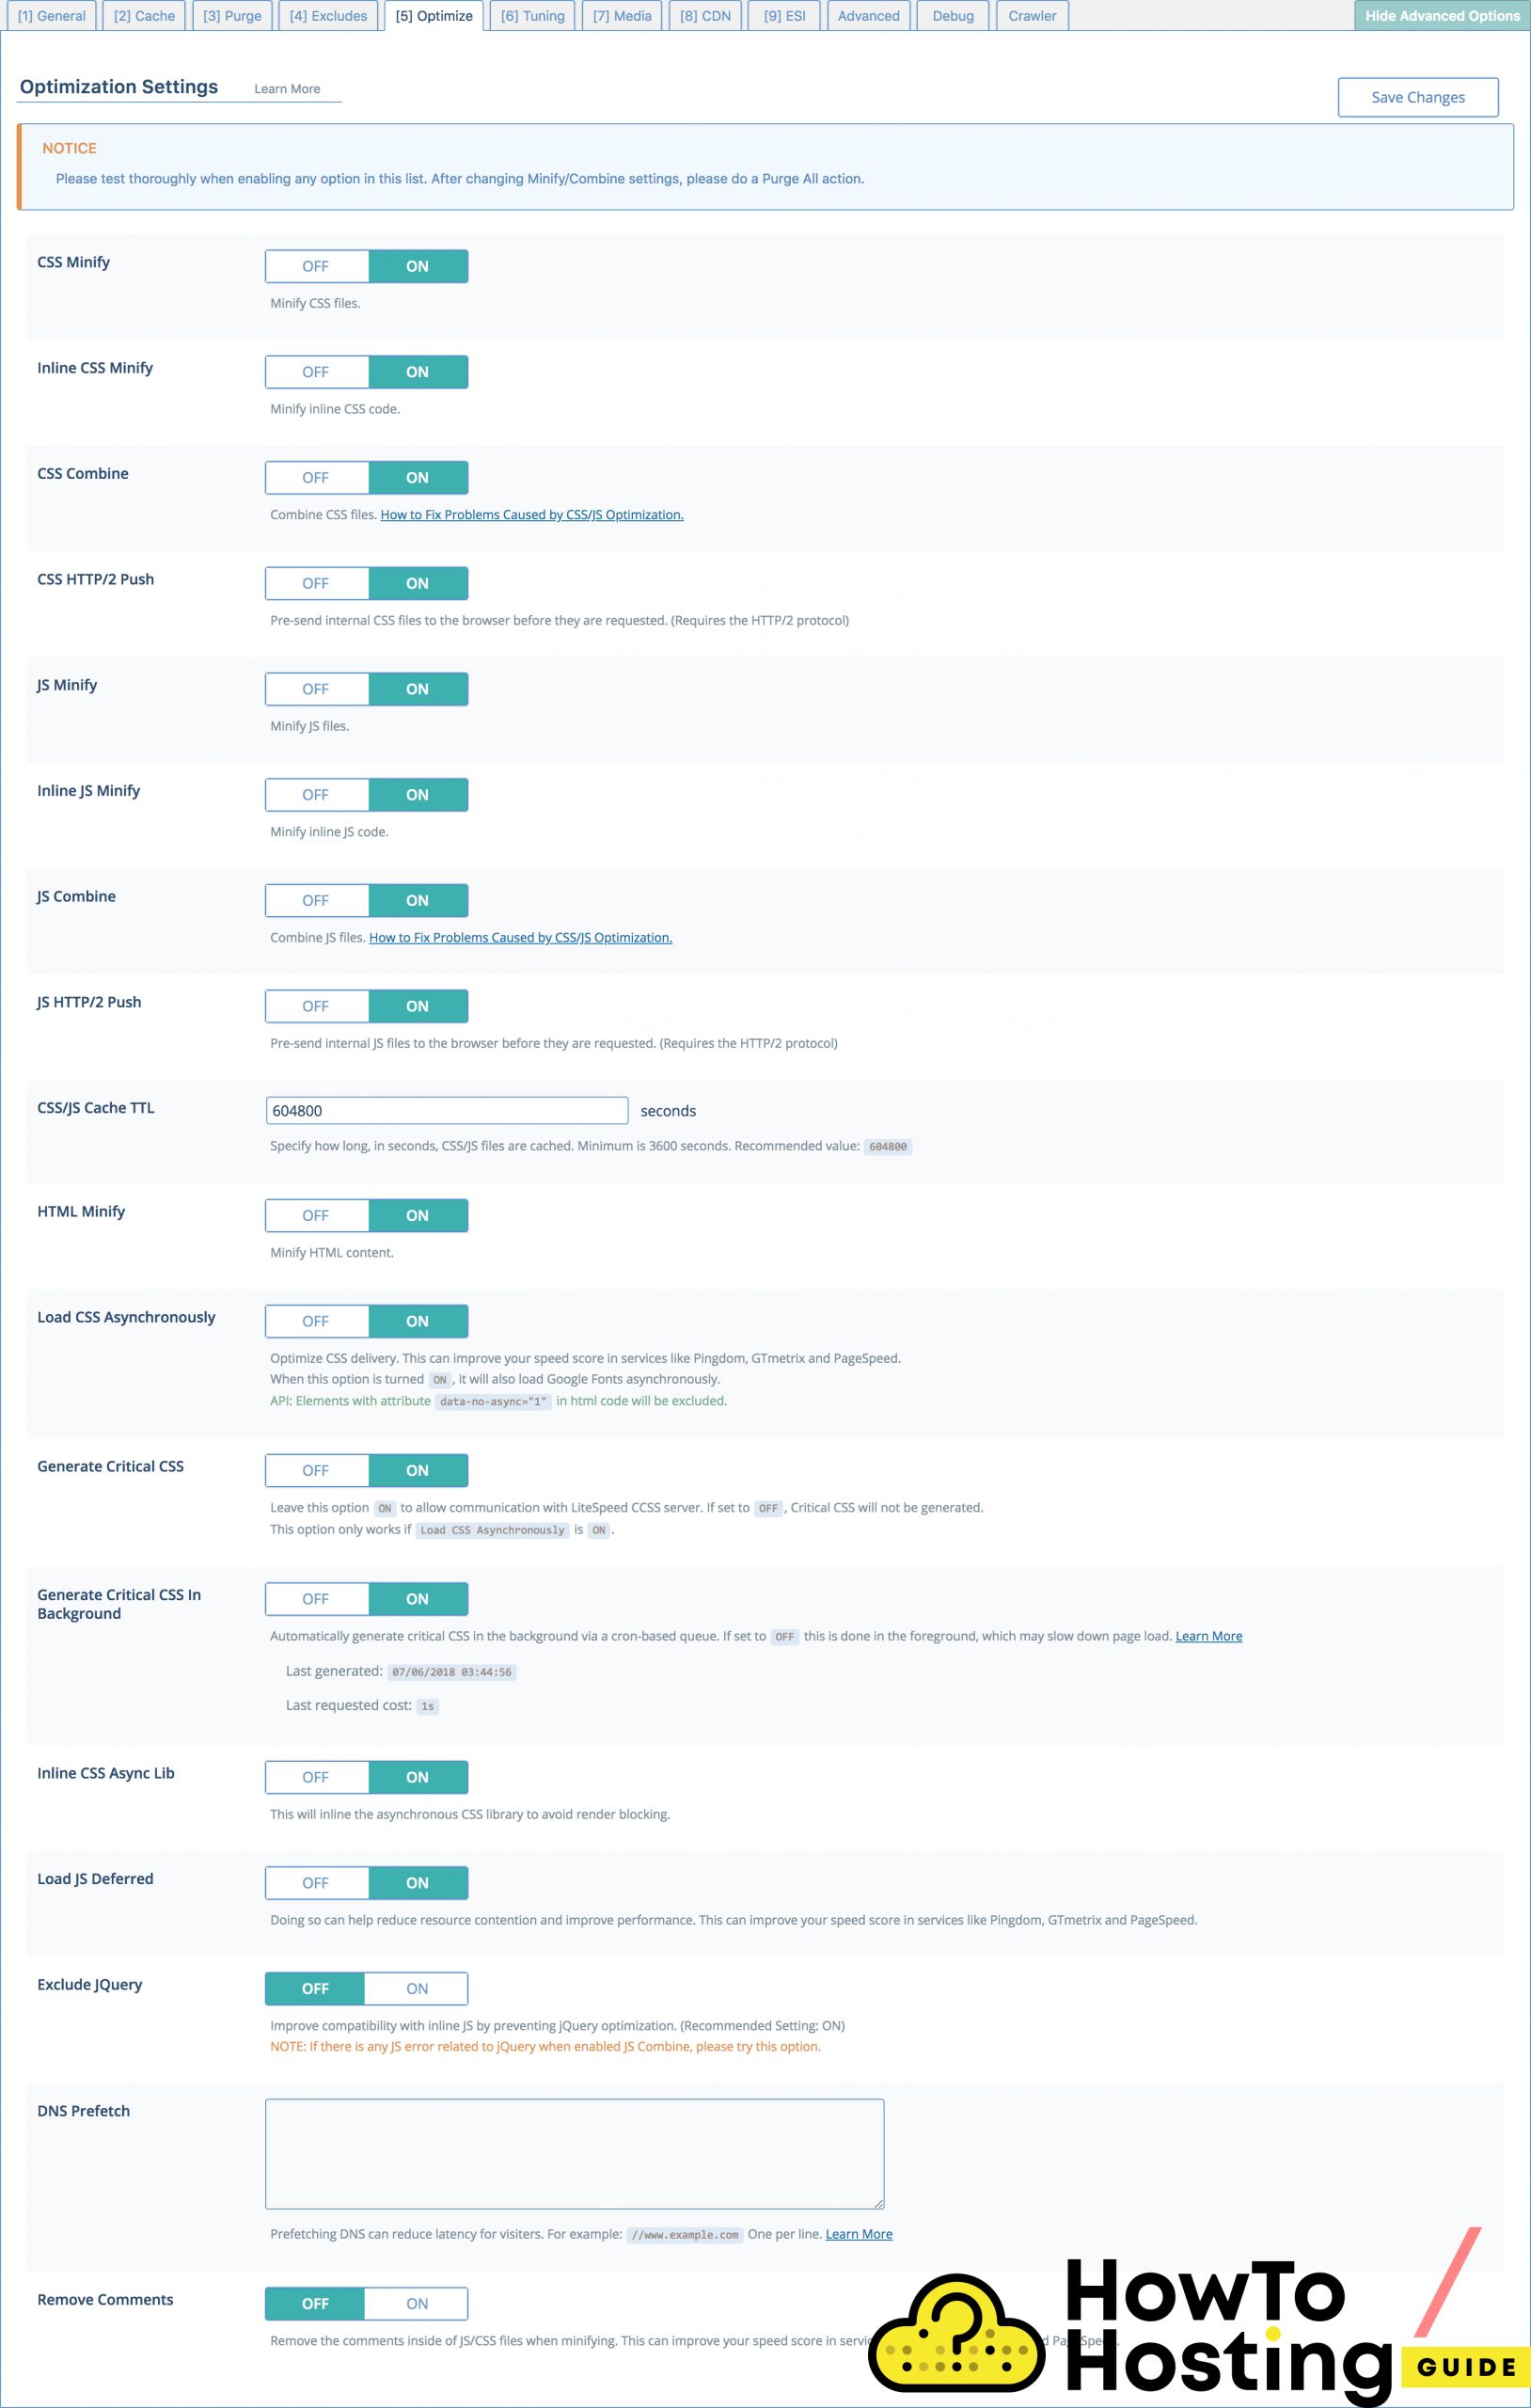
The rest of the options that we are going to review are more ‘advanced‘ and you should proceed to them with caution. There is quite a decent possibility that you can break your website if you don’t really do the things in the right way, so proceed if you are sure about what you are doing.
Tunning
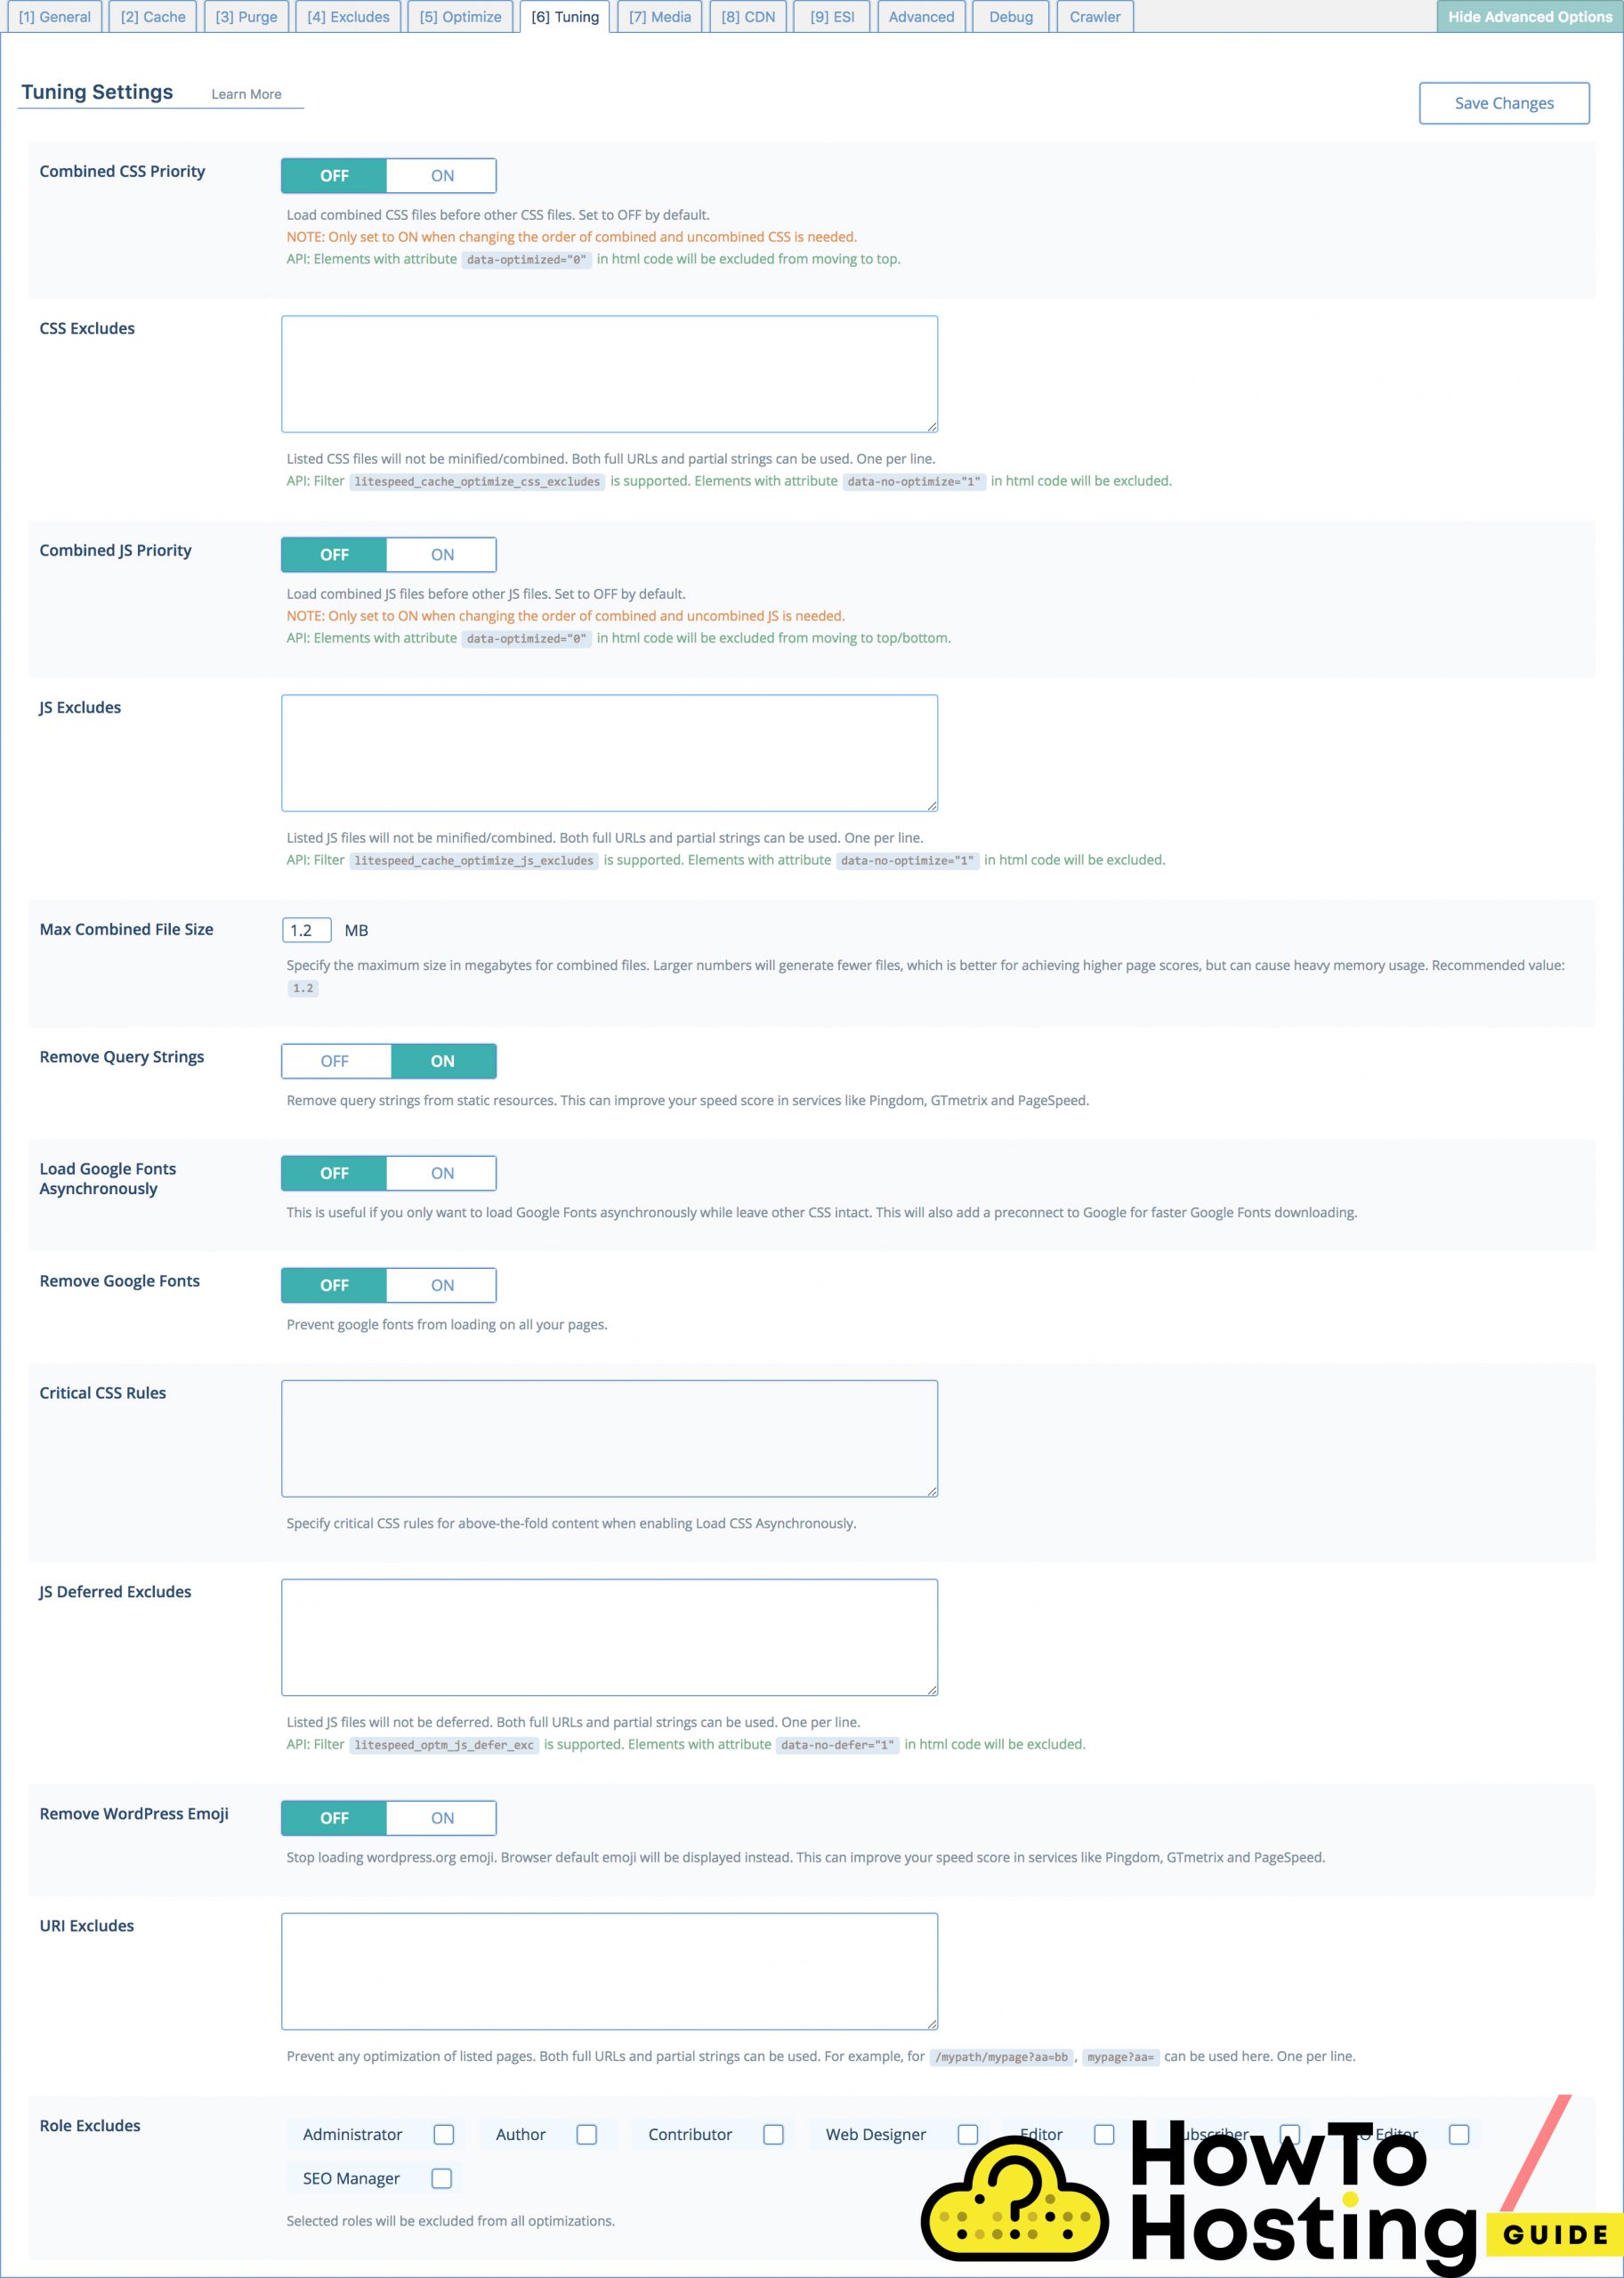
The purpose of the tunning section is quite similar to the Optimize, but besides the option that allows you to combine your javascript and CSS files, you can also specify the size limit of the combined files.
Another great thing that you can do is to Remove Query Strings, also use asynchronous loading for fonts.
Media
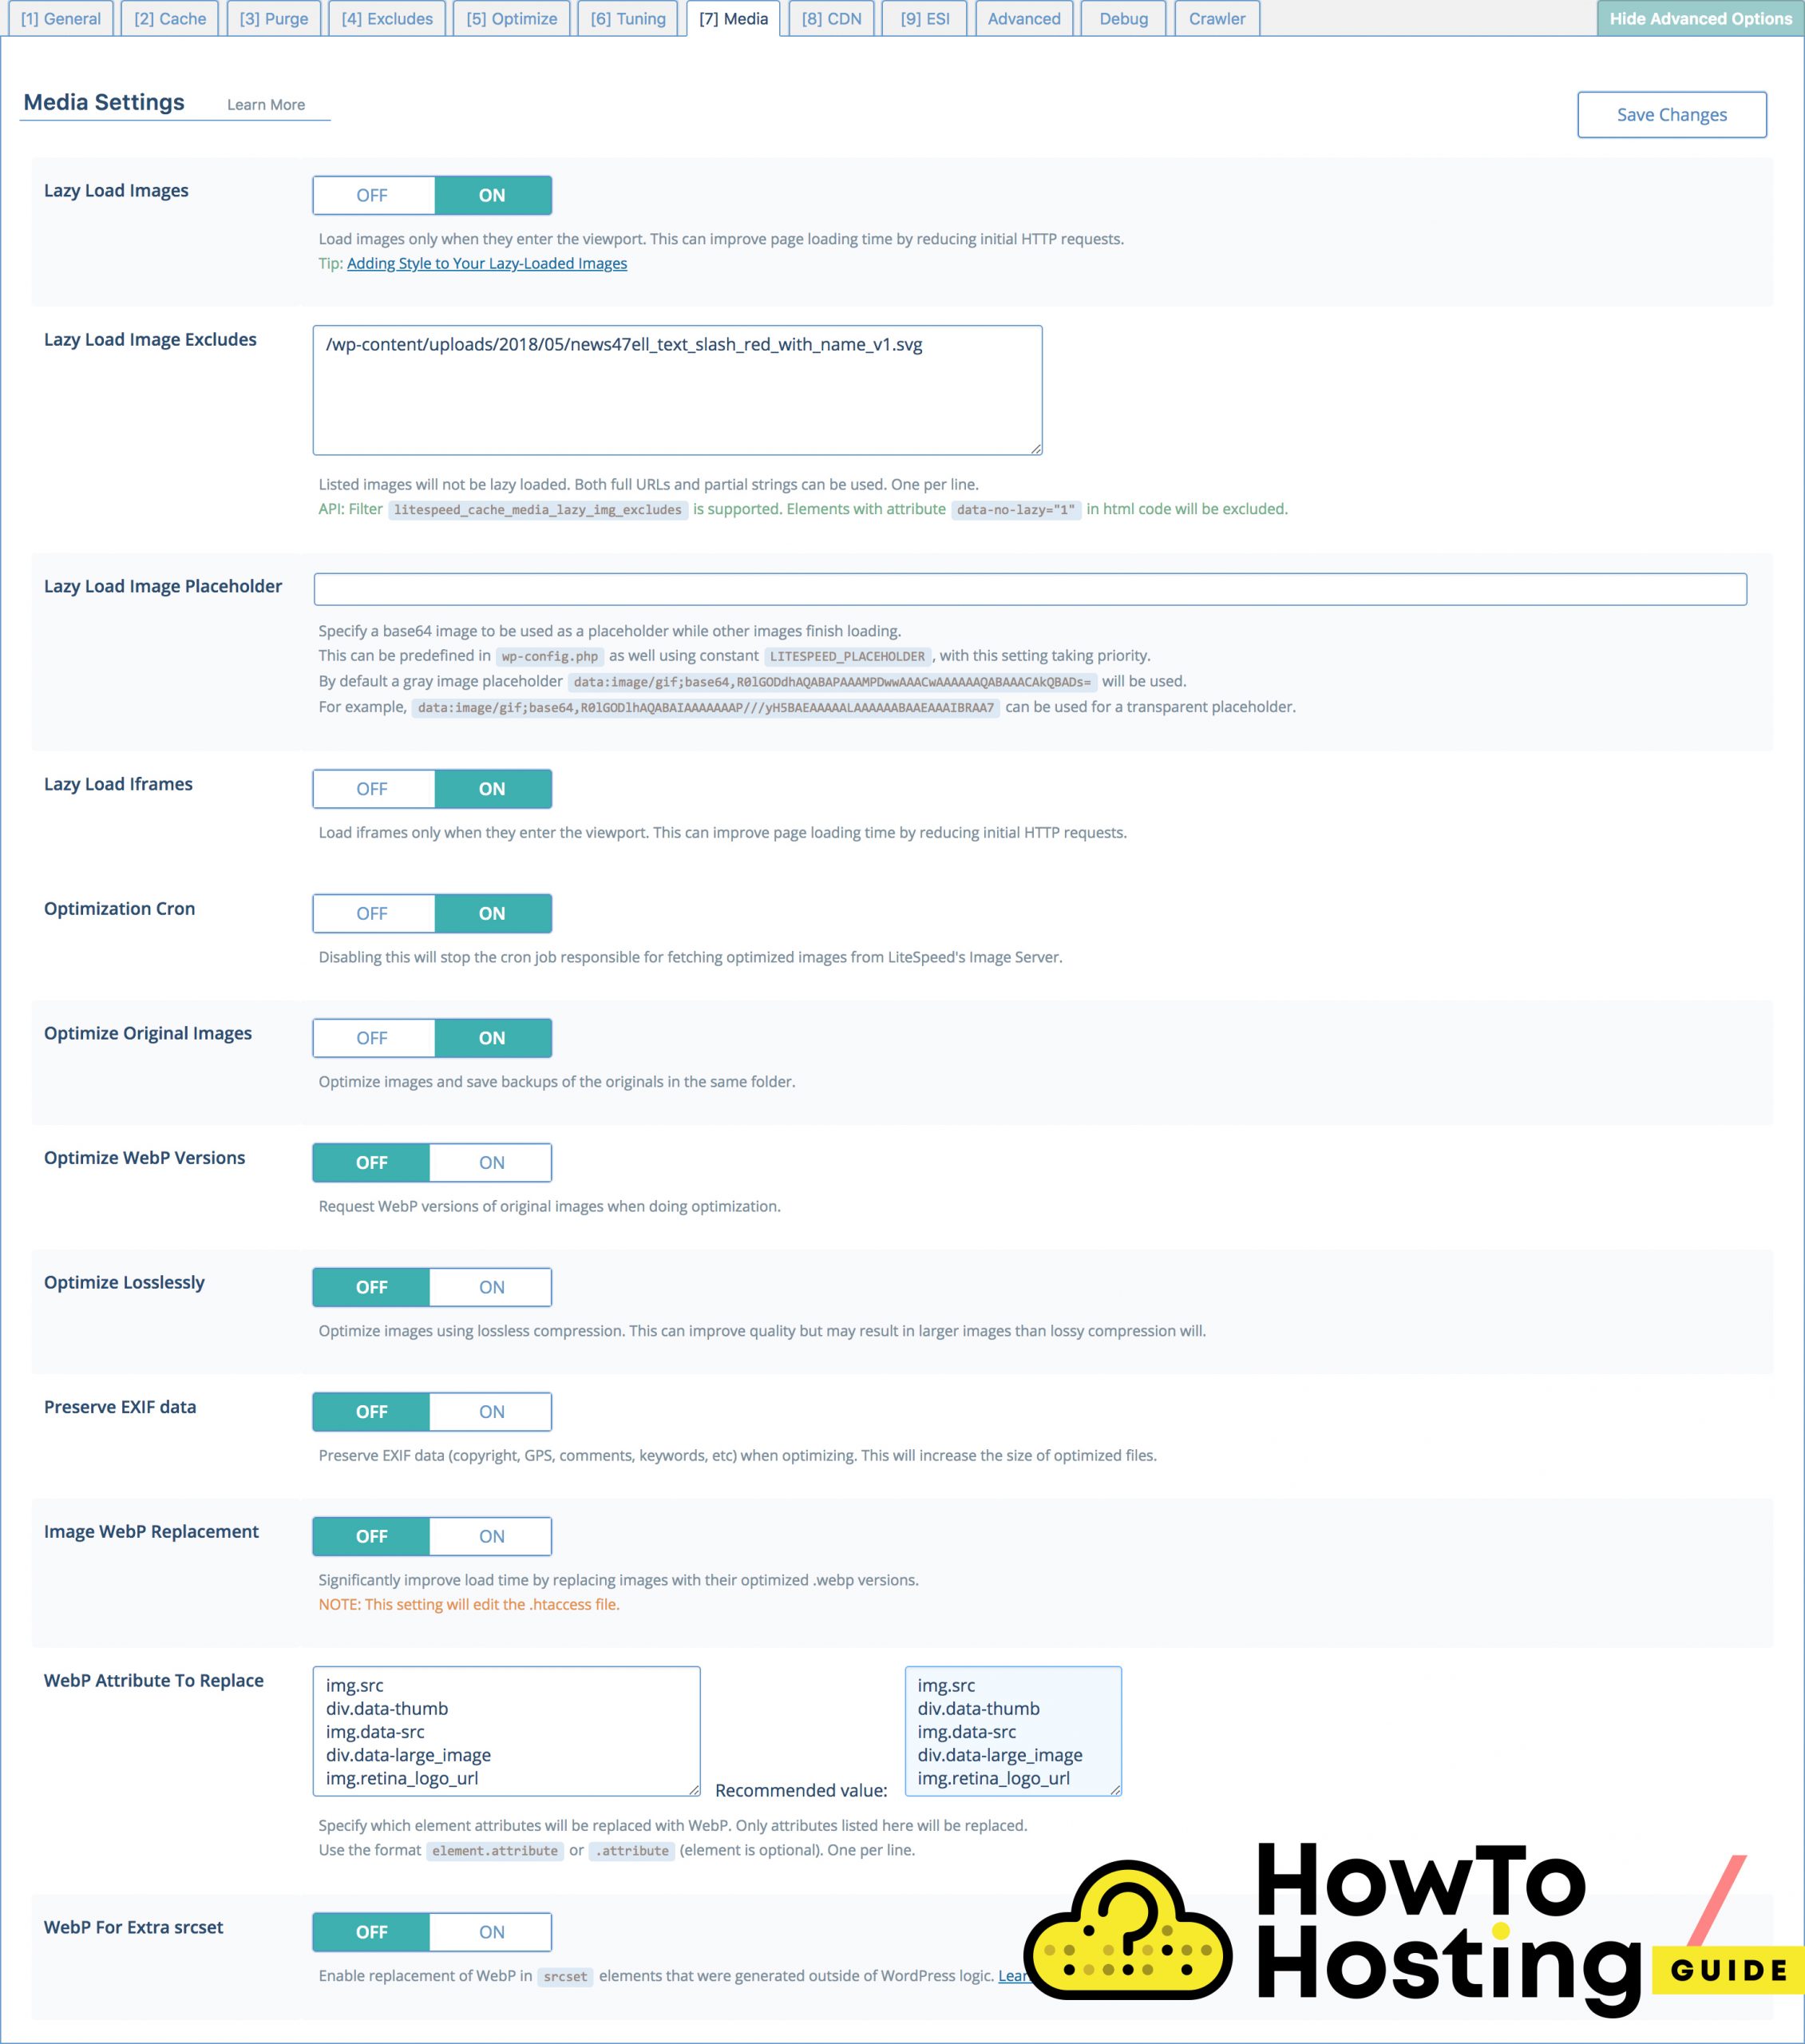
The Media tab is where you can enable lazy load for your images and iframes and also exclude images that you don’t want to be lazy-loaded, adding them to a filtered list.
ESI
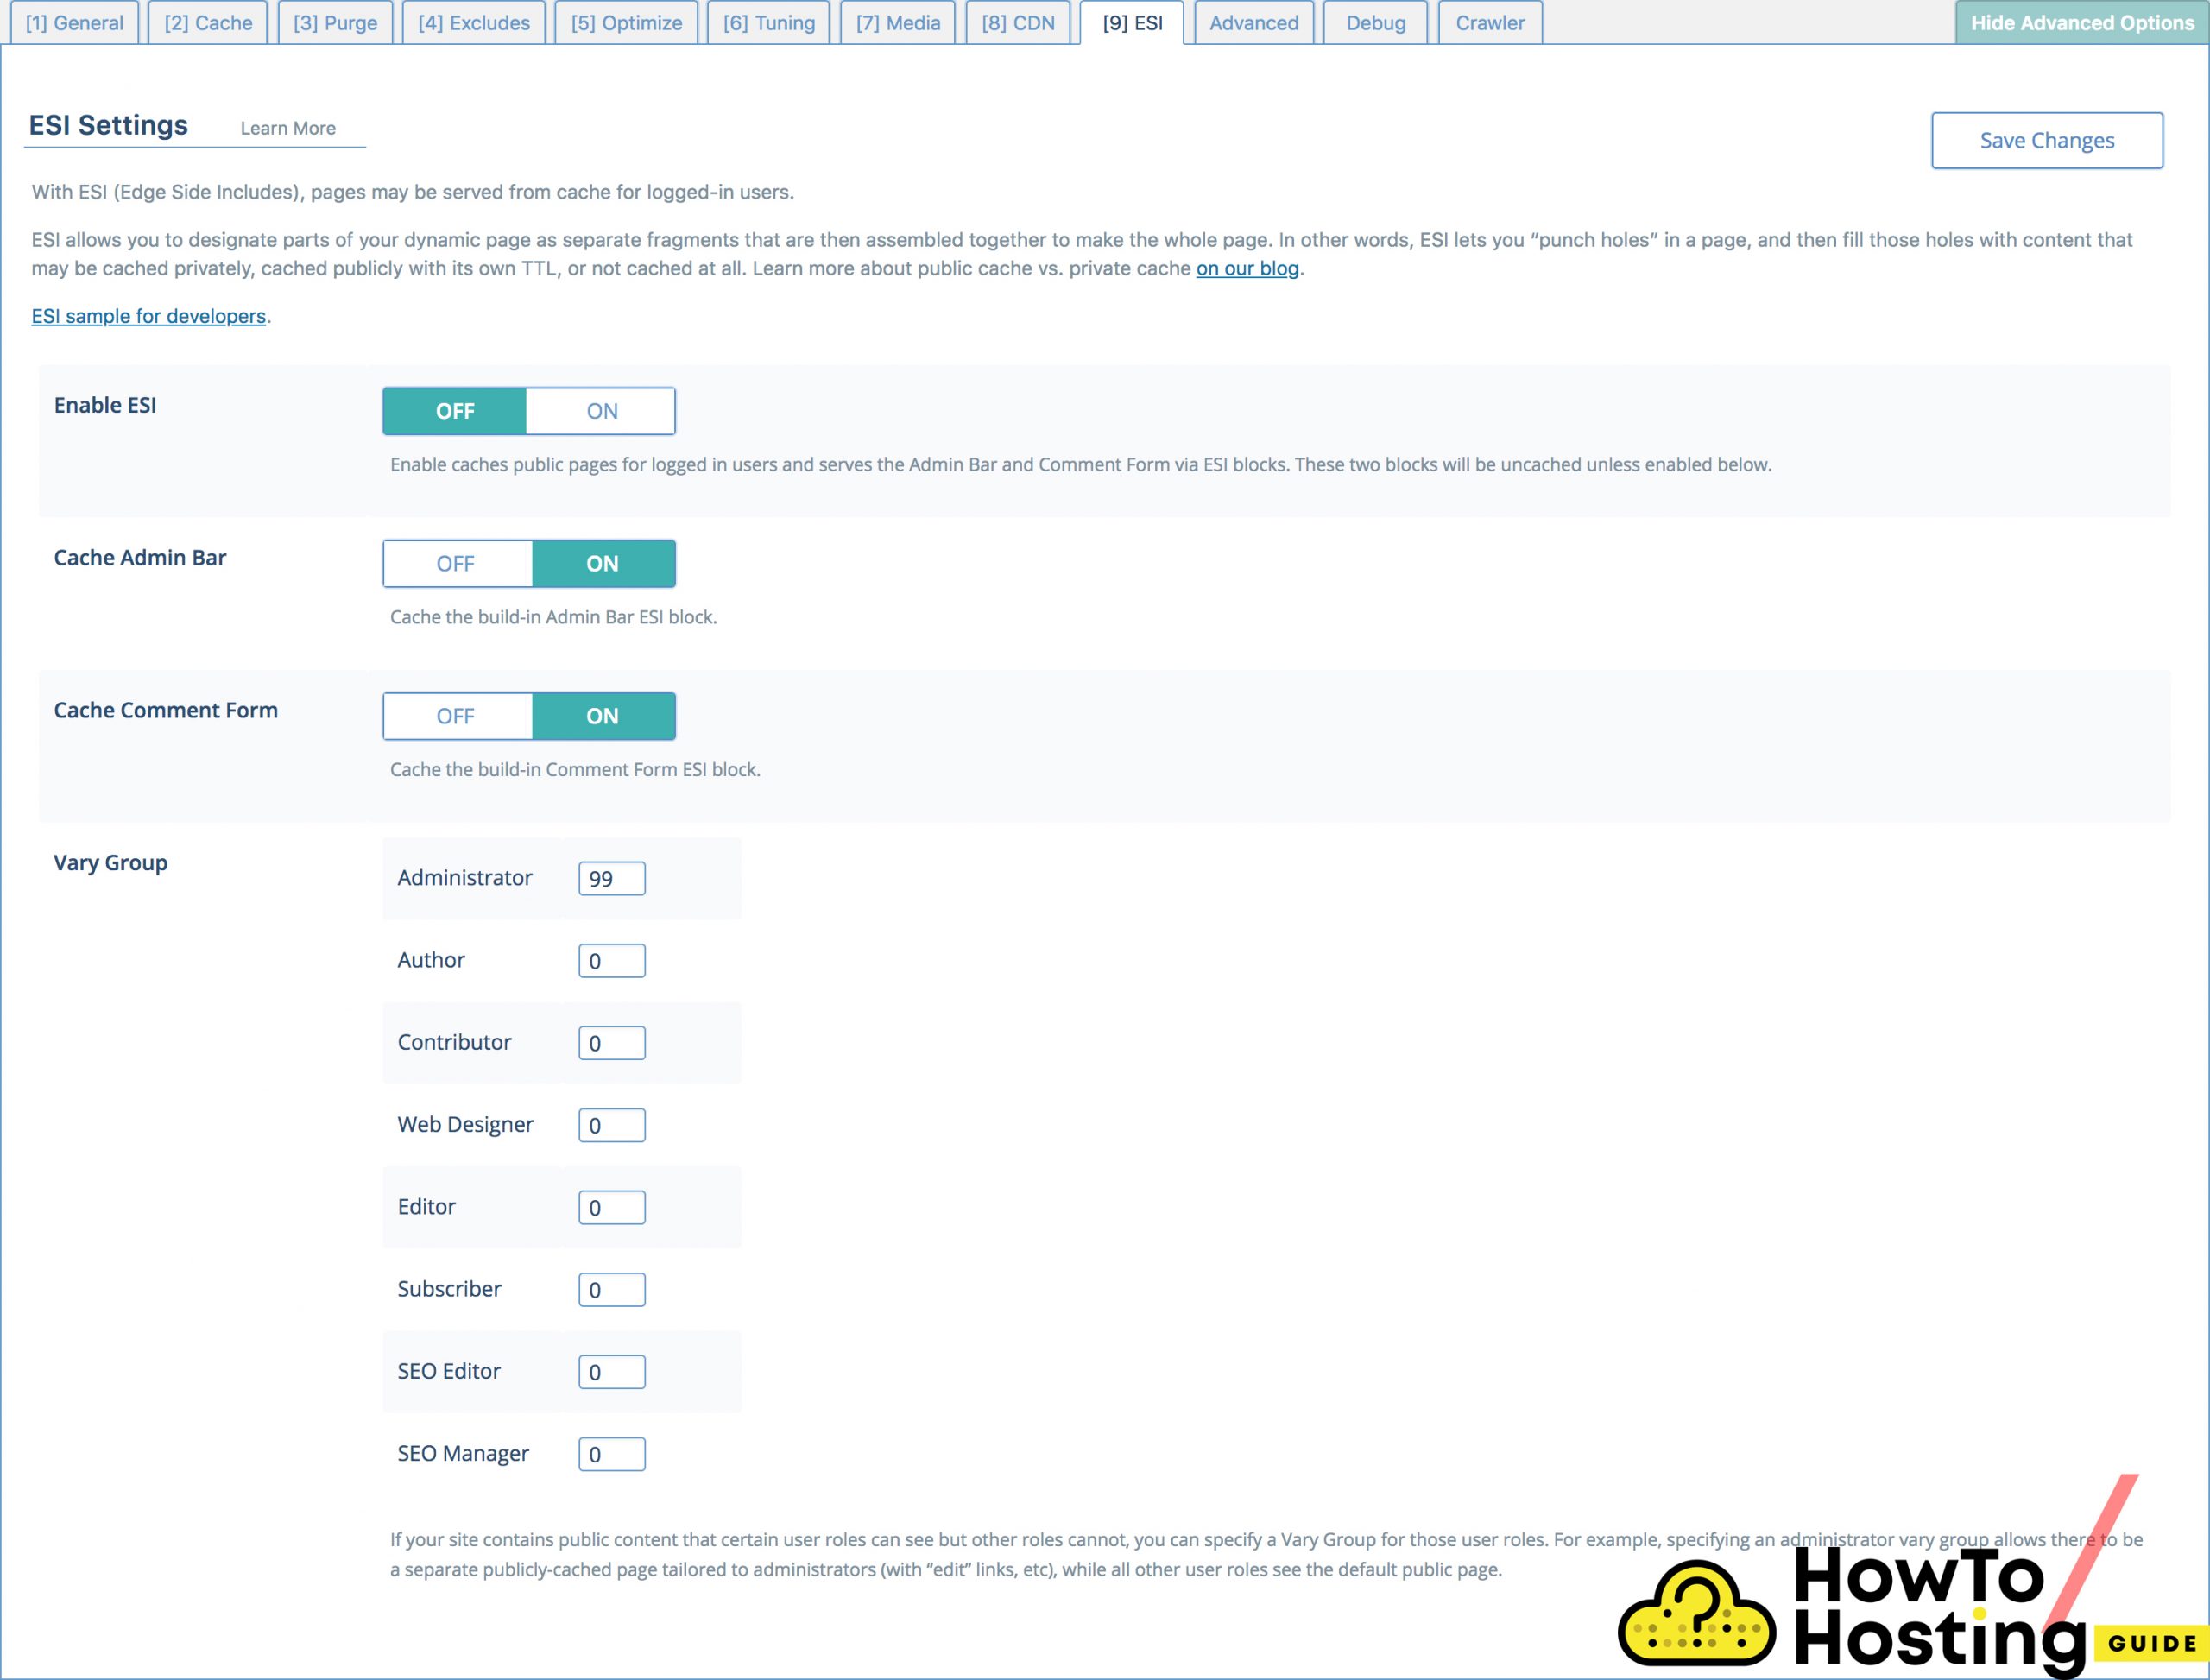
ESI is an advanced option that enables you to set gaps in the page and then fill them with content that might be cached privately, publicly, or not cached at all. This can be useful in some rare situations, and its a good thing that this feature is included in the plugin.
Advanced Tab
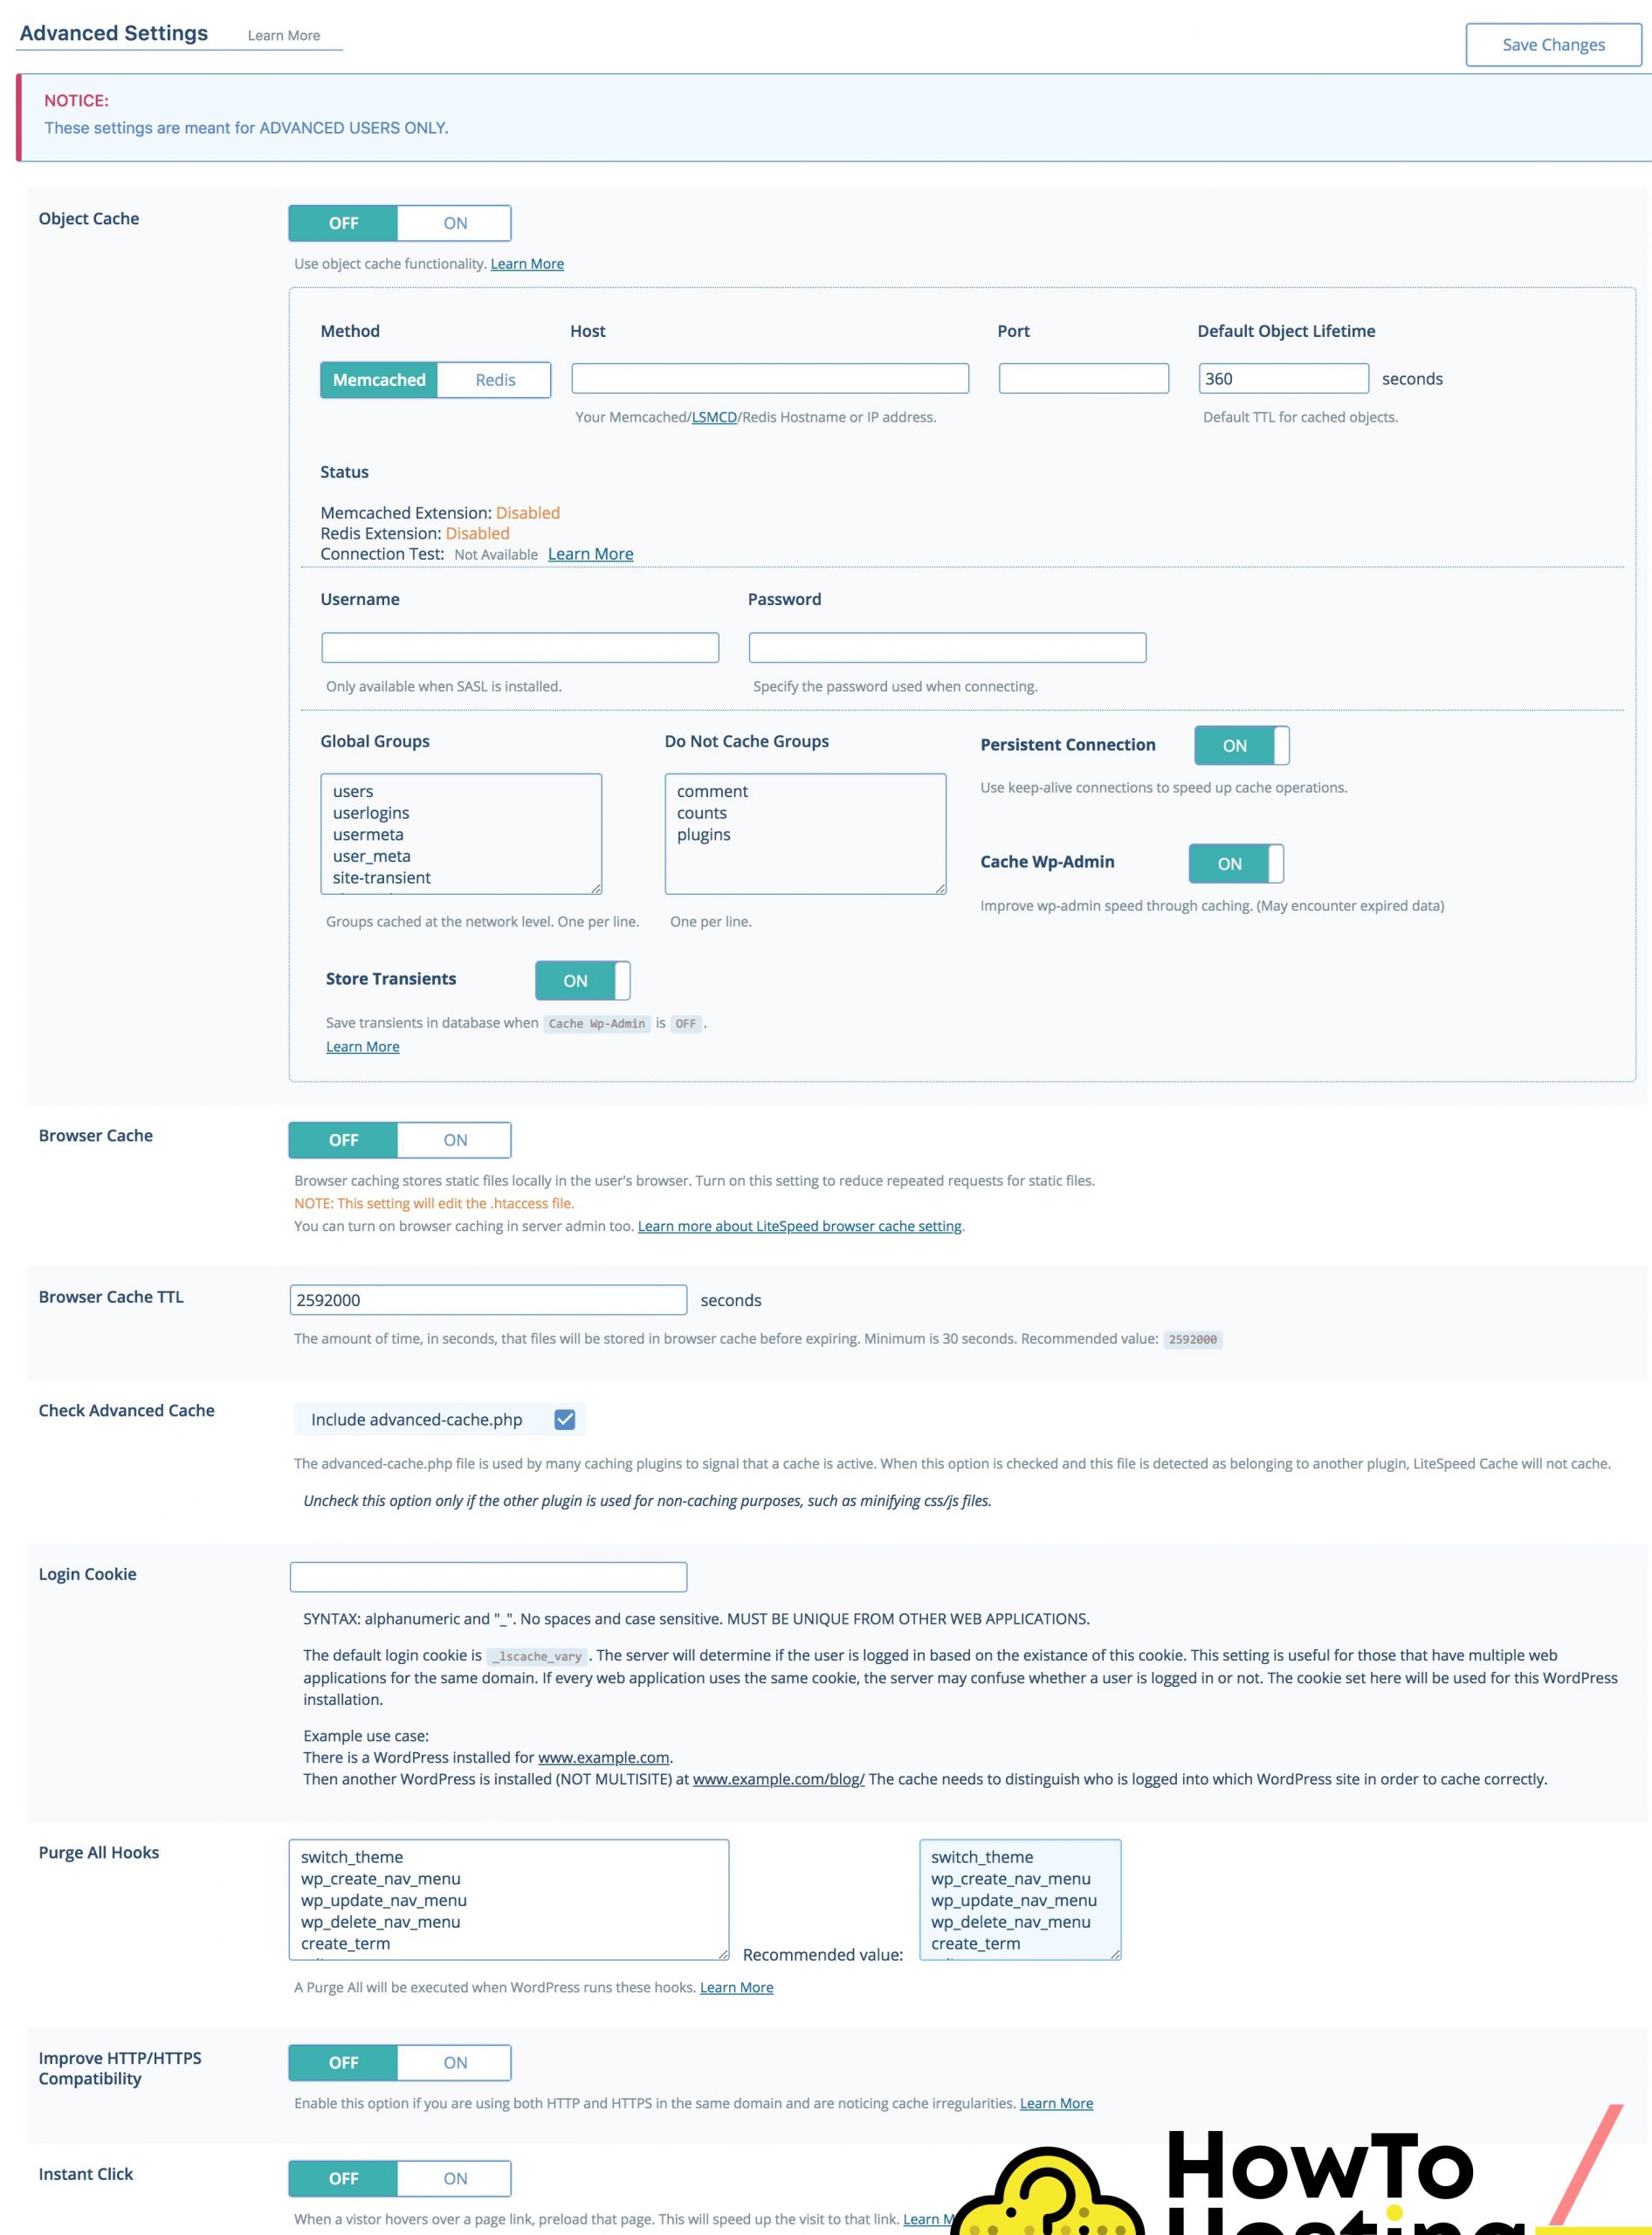
The advanced tab is where you can set your Object Cache, by using Redis or Memcached. What it does is actually storing frequently used queries for a certain period of time, and thus you save server resources for regenerating these modules or objects for every new site visitor.
Debug
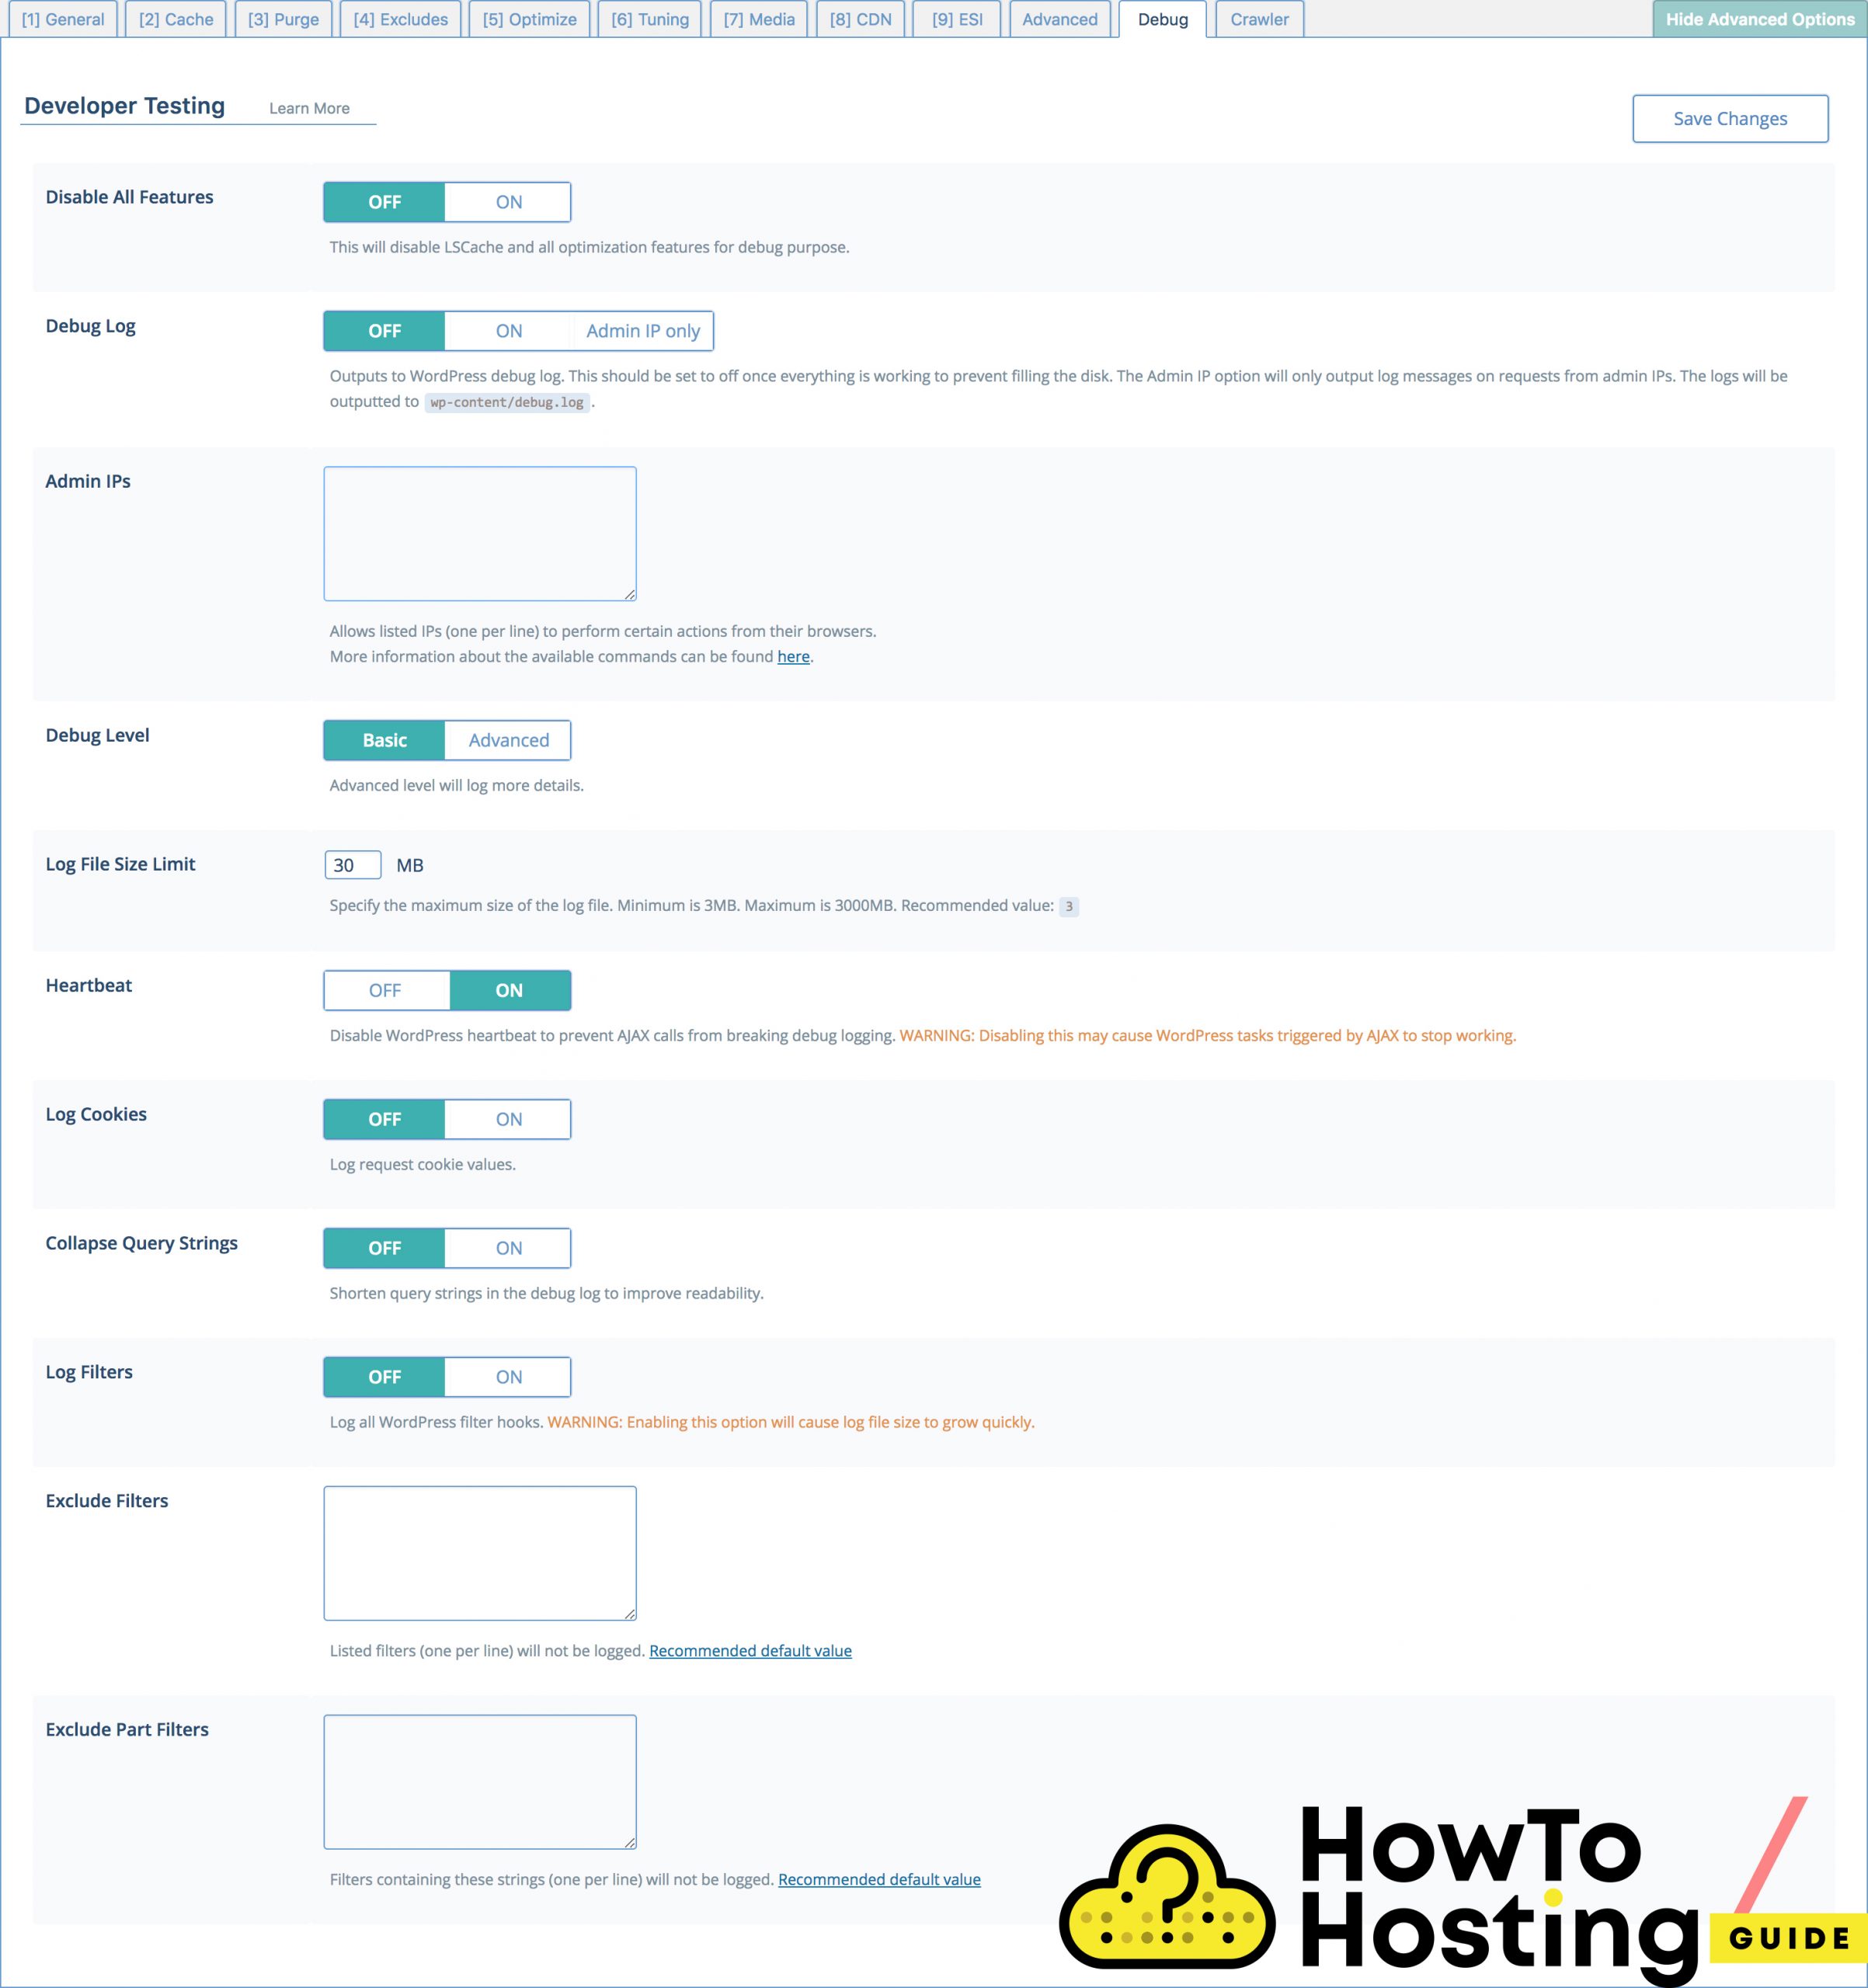
The debug section allows you to debug your website without caching. You can select an option to only sends log messages when a request is sent by a certain IP (for example admin’s IP), also set the level of the Debug and Log File Size limits.
Crawler
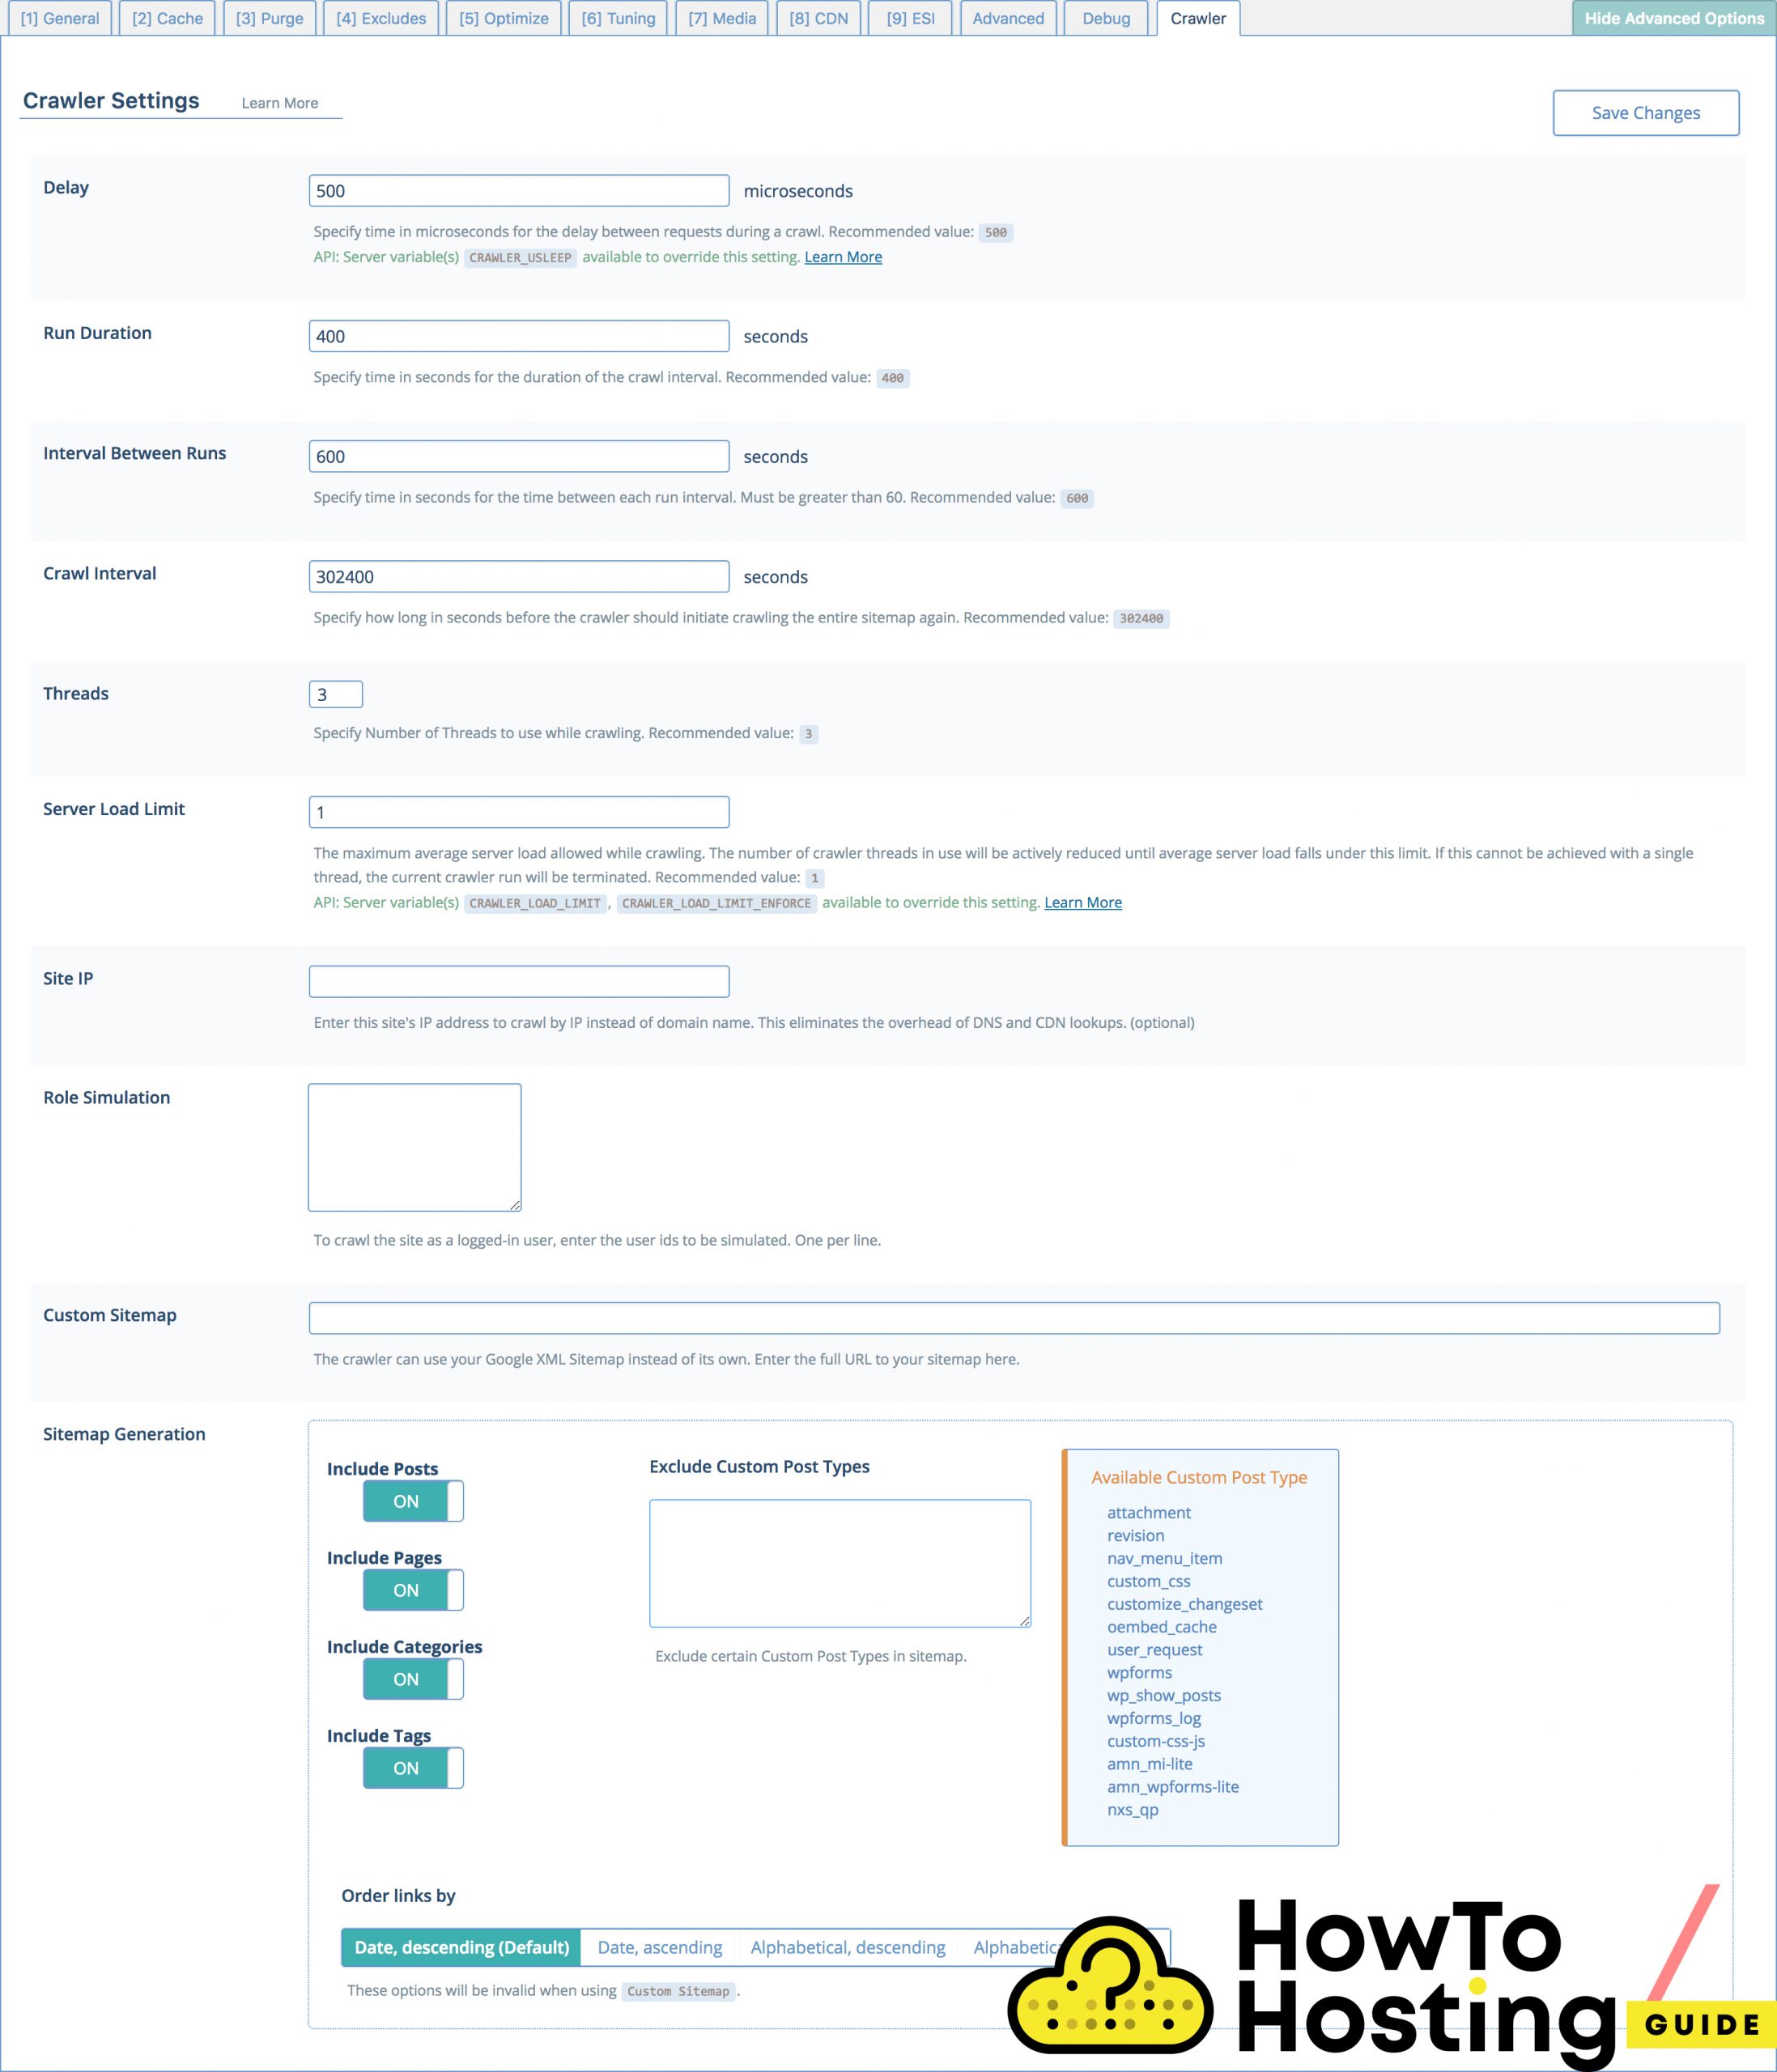
The plugin has its own crawlers that have a job to make sure that there is no page on your website with expired cache, and thus your website will always be updated and your visitors will not notice any slowdowns.
In this section, you can configure the crawler specifications such as time between requests, duration, intervals between runs, and many more. You can also set the crawler to crawl your website based on its IP, instead of the domain, to use the XML sitemap of Google instead of its own and many more.
WooCommerce
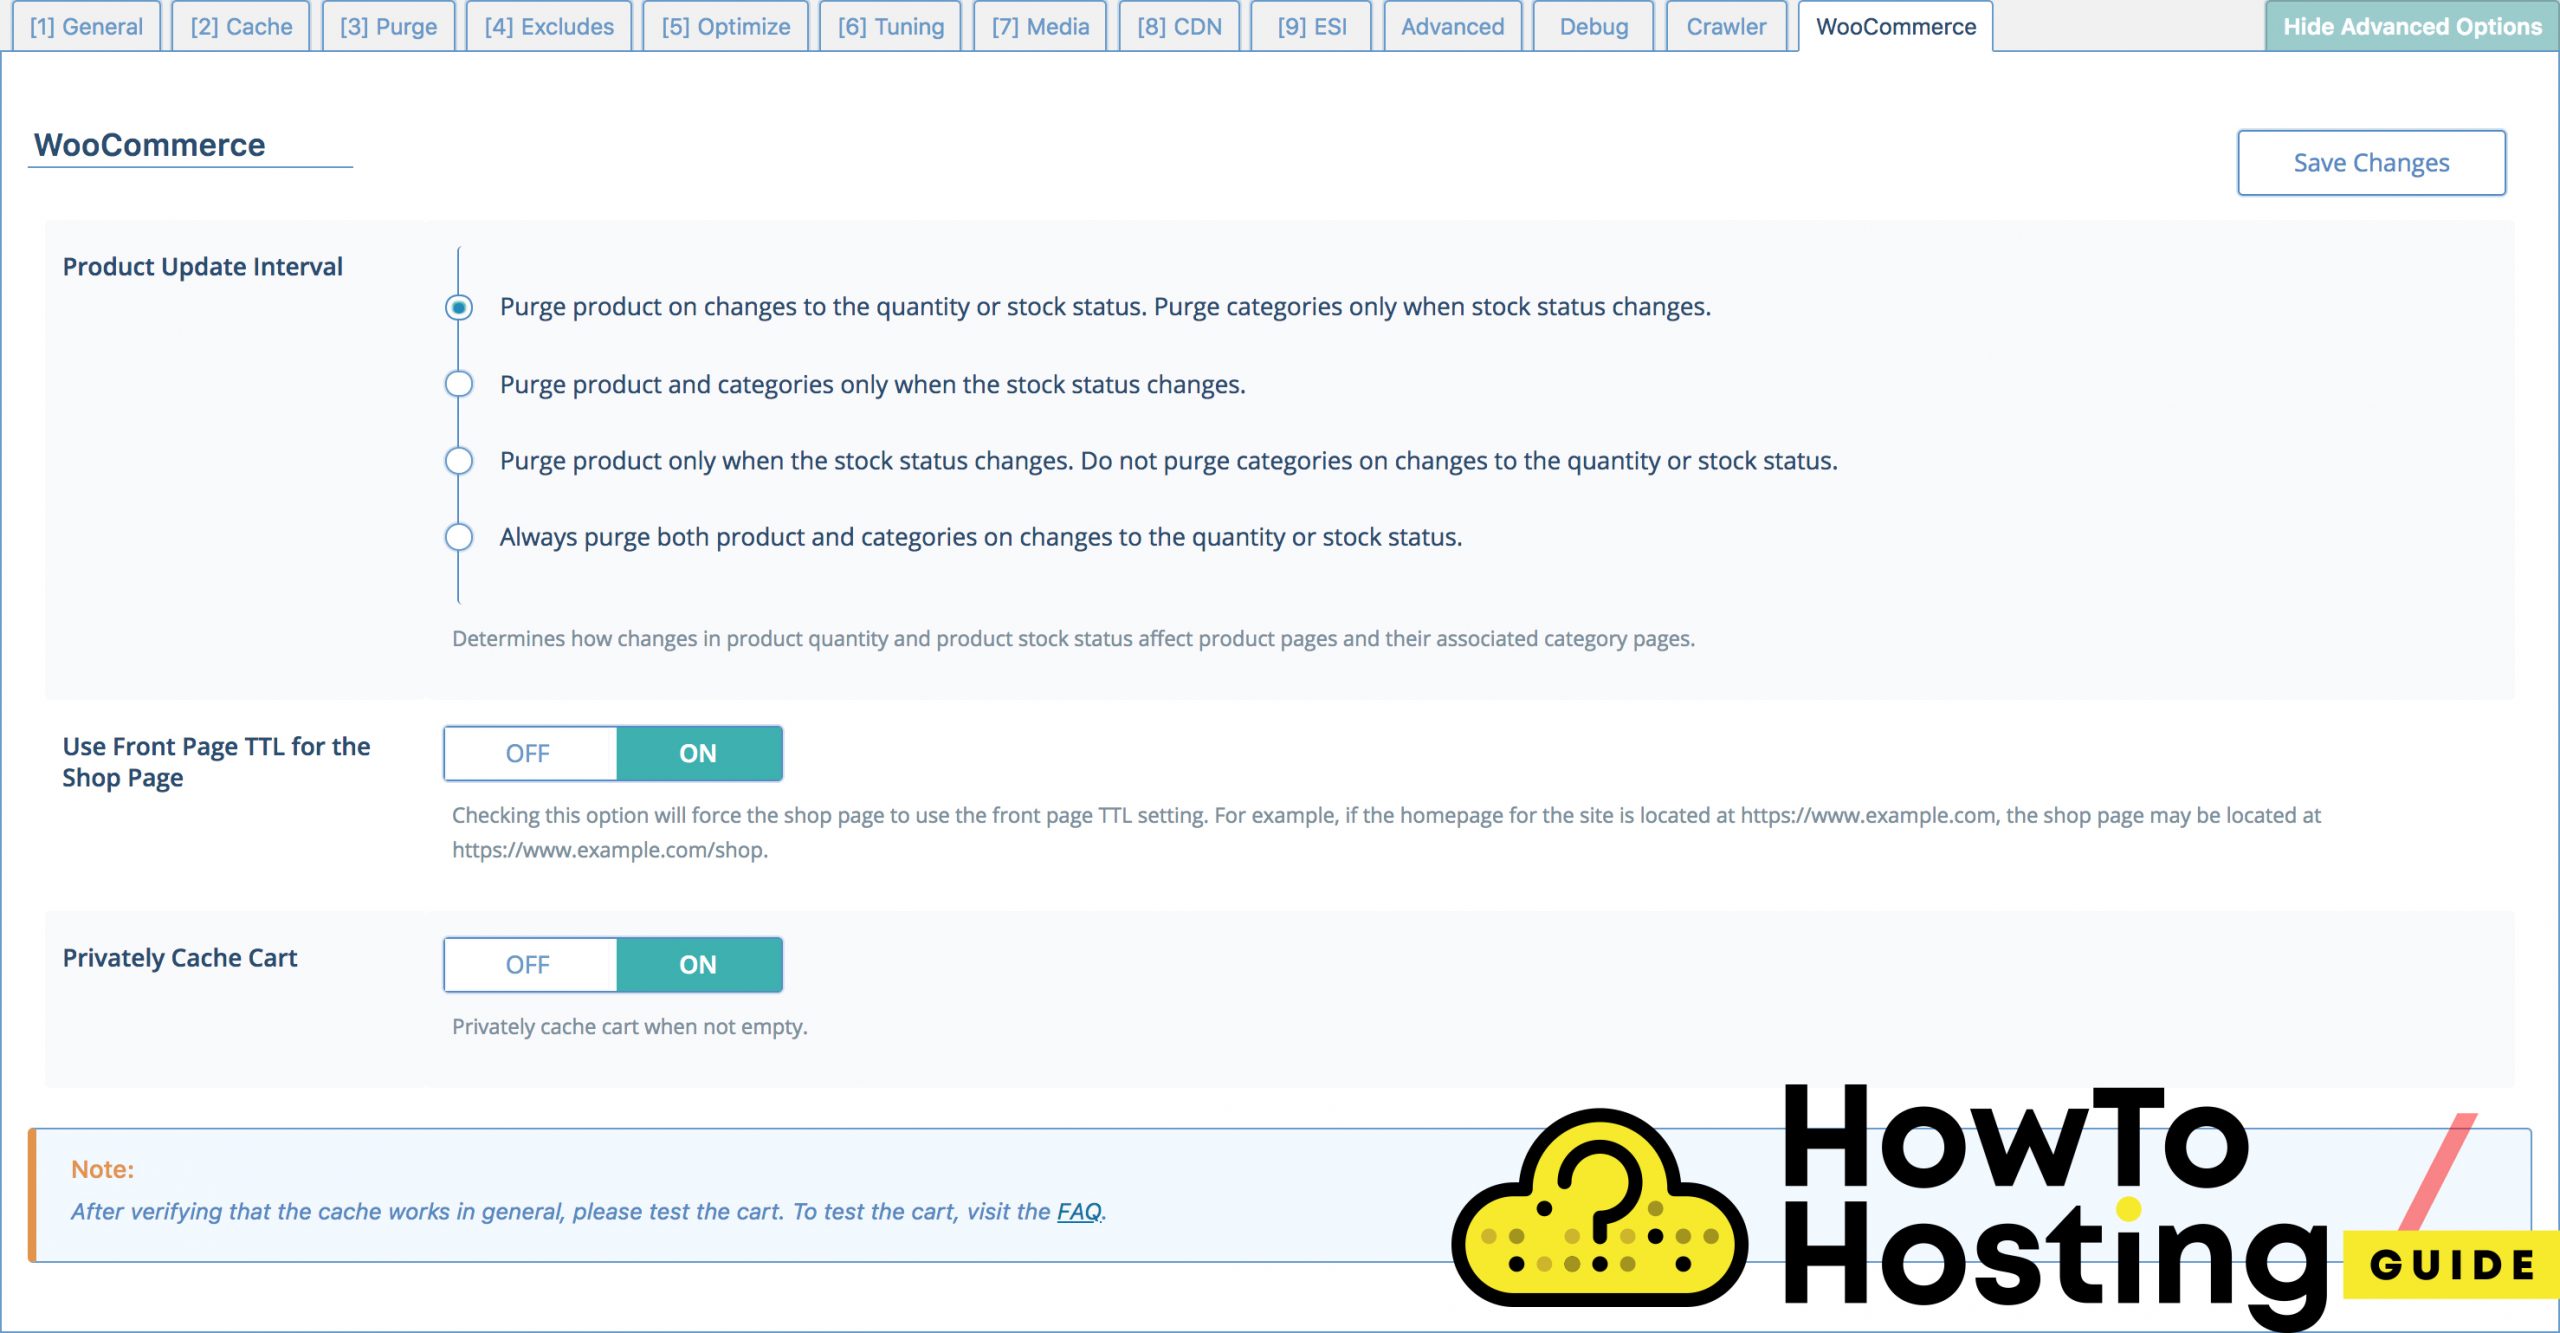
If you are managing a WordPress store with Woocommerce, you will see a section called Woocommerce. You can set the product Update Interval to all of your products, selecting from 4 different options.
Our Conclusion
Using a caching plugin is very important for every WordPress site, and LiteSpeed Cache is a great choice, that offers many different optimization possibilities. Make sure that you be careful when adjusting your optimization options and if you don’t feel advanced enough, you can always stick to the basic option adjustments.
