by
| Last Update:
|
0 Comments
On This Page: [hide]
In this article, you’ll learn how to easily add a horizontal line in your posts and pages. There are 2 ways of adding a horizontal line – through the Visual Editor(the easy way) and through the HTML code editor(the little bit more advanced but still very easy way).

How to Add a Horizontal Line/Separator through the Visual Editor
- Navigate to the post you need to add the horizontal line on in your WordPress dashboard.
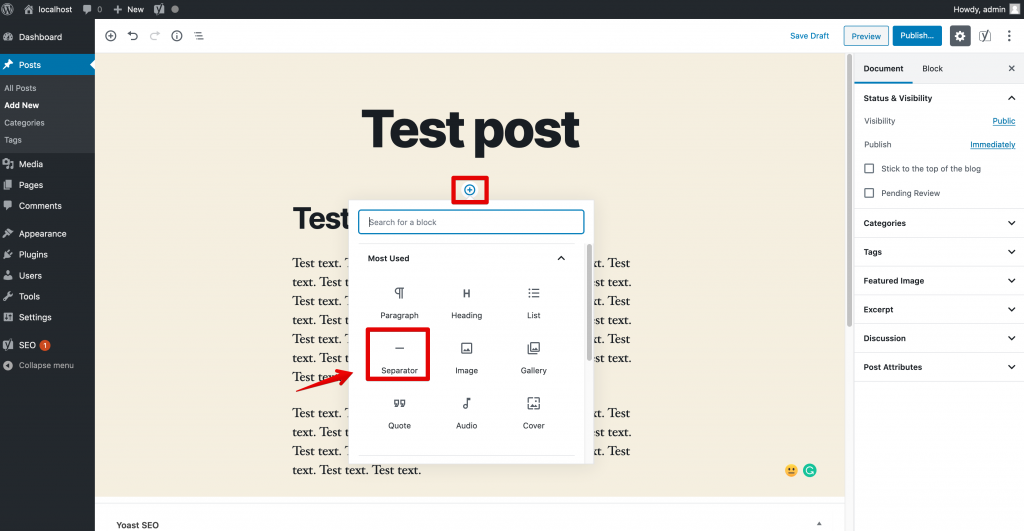
- Move your mouse between 2 blocks of your post and click on the ‘+’ button.
- Select ‘Separator’ as shown in the picture.
That way, you are adding the built-in WordPress separator code. Depending on the theme that you are using, the separator will look different. This is how the code that WordPress adds looks in the HTML Editor: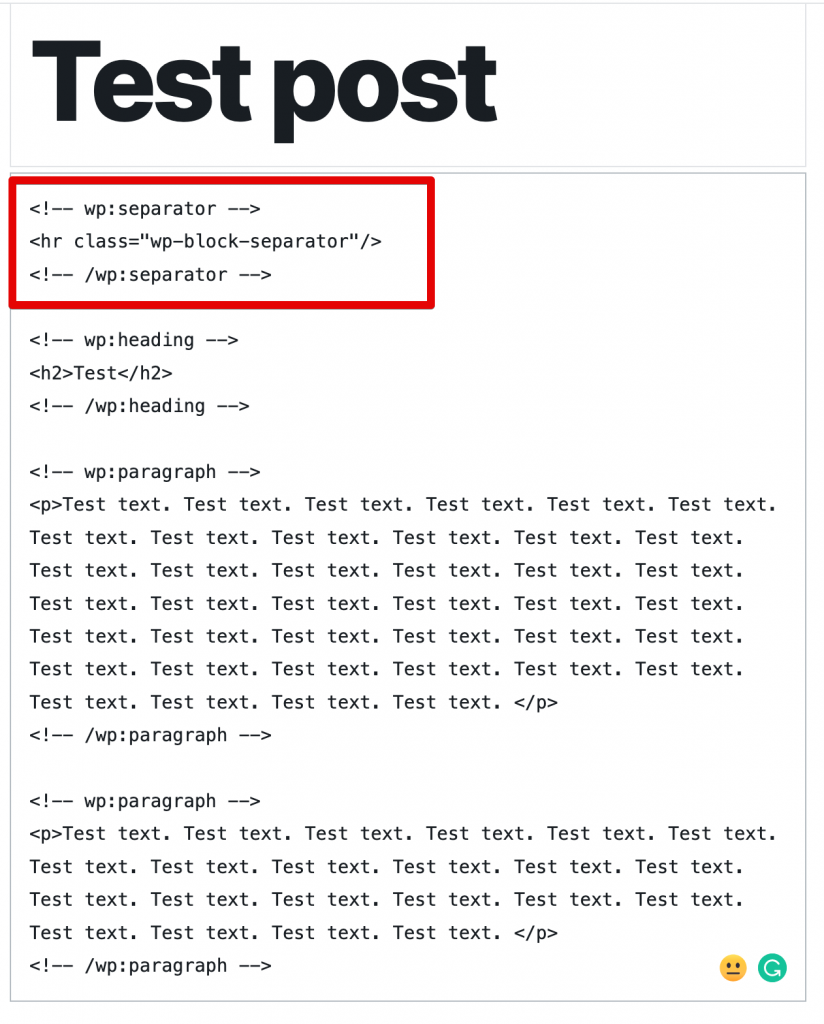
You can use it anytime to add that kind of separator if you are editing using HTML.
In our test, we used the basic 2020 theme for WordPress. Their separator looks like this:
How to Add a Horizontal Line/Separator using the HTML Code Editor
- Navigate to your WordPress post/page that you need to edit.
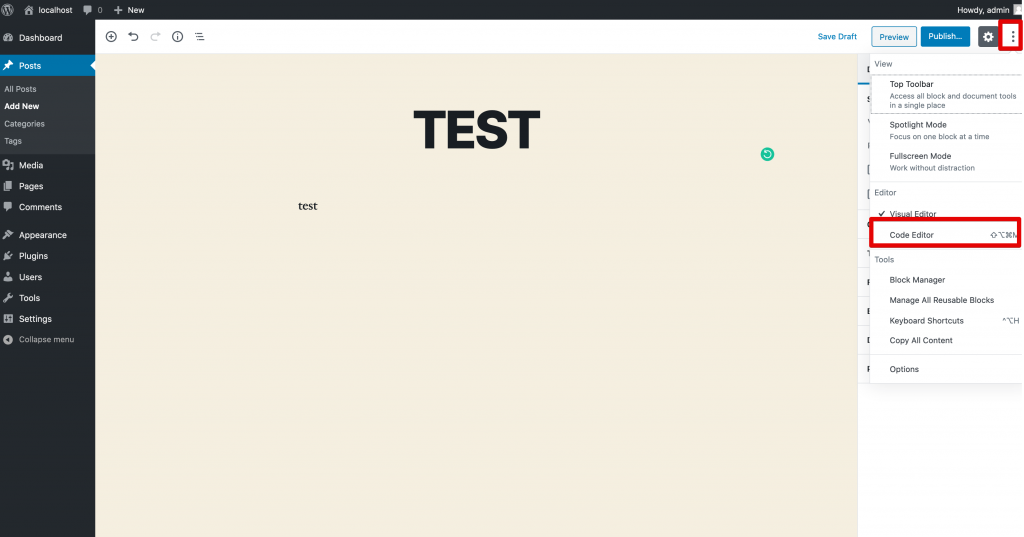
- Open up the HTML Code Editor.
- Decide where you want to put the separator on.
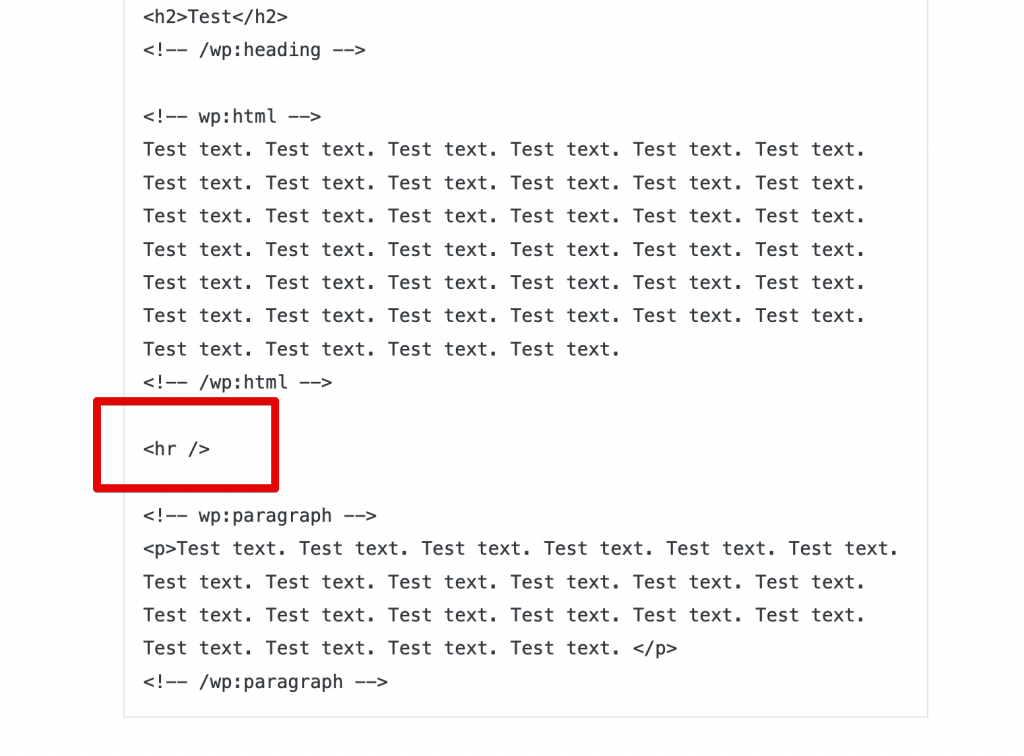
- In order to add the separator, you need to paste the following code on a new line:
→<hr />
This kind of separator can be added to any other HTML document using that code, not just WordPress posts/pages.
Now you have successfully added the default HTML horizontal line/separator.
