
Sur cette page: [cacher]
Ten minutes is honest only if your VPS is already provisioned, votre DNS de domaine pointe déjà vers lui, et tu peux copier-coller proprement. Plus proche de quarante si tu apprends. Bonnes nouvelles: le 2026 l'installation est plus courte que la 2018 version because Ubuntu 24.04 ships PHP 8.3 in its default repositories. No third-party PPAs, no compilation, no version juggling.
Réponse rapide: Spin up a fresh Ubuntu 24.04 VPS, installer Nginx, MariaDB 10.11, PHP 8.3-FPM with one apt command per package, create a database, drop WordPress into /var/www/yoursite.com, point an Nginx server block at /run/php/php8.3-fpm.sock, and finish in the browser. SSL via Let’s Encrypt adds another five minutes. The full sequence below is roughly 30 commandes.
Dernière révision: avril 2026. Commands verified on Ubuntu 24.04.2 LTS with WordPress 6.7.
Most LEMP-for-WordPress tutorials still floating around Google reference CentOS 7, which hit end-of-life in June 2024 and stopped getting security patches. A few use the Apache-style TCP socket for PHP-FPM when both services run on the same box, which adds latency for no reason. This guide uses the modern defaults: Ubuntu 24.04 LTS, Unix socket, and a server-block layout that drops cleanly into FastCGI cache later.
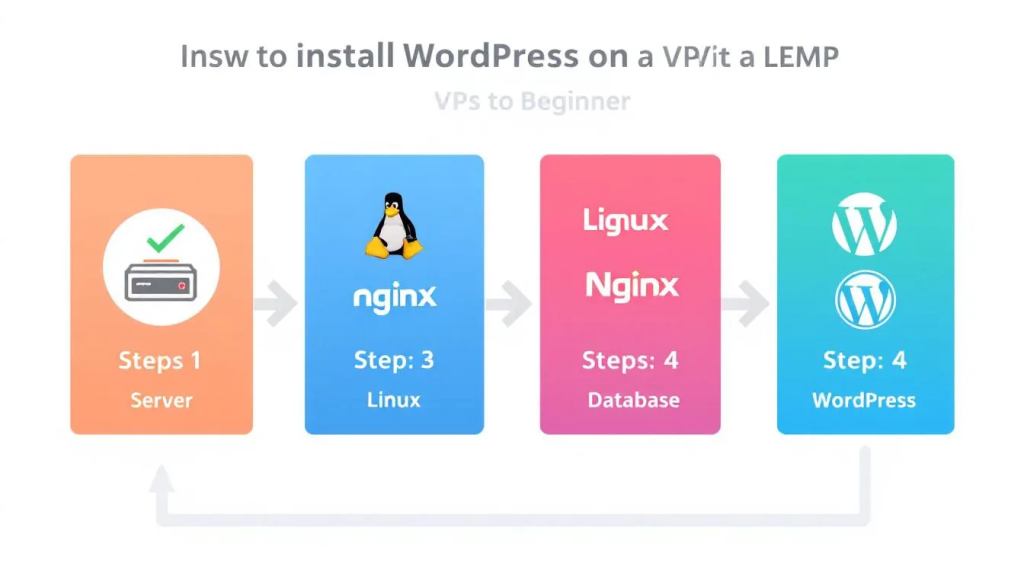
The LEMP Stack on Ubuntu 24.04, Component by Component
LEMP is an acronym, not a product. Each letter is a separate piece of software you install and connect.
L is Linux. Ubuntu 24.04 LTS is the path of least resistance in 2026. It’s supported until April 2029, the package repository is current, and most VPS providers offer it as a one-click image. Debian 12 works too if you prefer; the commands below need only minor tweaks.
E is Nginx (prononcé “engine-x”, which is where the E comes from). Nginx is an event-driven web server. Apache spawns a process or thread per connection, which works fine until traffic spikes. Nginx handles thousands of concurrent connections in a single worker, which is why most modern WordPress hosts default to it.
M is MariaDB or MySQL. WordPress doesn’t care which one you use as long as the version is high enough. WordPress 6.7 Besoins MariaDB 10.6+ or MySQL 8.0+. Ubuntu 24.04 ships MariaDB 10.11 LTS, which is supported until 2028. We’ll use MariaDB throughout.
P is PHP. WordPress 6.7 prend en charge PHP 8.1 à travers 8.4. Ubuntu 24.04 navires PHP 8.3 comme valeur par défaut, the active-support version through late 2026. PHP-FPM (Gestionnaire de processus FastCGI) is the piece that actually runs your PHP code; Nginx hands requests off to it via a Unix socket.
If you’re new to this whole layer of the stack, our overview of Fournisseurs d'hébergement NGINX covers the differences between Apache and Nginx in more depth, plus which budget hosts let you run a real Nginx setup vs. just renaming Apache.
Before You Run a Single Command
You need four things in place. Skipping any of them turns a 10-minute install into a 2-hour debug session.
- A fresh Ubuntu 24.04 VPS. Le minimum 1 processeur virtuel et 1 GB RAM for a hobby site, 2 GB if you’ll run WooCommerce or a heavy page builder. Anything from a USD 4/mo Hetzner CX22 to a Hostinger KVM 2 will do. Notre Guide d'hébergement WordPress VPS compares the practical options.
- SSH access as root or a sudo user. Most providers email you root credentials after provisioning. If you bought managed VPS, see our piece on géré vs. VPS non géré before continuing; a managed plan often does this whole install for you.
- A domain name pointing to your server’s IP. Add an A record at your registrar, then wait 5 à 15 minutes for DNS to propagate. SSL won’t issue until this resolves.
- Ports 22, 80, et 443 ouvert. If your VPS provider offers a cloud firewall (Hetzner, Vultr, DigitalOcean all do), open those three ports there too, not just in UFW.
Got those four? Open your terminal, SSH dans, and let’s start.
Étape 1: Update Ubuntu and Lock Down SSH
Always patch before installing anything. The default Ubuntu image is usually a few weeks behind on security updates.
sudo apt update && sudo apt upgrade -ysudo apt install -y ufw fail2ban unattended-upgrades
UFW (Uncomplicated Firewall) is Ubuntu’s wrapper around iptables. Enable it with the SSH port open first, otherwise you’ll lock yourself out.
sudo ufw allow OpenSSHsudo ufw enable
If you’re using a non-standard SSH port, remplacer OpenSSH avec 2222/tcp or whatever you set. Don’t reboot or close your terminal until you’ve confirmed SSH still works in a second window.
Étape 2: Install Nginx and Open the Firewall
Nginx is in the default Ubuntu repo. One command:
sudo apt install -y nginxsudo ufw allow 'Nginx Full'
Cette Nginx Full profile opens both 80 et 443. Visit your server’s IP in a browser and you should see the default Welcome to nginx! page. If it doesn’t load, check your VPS provider’s cloud firewall (a different layer than UFW).
Make sure Nginx is up now and stays up after a reboot:
sudo systemctl status nginxsudo systemctl enable nginx
Étape 3: Install MariaDB and Secure It
MariaDB 10.11 LTS is in the Ubuntu 24.04 repos. WordPress 6.7’s minimum is 10.6, so we’re well above the floor.
sudo apt install -y mariadb-serversudo mysql_secure_installation
The interactive mysql_secure_installation script asks a string of questions. The right answers for a fresh install:
- Enter current root password: just press Enter (there isn’t one yet).
- Switch to unix_socket authentication: ET.
- Change root password: ET, and pick a strong one.
- Supprimer les utilisateurs anonymes: ET.
- Interdire la connexion root à distance: ET.
- Remove test database: ET.
- Reload privilege tables: ET.
Skipping any of those leaves real attack vectors open. The remote root login one matters most: if your MariaDB port ever gets exposed by accident, an open root login becomes someone else’s database in minutes.
Étape 4: Installer PHP 8.3 et PHP-FPM
WordPress needs PHP plus a fistful of extensions. Install them in one shot:
sudo apt install -y php8.3-fpm php8.3-mysql php8.3-curl php8.3-gd php8.3-mbstring php8.3-xml php8.3-zip php8.3-imagick php8.3-intl php8.3-bcmath php8.3-opcache
That bundle covers the WordPress core, image processing for the media library (imagick + Dieu), the i18n features for non-English sites (intl + mbstring), and OPcache for compiled-bytecode caching. Sauter php8.3-imagick only if you’re certain you’ll never upload an image.
Sanity-check PHP-FPM:
sudo systemctl status php8.3-fpm
By default it listens on /run/php/php8.3-fpm.sock. That’s the path Nginx will reference in Step 7. No changes needed unless you’re running multiple PHP versions side by side.
Étape 5: Create the WordPress Database
WordPress needs its own database and a dedicated user. Don’t use the MariaDB root account; one compromised plugin shouldn’t equal full database root.
sudo mariadb
You’re now in the MariaDB shell. Run these lines, remplacer strongpasswordhere with something a password manager generated:
CREATE DATABASE wordpress DEFAULT CHARACTER SET utf8mb4 COLLATE utf8mb4_unicode_ci;CREATE USER 'wpuser'@'localhost' IDENTIFIED BY 'strongpasswordhere';GRANT ALL ON wordpress.* TO 'wpuser'@'localhost';FLUSH PRIVILEGES;EXIT;
le utf8mb4 charset matters. WordPress emoji support, full Asian-language characters, and any modern text-handling all assume utf8mb4. The older utf8 charset in MySQL is a 3-byte trap that breaks emoji silently.
Étape 6: Téléchargez WordPress
Two options here. Pick whichever feels easier.
Option A: boucle + tar. Le plus rapide, no extra software:
cd /tmp && curl -O https://wordpress.org/latest.tar.gztar -xzf latest.tar.gzsudo mv wordpress /var/www/yoursite.comsudo chown -R www-data:www-data /var/www/yoursite.comsudo find /var/www/yoursite.com -type d -exec chmod 755 {} \;sudo find /var/www/yoursite.com -type f -exec chmod 644 {} \;
Option B: WP-CLI. Slightly more setup, but every WordPress task gets faster afterward (theme installs, mises à jour des plugins, salt rotations, database search-and-replace).
curl -O https://raw.githubusercontent.com/wp-cli/builds/gh-pages/phar/wp-cli.pharchmod +x wp-cli.phar && sudo mv wp-cli.phar /usr/local/bin/wpsudo -u www-data wp core download --path=/var/www/yoursite.com
Pourquoi www-data? It’s what Nginx and PHP-FPM run as on Ubuntu by default. Files owned by that user, with directories at 755 and files at 644, is the standard secure pattern. Éviter 777, jamais, n'importe où; it’s a classic shared-hosting habit that has no place on a VPS.
Étape 7: Configure the Nginx Server Block
Create a new server-block file:
sudo nano /etc/nginx/sites-available/yoursite.com
Paste this in, remplacer yoursite.com with your real domain:
server {listen 80;server_name yoursite.com www.yoursite.com;root /var/www/yoursite.com;index index.php index.html;location / { try_files $uri $uri/ /index.php?$args; }location ~ \.php$ {include snippets/fastcgi-php.conf;fastcgi_pass unix:/run/php/php8.3-fpm.sock;}location ~ /\.ht { deny all; }location = /xmlrpc.php { deny all; }}
Two pieces deserve attention. le try_files directive is what makes WordPress permalinks work; without it, anything other than the homepage returns a 404. le xmlrpc.php deny all line blocks a notorious brute-force attack vector that almost no WordPress site uses anymore (Jetpack and a few legacy mobile apps still need it; if you depend on either, comment that line out).
Enable the site, disable the default, and reload:
sudo ln -s /etc/nginx/sites-available/yoursite.com /etc/nginx/sites-enabled/sudo rm /etc/nginx/sites-enabled/defaultsudo nginx -tsudo systemctl reload nginx
le nginx -t step matters. It validates your config before reload, which prevents you from breaking the running server with a typo.
Étape 8: Edit wp-config.php
WordPress ships a sample config file you copy and edit:
cd /var/www/yoursite.comsudo cp wp-config-sample.php wp-config.phpsudo nano wp-config.php
Find the database section near the top and fill in what you set in Step 5:
define( 'DB_NAME', 'wordpress' );define( 'DB_USER', 'wpuser' );define( 'DB_PASSWORD', 'strongpasswordhere' );define( 'DB_HOST', 'localhost' );
Now the salts. Visite https://api.wordpress.org/secret-key/1.1/salt/ in a browser. The page returns eight randomly generated lines (AUTH_KEY, SECURE_AUTH_KEY, LOGGED_IN_KEY, NONCE_KEY, plus matching salts). Replace the placeholder block in wp-config.php with what the page generated. New random values every install, aucune exception.
Enregistrez le fichier. If you used WP-CLI in Step 6, you can skip the manual editing entirely with sudo -u www-data wp config create --dbname=wordpress --dbuser=wpuser --dbpass=strongpasswordhere; it pulls fresh salts automatically.
Étape 9: Run the Browser Installer
Ouvrez votre domaine dans un navigateur. WordPress detects an unconfigured install and shows the language picker. De là:
- Pick your language. Click Continue.
- Titre du site, nom d'utilisateur administrateur (don’t pick “administrateur”; bots target it), strong password, votre email.
- Tick Décourager les moteurs de recherche if the site isn’t ready for traffic yet.
- Click Install WordPress.
You should see a “Succès!” screen in 5 à 10 secondes. S'identifier. You’re on a self-hosted WordPress install on your own LEMP stack. The whole user-facing process from this point is identical to any other WordPress install.
Add HTTPS with Let’s Encrypt (Five More Minutes)
HTTP-only WordPress in 2026 is broken. Browsers warn visitors, the WordPress login form leaks credentials in plaintext, and Google deranks the site. Certbot fixes all three for free.
sudo apt install -y certbot python3-certbot-nginxsudo certbot --nginx -d yoursite.com -d www.yoursite.com
Certbot rewrites your Nginx server block in place, adding the 443 listener and the certificate paths. It also offers to redirect all HTTP traffic to HTTPS; say yes. Renewals run automatically twice a day via a systemd timer. You’ll get an email if anything ever fails.
Confirm with:
sudo certbot renew --dry-run
Speed Tier: FastCGI Cache, OPcache, Redis
A vanilla LEMP install is already faster than 90% of shared hosting. If you want the response times that managed WordPress hosts brag about (sub-100 ms time to first byte), three more layers get you there.
OPcache compiles your PHP files into bytecode and keeps the result in memory. It’s already installed (we added php8.3-opcache in Step 4). Default settings work fine; raising opcache.memory_consumption à 256 dans /etc/php/8.3/fpm/php.ini helps if you run lots of plugins.
Nginx FastCGI cache stores the entire rendered HTML page in Nginx’s memory and serves repeat requests without ever touching PHP or MariaDB. Independent benchmarks show response times dropping from 200 à 500 ms on plugin caches down to roughly 40 ms on FastCGI cache. The trade-off is configuration complexity and the need to bypass cache for logged-in users, wp-admin, and any cart/checkout pages. Pair it with the free Nginx Helper plugin from WordPress.org so cache purges happen automatically when you publish a post.
Cache d'objets Redis handles the database query layer. Repeat queries (option lookups, transients, user metadata) get cached in RAM instead of hitting MariaDB. This is the layer that matters most for WooCommerce, Presse copain, and any membership site where pages can’t be statically cached.
If managing all three feels like too much, notre tour d'horizon de hébergement WordPress en nuage options covers managed providers that ship these layers preconfigured.
Hardening Beyond the Defaults
Your install is now safer than most shared hosting, but it isn’t done. A short list of high-impact additions:
- Configure fail2ban for WordPress. You installed fail2ban back in Step 1. Add a jail that watches Nginx access logs for repeated 401s on
wp-login.phpand bans the offending IP for 24 heures. - Disable file editing in admin. Ajouter
define( 'DISALLOW_FILE_EDIT', true );àwp-config.php. This stops a compromised admin account from editing PHP files through the dashboard. - Move wp-config.php one level up. WordPress automatically looks one directory above the install root for
wp-config.php. Moving it to/var/www/au lieu de/var/www/yoursite.com/puts the database credentials outside the document root entirely. - Limit the admin login surface. Either change the URL with a plugin like WPS Hide Login, or restrict
wp-adminto your office IP via Nginx (allow x.x.x.x; deny all;inside alocation /wp-adminbloquer). - Two-factor authentication for every admin. The Wordfence or Two-Factor plugin both work. Brute-force attacks become irrelevant against a TOTP code.
Automate Backups Before You Forget
Your LEMP stack is exactly two things in a backup sense: le /var/www/yoursite.com directory and the wordpress base de données. Back up both, on a schedule, to somewhere not on this server.
Simplest path: le libre UpdraftPlus plugin pointed at S3, Google Drive, or Backblaze B2. Set the schedule to daily for the database and weekly for files, retain 14 à 30 journées, done.
If you’d rather stay command-line native, a five-line cron job using mysqldump + tar + rclone is roughly equivalent and uses no plugin. D'une manière ou d'une autre, restore-test the backup once a quarter; an unverified backup is just optimism.
Troubleshooting Common Errors
502 Bad Gateway
Nginx can’t reach PHP-FPM. Usually means PHP-FPM isn’t running, the socket path in your server block is wrong, or permissions on the socket file are off. Check with sudo systemctl status php8.3-fpm première. If it’s running, verify the socket path matches what Nginx expects (default is /run/php/php8.3-fpm.sock).
Erreur de connexion à la base de données
Votre wp-config.php credentials don’t match what you set in MariaDB. Re-check DB_NAME, DB_USER, DB_PASSWORD. Test the credentials directly: mariadb -u wpuser -p wordpress. If that fails with an auth error, the password in wp-config.php is wrong, or the user wasn’t granted privileges on that database.
WordPress permalinks return 404
Disparu try_files $uri $uri/ /index.php?$args; in your Nginx location / bloquer. Ajoutez-le, courir sudo nginx -t, then reload Nginx. Permalinks work immediately afterward; no plugin reset needed.
White screen of death after a plugin install
A PHP fatal error is being logged but not displayed. Tail /var/log/nginx/error.log et /var/log/php8.3-fpm.log. If you can’t access the dashboard, rename the offending plugin folder via SSH (mv plugin-name plugin-name-disabled) and the site comes back. De là, check the plugin’s PHP version requirement; many older plugins break on PHP 8.3.
Permission denied when uploading media
le wp-content/uploads directory isn’t writable by www-data. Courir sudo chown -R www-data:www-data /var/www/yoursite.com/wp-content and the issue clears. If you’re on shared hosting that requires a different user, check your provider’s docs; the user differs by host.
Questions fréquemment posées
Why use Nginx instead of Apache for WordPress?
Nginx handles concurrent connections more efficiently and serves static files (CSS, JS, images) faster with less RAM. On a 1 GB VPS, Apache typically saturates around 50 utilisateurs concurrents; Nginx handles several hundred on the same hardware. Apache still has its place when you depend on .htaccess overrides or specific Apache modules. For most modern WordPress installs, Nginx is the right default.
Can I install WordPress on a LEMP stack without root access?
Non. Installing Nginx, PHP-FPM, and MariaDB requires sudo Au minimum. If your hosting plan only gives you cPanel and FTP, you’re on shared hosting and the LEMP install isn’t yours to run. You’d need a VPS or cloud server with root access, or move to a managed WordPress host that already runs Nginx underneath.
Does the 10-minute timing actually hold up?
De façon réaliste, ten minutes is the floor, not the average. With a fresh Ubuntu 24.04 image, a domain already pointed, and the commands pre-copied into a text editor, the install runs in 8 à 12 minutes. First-timers reading and verifying each step are closer to 30 à 45 minutes. The biggest time sink is DNS propagation and the SSL certificate request, which together can stretch to 20 minutes on a bad day.
Is MariaDB or MySQL better for WordPress?
Either works fine; WordPress doesn’t notice. MariaDB has the edge in the open-source community, ships in Ubuntu’s default repo, and never had the Oracle ownership question marks. MySQL 8.0 is faster for some specific JSON-heavy workloads, which rarely matter for WordPress. Pick MariaDB unless you have a real reason to use MySQL.
Do I need a CDN if I run FastCGI cache?
Different layers, different jobs. FastCGI cache speeds up your origin server; a CDN puts cached copies in 200+ cities so visitors in Sydney don’t fetch from your Frankfurt server. Run both on any site with international visitors. Cloudflare’s free plan plus FastCGI cache covers 95% of small WordPress sites with no monthly cost.
Can I host multiple WordPress sites on the same LEMP stack?
Oui. Each site gets its own Nginx server block (one file per domain in /etc/nginx/sites-available/), its own database in MariaDB, and its own folder under /var/www/. PHP-FPM serves all of them through the same socket. The only practical limit is RAM; budget 200 à 400 MB per site for moderate traffic, more for WooCommerce.
Dernier mot
The LEMP install is the easy part. Keeping it running is the longer game: monthly Ubuntu updates, quarterly PHP version checks, log rotation that doesn’t fill the disk, certificate renewals you actually verify. None of that is hard, but it isn’t free either. If the maintenance side feels like work you don’t want to do, our overview of fournisseurs d'hébergement cloud covers managed options where someone else takes care of the OS layer entirely. Self-hosting WordPress on LEMP is a control choice, not a cost choice. Whether the control is worth the maintenance depends on what you’re building and how comfortable you are at the command line.