


On This Page: [hide]
Online fundraising is one of the most popular forms for nonprofits to raise money. It becomes more and more popular each year. Creating a fundraising website using WordPress is pretty easy and in this article, we will provide all different ways to get there. Make sure you read to the end…
Fundraising WordPress Plugins
A plugin, named WPForms, offers one of the easiest and fastest ways to integrate a fundraising payment method to yoalur WordPress website.
The payment version of WPForms has 4 different plans:
- Basic 40$,
- Plus 100$,
- Pro 200$,
- Elite plan 300$.
The Basic plan will enable you to integrate your fundraising method, so if you don’t aim for something even bigger, you can go for it.
Follow the steps below to properly install and use WPForms
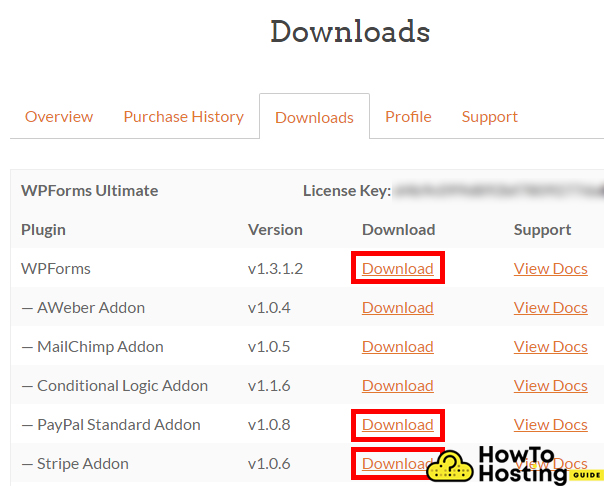
Ones you purchase your WPForms plan, you should go to Downloads and download WPForms as well as the PayPal Standart Addon and the Stripe addon.
Then, go to your dashboard, click on Plugins, and activate these 3 plugins that you have just installed.
Donation Form
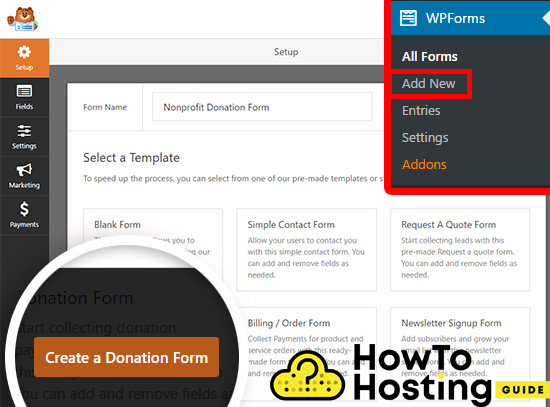
After you’ve successfully installed and activated your plugins, you can go ahead and create your donation form. To do that, click on Add New button which is under WPForms, and then click the create a donation form button.
You will see a reminder textbox that reminds you to configure your payments.
Click OK and proceed with the creation of your Donation Form.
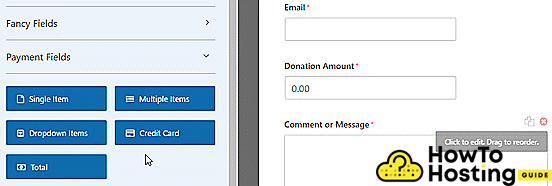
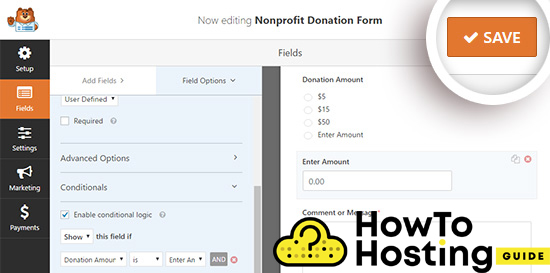
The donation form has a few fields – name, email, donation amount, and a comment or a message. You can use multiple choice or dropdown fields instead.
For this tutorial, we are going to show you how to add multiple payment choice fields, together with a few donation amount options, and of course an option that lets users enter their preferred amount.
If you want to add multiple choice, click on the Multiple Items button and then by drag and drop reorder the fields to adjust them just as you want.
Then, you can go ahead and change the label to whatever you want, for example, the Donation Amount.
On the right side of your screen, you will have a preview of how your form looks like.
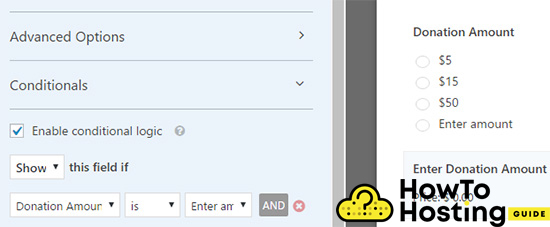
Next, you will have to make a change to the single item field to make it displayable only when the enter amount option is being clicked.
To do that, click on the Required checkbox.

After that, scroll down until you see Conditionals and mark check the Enable conditional logic checkbox.
Then click on the Save button and then you’ve finished your form.
Now you will have to set up the payment integration.
Payment Integration
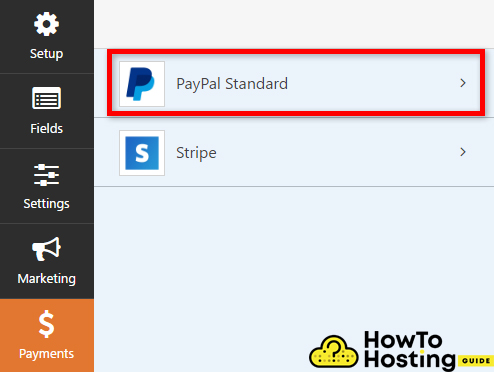
For the tutorial, we are going to guide you through the process of setting the payment integration with PayPal and Stripe
Click on the “Payments” menu of the WPForms plugin, and then select the PayPal standard.
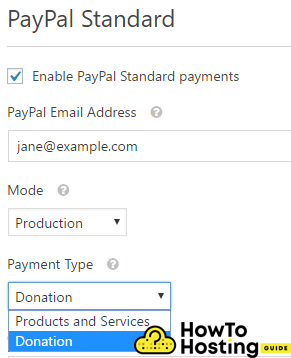
Next, you will have to input your settings on the right side of your screen.
To do that, make sure that you check the Enable Paypal Standart Payments checkbox and then in the input field write down your PayPal account email.
Change the payment type to a donation.
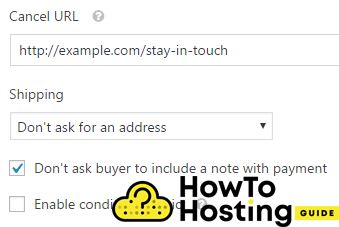
Then, just below that, you can write an URL address where you want to send your visitors if they cancel the checkout process for any reason.
A good approach to this situation would be to try to re-engage them with some relevant post, content, showing them something interesting on your social media or anything that you can think of.
You can also specify shipping address but as long as people pay for a donation, you would like to let this option on Don’t ask for an address
Click save and proceed.
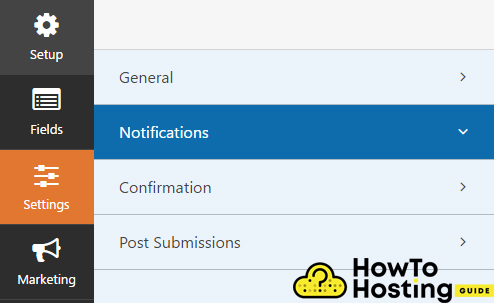
Customizing Notifications
Make sure donators are receiving an email after their donation is done. This is very important in order to confirm the whole process.
To do that, you should customize the email notifications for your form by clicking Settings and then Notifications.
Add New Notification button, to make the donator’s notification, enter a notification name – this could be anything that you want. Then, click on the Show Smart Tags button which is located in the top right corner of the window.
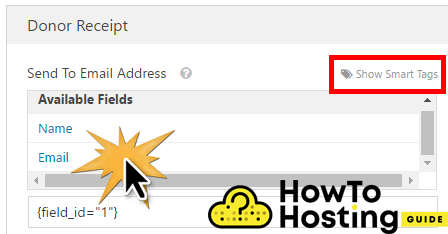
And now you can configure the message that your donator will receive.
When you are done, click save and exit.
It is pretty easy and straightforward.
Accepting Donations Via Stripe
If you want to use Stripe instead of Paypal for some reason, you can also implement it very easily to your website with the WPForms plugin.
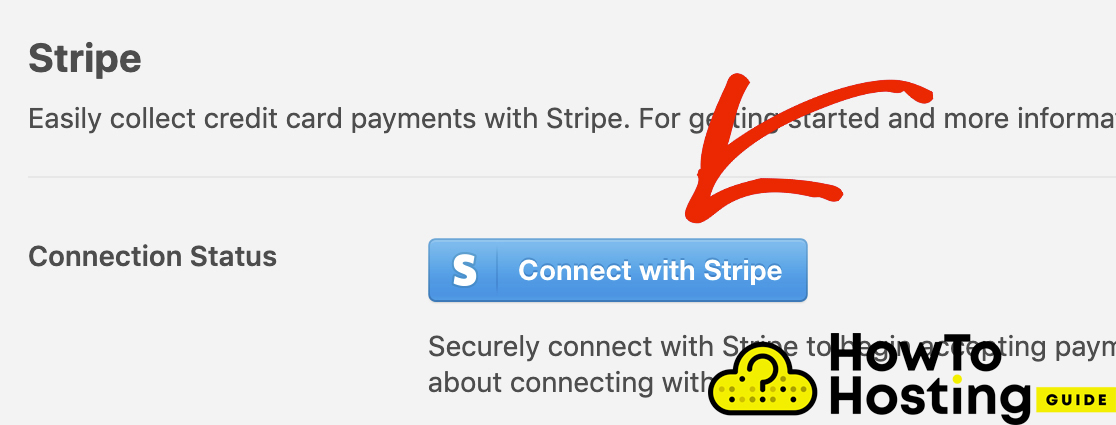
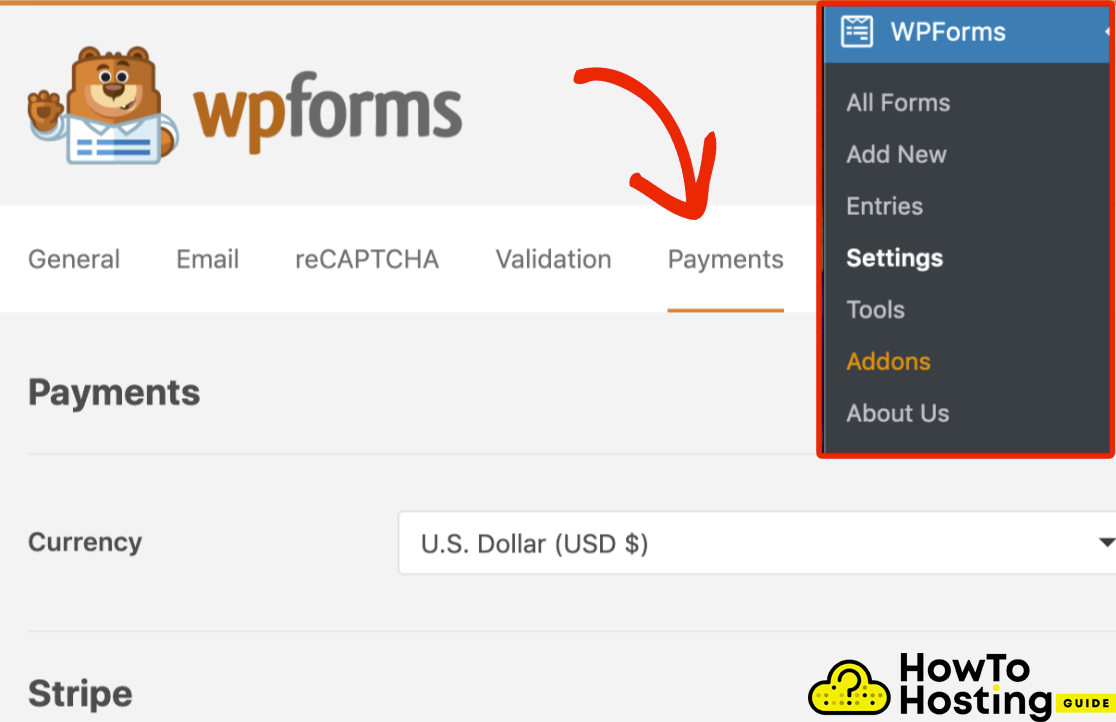
Go to your admin dashboard, click on the WPForms menu, then click Addons and then find the stripe addon and install it.
Then click on the connect with the stripe button.
Once Stripe addon is ready to go, you can open the WPForms site, click on the payments tab, and select your currency.
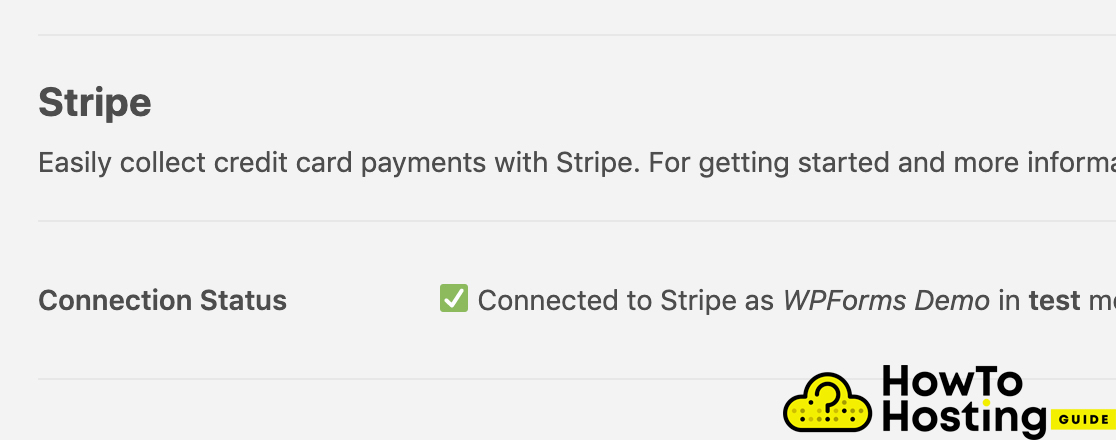
Next, you will be asked to authorize your connection, agree with the requirements and you will be redirected to your admin area.
If everything was successfully configured, you should see a connection status checked with a green tick.
How to Add Stripe To Your WPForms
After you have successfully connected with stripe, you need to add it to your WPForms.
To do that, you should first create a new form or edit any of your existing forms.
To adjust any form to work with Stripe, you need to have at least two of your form fields:
- One for items field – it can be either single, multiple, checkbox or dropdown item.
- Stripe Credit Card Field.
For our tutorial, we have created a simple order form that has Name, Email, Dropdown Items, Total and Stripe Card field.

Now, you need to enable Stripe payments.
To do that, go to Payments and click Enable Stripe Payments, just like you did for Paypal.
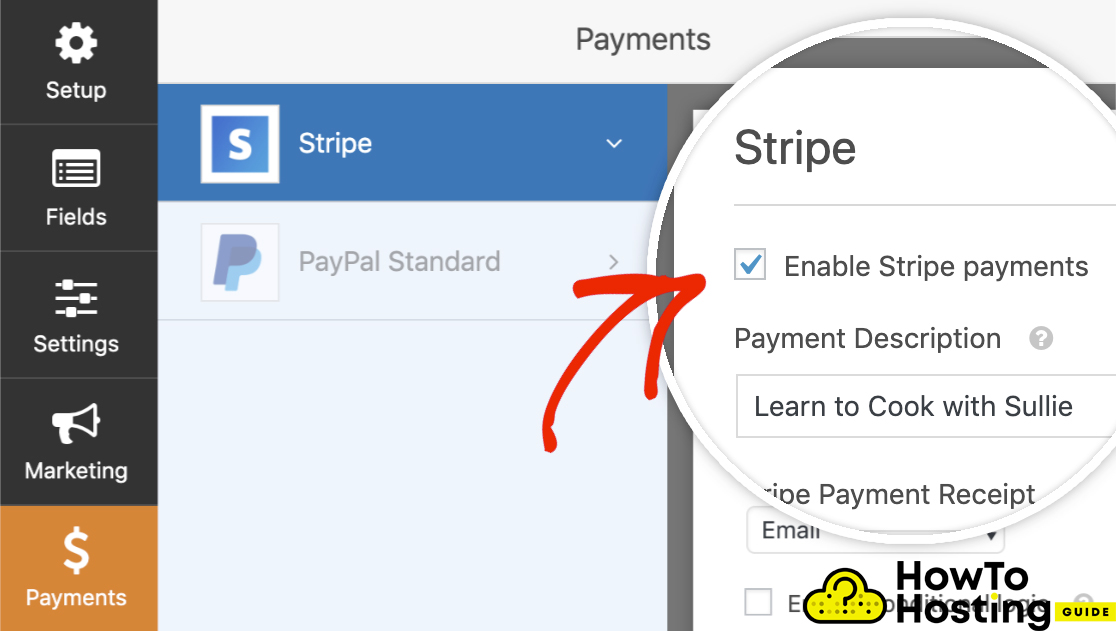
After that, you will be able to write down your short payment description.
This description will appear on the user’s payment window when they are paying.
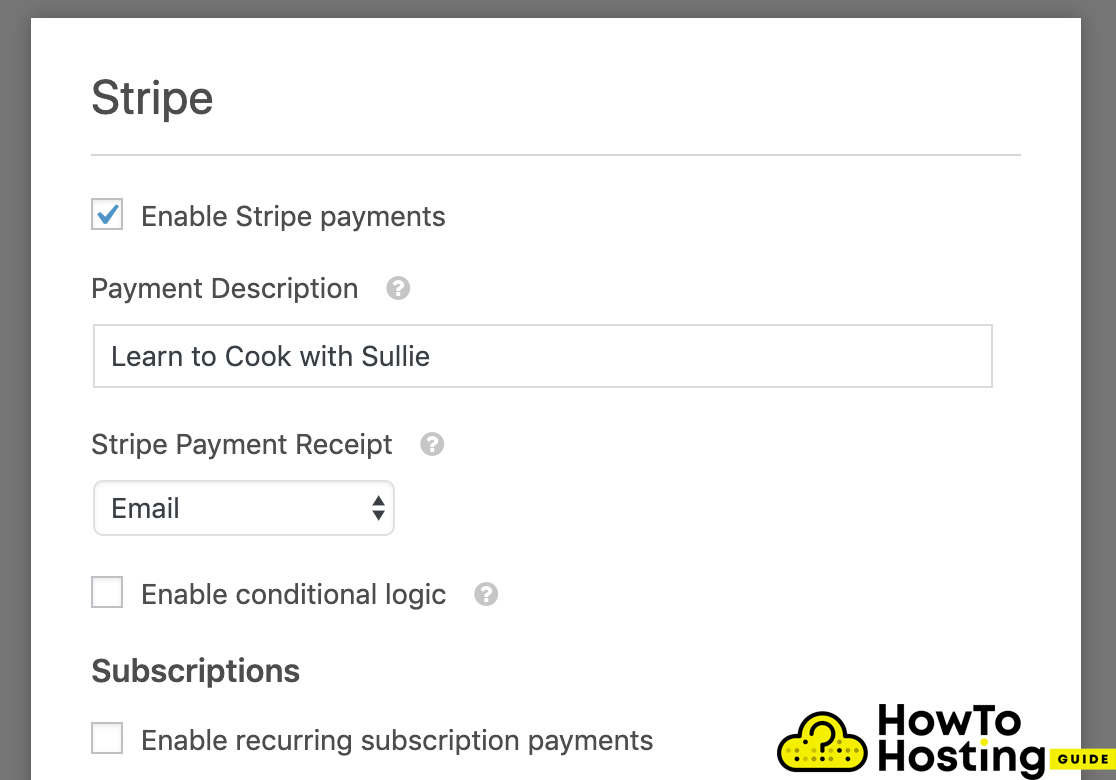
Once you set your payments you are all set. If you want to set Recurring or Subscription payments, it is pretty easy to do it.
It can be done from the same settings panel, just under the Subscriptions section you will see a checkbox that says “Enable recurring subscription payments”.
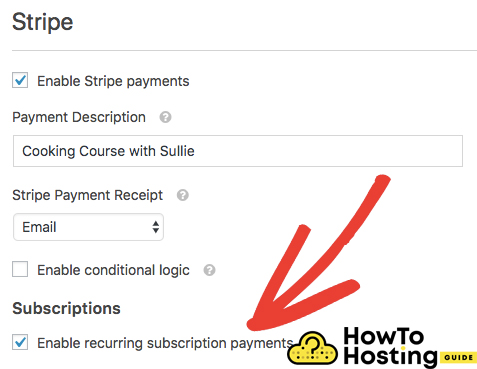
Check this box and you will see a new one, where you can set some more settings such as plan name, recurring period, and customer email.
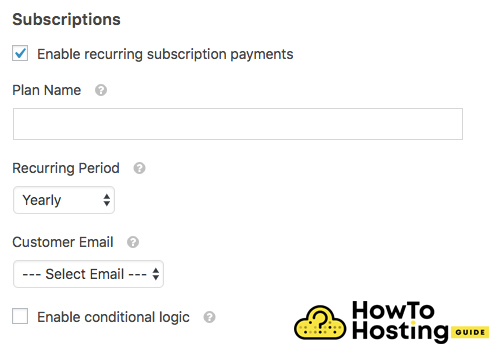
Plan name – this is a title for the subscription.
This can be something like “Donation to Y” and this will be how the stripe transaction is named.
Recurring Period – This option lets you choose how often a payment should occur. Whether daily, weekly, monthly, or yearly.
Customer Email – Select an email from your form, where the customer can be found or contacted. This is a required field for stripe subscriptions.
Stripe Conditional Logic
Stripe has an option that includes setting conditional logic in the payments.
The conditional logic lets you create more advanced and smart forms that can be automatically changed based on the selection of the users.
Making conditional forms is a bit more advanced thing to do and you can use the conditional logic for many things such as letting users choose if they want to pay either with PayPal or Stripe, making some payments optional or letting the users submit a one-time donation or a recurring donation.
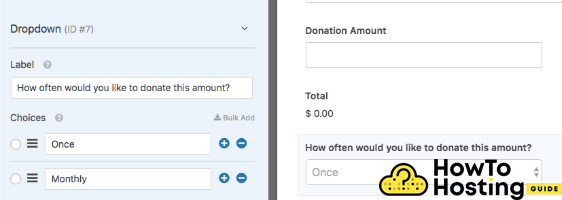
For our example, we will create a donation form that will include a dropdown menu or a multiple-choice field that enables users to choose between a one-time donation or a recurring donation.
Let’s say that you want to have a one-time donation and a monthly donation.
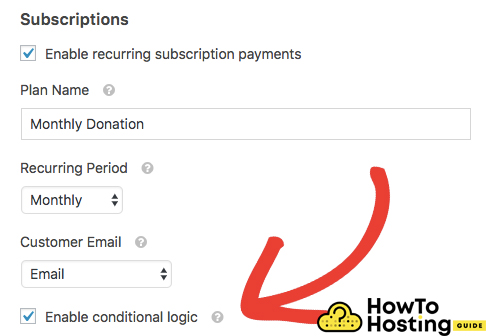
Then, you have to return under our Stripe tab and you need to set up the payment option for monthly payments. To do this, you need to set the Recurring period of our form to Monthly and enable the conditional logic.
This will let you display the additional field, where you are going to create the conditional rules – for example, you can set a conditional rule that states Donation type – Monthly
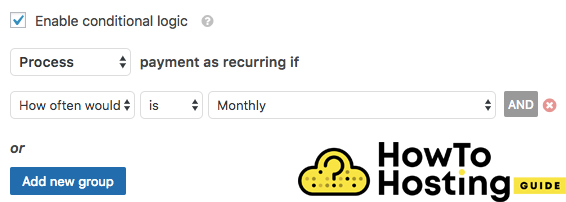
You can choose How often you want the payment to reoccur, for example, Monthly. And now, your recurring payment is set.
Adding Your Donation Forms To Your Fundraising Website
After you’ve successfully created your donation form and connected it either with PayPal or Stripe, it is time to put it on your website and let people donate.
Add it to any post or page using a simple shortcode or with placing a donation widget in the sidebar or footer.
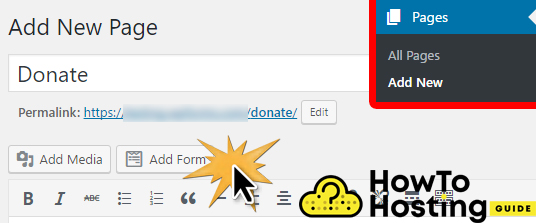
To add a new donation page, click on the Add new button under your Pages section of your WordPress dashboard, then click on the new button “Add Form“. You can adjust your form name, and chose whether you want to display its title or description.
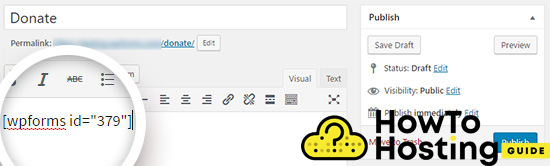
Then, a shortcode will appear on your page and you can copy it and use it anywhere you want. You can, for example, add it to any post, blog post, page, or widget.
How To Create a Fundraising Website – Initial Step Guide
After revealing you all the needed steps for the veritable creation of a fundraising website, now let’s move to the initial steps of creating the website.
Video tutorial on creating a Fundraising Website (Quicker Method to Do It):